Zero Waste Cauliflower: Unique and Easy Recipes to Try Today

Zero Waste Cauliflower: Unique and Easy Recipes to Try Today

If you love sustainable cooking and plant-based dishes, get ready to have your taste buds thrilled with this zero-waste cauliflower recipe. It’s a fantastic way to cut down on waste while enjoying a crispy, sticky, and irresistibly tasty treat. Let’s jump into making these Zero Waste Cauliflower Wings!

Why Cauliflower?

Cauliflower is packed with vitamins C and K, as well as fiber, antioxidants, and essential nutrients. It’s well-known for its anti-inflammatory benefits and its potential to support digestive health. Plus, it’s low in calories and carbs, making it a smart option for anyone keeping an eye on their weight or managing blood sugar levels.

The Recipe: Sticky Cauliflower Wings

Here’s how to use every part of your cauliflower head, from the florets to the leaves, for a truly zero-waste meal. Get ready to be wowed by the flavor and texture—this is a recipe I’m excited to make over and over!

Ingredients:

  • 1 head of cauliflower
  • 3/4 cup flour
  • 1/2 cup plant-based milk
  • 1/4 teaspoon garlic powder
  • 1/2 teaspoon salt
  • 1/4 teaspoon black pepper
  • Panko breadcrumbs

For the Sticky Sauce:

  • 1 teaspoon sesame seeds
  • 1 teaspoon cornstarch
  • 4 tablespoons soy sauce
  • 1/2 cup maple syrup
  • 1/2 cup water
  • Pinch of ground ginger
  • Scallions and sesame seeds for garnish

For the Cauliflower Dip:

  • Chopped and blanched cauliflower stems and leaves
  • 1/2 cup plant-based milk
  • 2-3 garlic cloves
  • 1/2 cup peanut butter
  • 1/3 cup peanuts
  • 1/3 cup olive oil
  • Juice of half a lemon or 2 tablespoons vinegar
  • 1/4 teaspoon salt
  • 3 tablespoons soy sauce
  • 2 tablespoons grated ginger

Instructions:

  1. Prepping the Cauliflower: Start by dividing the cauliflower into florets, aiming for a “wing” shape. Don’t toss those stems and leaves just yet—they’re going to make a delicious dip later.
  2. Making the Batter: In a mixing bowl, combine the flour, plant-based milk, garlic powder, salt, and black pepper until you get a smooth batter. Dip each cauliflower wing into the batter, coating it evenly.
  3. Coating and Baking: In a separate bowl, add panko breadcrumbs. Roll the battered cauliflower wings in the breadcrumbs, ensuring they’re fully coated for that extra crunch. Arrange them on a baking sheet and bake at 180°C (350°F) for about 20 minutes for a crispy texture or 30 minutes for a softer inside.
  4. Preparing the Sticky Sauce: While the wings bake, mix the soy sauce, maple syrup, water, cornstarch, sesame seeds, and ginger in a pan over low heat. Stir until the sauce thickens. Toss the baked wings in the sticky sauce until they’re well-coated. Garnish with chopped scallions and extra sesame seeds.
  5. Making the Cauliflower Dip: For the dip, blanch the cauliflower stems and leaves. Blend them with plant-based milk, garlic, peanut butter, peanuts, olive oil, lemon juice (or vinegar), salt, soy sauce, and ginger until smooth. Adjust the thickness with more milk or water if needed. Garnish with fresh chili or herbs for an extra kick.
Your sticky cauliflower wings are now all set to be enjoyed with that tasty dip. Whether you’re having a gathering or just a solo snack, this zero-waste recipe won’t let you down. It’s a crunchy, savory, and slightly sweet treat that’s as good for the planet as it is for your taste buds. Give it a try and let your taste buds savor this sustainable delight.

Happy cooking!

How To Turn Potatoes into a Plant-Based Delicious Dessert

How To Turn Potatoes into a Plant-Based Delicious Dessert

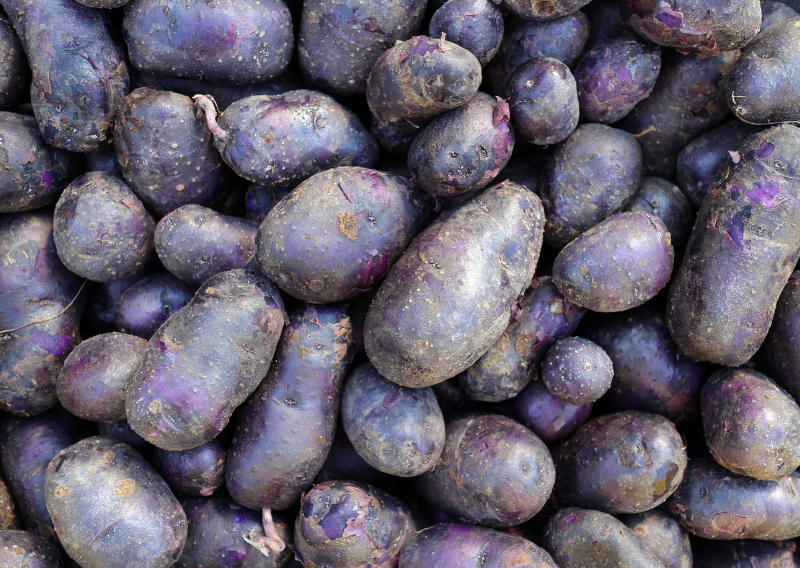
Potatoes are a versatile ingredient, and while they are commonly used in savory dishes, they can also create an unexpectedly delightful dessert! Recently, I took some of my homegrown potatoes and turned them into a rich, creamy plant-based treat. The result? Absolutely incredible, with a smooth texture that melts in your mouth. Thanks to a simple harvest from my garden, making it a wholesome and satisfying way to enjoy dessert. You’d be amazed at how a simple potato can be transformed into something so delicious!

My Potato Harvest

This year, I grew five different varieties of potatoes in just five grow bags, squeezing out a total harvest of 5.3 kg in a space of just 2m x 50cm. It’s amazing how much you can grow in such a compact space! I chose varieties that each had unique colors, tastes, and textures to experiment with in the kitchen. Here’s what I grew:

  • Blue Annelise
  • Congo Blue
  • Fortyfold
  • Allouette
  • Edzell Blue

Potatoes aren’t just white or brown—they can be blue, purple, and even pink. I’ve come to appreciate the versatility of these beauties, especially the deep purple varieties like Congo Blue and Blue Annelise, which I ended up using for this dessert recipe.

The Recipe: Purple Potato Dessert

This recipe is completely plant-based, so it’s not only delicious but also eco-friendly.

Crust Ingredients:

  • 240g almond flour
  • 80g plant-based butter
  • 3 Tbsp ground flax meal
  • 50g granulated sugar
  • 60g water

Bake the crust for 15 minutes at 170°C to achieve a golden, crunchy base.

Filling Ingredients:

  • 700g purple potatoes (I used Congo Blue and Blue Annelise)
  • 400ml full-fat coconut milk
  • 1 cup soaked cashews
  • 6 tsp agar powder
  • 170g agave syrup
  • A splash of vanilla extract
  • A pinch of salt

Blend everything until smooth, then let it set in the fridge until it’s firm and ready for serving.

Chocolate Topping Ingredients:

  • 1/2 cup melted coconut oil
  • 1/2 cup dark chocolate chips
  • A pinch of salt

Pour the melted chocolate on top and let it harden for a satisfying crunch when you dig in.

    The Perfect Pairings

    This potato dessert is tasty on its own, but why not take it up a notch with some plant-based pairings? Here are a few options:

    1. Coconut Whipped Cream – Add a fluffy, rich topping to your potato dessert for an extra layer of indulgence.
    2. Fresh Berries – The tartness of raspberries or strawberries cuts through the sweetness and pairs beautifully with the creamy potato filling.
    3. Chopped Nuts – A sprinkle of toasted almonds or pecans brings out the nutty notes of the almond flour crust.
    4. Chia Seed Pudding – Serve alongside a small glass of chia seed pudding for a creamy, plant-based parfait experience.

    Why Potatoes Make a Great Dessert

    You might be thinking, “Why potatoes in dessert?” Well, aside from being naturally starchy, which adds a creamy texture, purple potatoes (like the ones in this recipe) are subtly sweet. Plus, they’re loaded with antioxidants, making this treat not only satisfying but also packed with some sneaky nutrients.

    In my garden, I’ve learned to appreciate every plant I grow, and experimenting with them in both savory and sweet recipes has been a game-changer. Potatoes aren’t just for mashing anymore—they’re a versatile ingredient waiting to surprise you!

    Growing your own potatoes (or any other veggie) teaches you just how much you can do with the space you have. Whether you’re in a small urban garden or have a bit more land to work with, experimenting with unique potato varieties is so rewarding.

    So, next time you’re pulling potatoes from your garden, don’t stop at the savory side—turn them into a sweet, plant-based masterpiece.

    Happy growing!

    How To Make Plant-Based Wild Plum Dumplings (Easy Recipe!)

    How To Make Plant-Based Wild Plum Dumplings (Easy Recipe!)

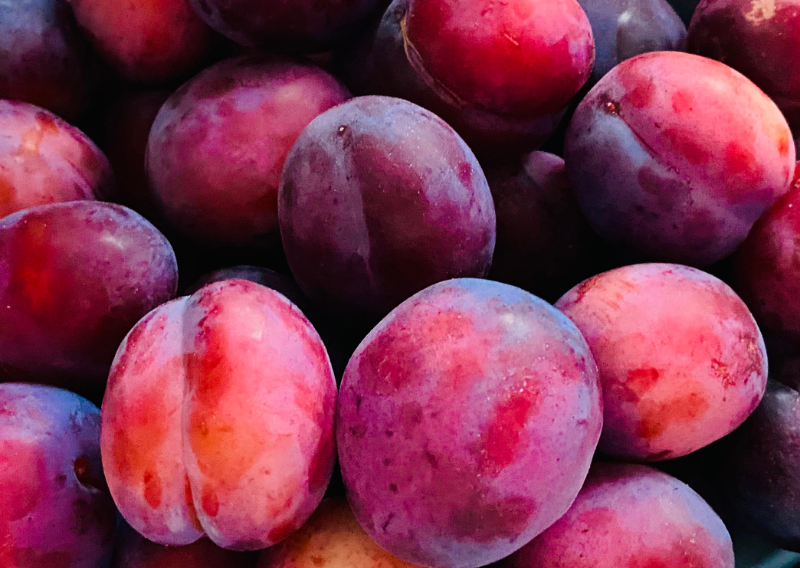
    Ah, plum dumplings. Just saying those words might make your mouth water, especially if you’ve ever had the pleasure of tasting this Romanian classic. Known as “Galuste cu Prune” in its native land, this dish is a nostalgic treat for many, often bringing back memories of family gatherings and grandparent cooking. Today, we’re putting a modern twist on this traditional dessert with a plant-based recipe that’s both delightful and sustainable.

    A Taste of Tradition with a Modern Twist

    Wild plum dumplings are a delightful treat, with tender, juicy plums encased in soft potato dough and coated with sweet, buttery breadcrumbs. It’s like a warm hug for your taste buds, all wrapped up in a delicious package. This recipe is also entirely plant-based, making it perfect for anyone who wants to enjoy a sweet indulgence without compromising their dietary choices.

    Inspired by my fiance Iasmina @lajatattoo, who fondly remembers making these dumplings with her grandma in Romania, our version brings a touch of nostalgia to the table. Her recipe is sure to create new fond memories for anyone who tries it. For an extra special treat, Iasmina suggests serving these dumplings with a scoop of your favorite plant-based ice cream. Trust us—it’s a dessert match made in heaven!

      Ingredients That Make Magic

      Dumplings:

      • 3 cups mashed potatoes
      • 2 handfuls of breadcrumbs
      • 3 handfuls of flour
      • 1 tablespoon dragonfruit powder (optional, for a pop of color)
      • Plums or apricots (fresh and juicy)

      Coating:

      • 2 tablespoons plant-based butter (or any oil of your choice)
      • 1 cup breadcrumbs
      • 2 tablespoons cinnamon
      • 2 tablespoons sugar
      • 2 tablespoons ground almonds

      Step-by-Step Procedure:

      1. Start by combining the mashed potatoes, flour, and breadcrumbs. Mix well until everything is incorporated. The dough should be soft but not too sticky—think of a gnocchi dough consistency. If it’s too sticky, add a bit more flour.
      2. Let the dough rest in the fridge for 30 minutes. This helps it firm up a bit, making it easier to handle.
      3. While the dough is chilling, melt the vegan butter in a hot pan and mix in the breadcrumbs. Once the mixture is cool, stir in the cinnamon, sugar, and ground almonds. Feel free to get creative with flavors—coconut and vanilla can add a lovely twist!
      4. Flour your hands to make rolling the dough easier. Take a small portion of dough, flatten it, and wrap it around a plum or apricot, making sure the dough is about half a centimeter thick. Seal well to encase the fruit completely.
      5. Boil the dumplings until they float, which usually means they’re done. Drain them well before rolling them in the breadcrumb mixture to coat.

      Health Benefits and Sustainable Delights

      Wild plum dumplings come with some health benefits. Plums and apricots are packed with vitamins and antioxidants that support overall well-being. The plant-based nature of this recipe makes it an excellent choice for anyone looking to reduce their environmental impact while still enjoying delicious food.

      Whether you’re reminiscing about childhood memories or making new ones, these plant-based wild plum dumplings are sure to satisfy your sweet tooth and warm your heart. Enjoy them on their own or with a scoop of plant-based ice cream for the ultimate dessert experience.

      Bon appétit!

      DIY Sustainable Laundry Detergent: Simple Steps for Eco-Friendly Cleaning

      DIY Sustainable Laundry Detergent: Simple Steps for Eco-Friendly Cleaning

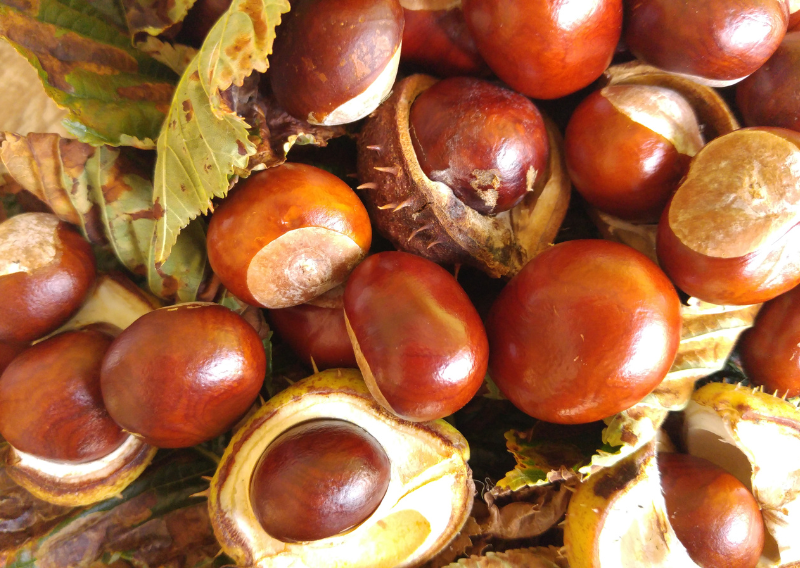
      When you think of eco-friendly laundry detergent, you might think of fancy packaging with all-natural ingredients listed in fine print. But did you know that one of the best sustainable options comes straight from trees, scattered in parks and urban areas? Yes, I’m talking about conkers!

      Conkers were a big part of my childhood too. I remember walking through parks and up hills, filling bags with them, and turning it into a competition to see who could collect the most. Who would’ve thought that years later, I’d find a completely new appreciation for these shiny brown nuts—not for games, but for something as practical as laundry.

      Why Choose Sustainable Laundry Detergent?

      Sustainable laundry detergent is not just about keeping your clothes clean. It’s about reducing waste, using natural ingredients, and minimizing your environmental footprint. Choosing something as simple as a conker-based detergent means using what nature provides, avoiding synthetic chemicals, and keeping your laundry routine 100% zero-waste. Plus, it’s a fun DIY project that makes laundry feel a bit less like a chore.

      How to Make Your Own Conker Laundry Detergent

      Ingredients:

      • 4 kg of conkers (horse chestnuts)
      • 1/2 cup of conker powder
      • 3 cups of water
      • 1 teaspoon of baking soda (optional)
      • Essential oil drops (optional)

      Instructions:

      1. Collect Your Conkers – First, you’ll need about 4 kg of horse chestnuts. You can usually find them in parks or scattered in urban areas during autumn.
      2. Wash and Prep – Once collected, wash your conkers to remove dirt and debris. Then, cut them into small chunks. You’ll need to blend these chunks into a pulp to make your conker powder. If you’ve got a strong blender, great—otherwise, a food processor works just as well.
      3. Dry the Powder – You can air dry, use a dehydrator, or even pop them in the oven. Once the powder is dry, store it in airtight jars.
      4. Make the Detergent – About 30 minutes before you start, mix 1/2 cup of conker powder with 3 cups of hot water in a jar. The hot water will help release the natural saponins from the chestnuts (that’s the magic cleaning compound).
      5. Strain and Store – After the conkers have soaked for a bit, strain the liquid. You should end up with a milky, foamy mixture. This is your conker detergent. It can be stored in the fridge for up to a week—just remember to give it a little shake before using.
      6. Use in Your Laundry – For each load, add about 1/2 cup of your homemade detergent. Keep in mind, that this works best for lightly soiled clothes. If you’re dealing with heavy stains or whites, you can boost it by adding some baking soda and essential oils for a nice scent.

      A Few Cautions

      While Conker detergent is perfectly safe for your clothes, it’s important to remember not to eat them! Horse chestnuts contain esculin and saponin, which are toxic to humans and animals if consumed. So, be sure to keep your conker detergent safely out of reach of kids and pets.

      Making your own conker laundry detergent is not just a great way to cut down on waste, but it’s also a fun, nostalgic activity that brings you closer to nature. Whether you’re a gardener, a sustainability enthusiast, or just someone who loves trying new DIY projects, this is a great step toward a greener lifestyle. And who knows, maybe laundry day will become a bit more enjoyable!

      Happy DIY!

      DIY Rose Water Recipe: Quick 20-Minute Skincare Boost for Radiance

      DIY Rose Water Recipe: Quick 20-Minute Skincare Boost for Radiance

      If you’ve ever stopped to smell the roses, you know their scent is truly magical. But did you know you can capture that lovely aroma in a bottle and enjoy it every day? DIY rose water is the answer! It’s a natural skincare spray that’s not only easy to make but also filled with benefits for your skin. It also takes just 20 minutes from start to finish. That’s right—just 20 minutes to turn those beautiful blooms into a luxurious treat for your skin!

      Why Rose Water is the Real Deal

      This DIY rose water is more than just a delightful, fragrant mist, it’s also packed with health benefits. Roses are celebrated for their medicinal, antidepressant, and anti-inflammatory properties, making them a fantastic addition to your skincare routine.

      • Medicinal Magic: Rose water has been used for centuries in traditional medicine to treat everything from sore throats to digestive issues. It’s a natural healer, helping to soothe irritated skin and promote overall well-being.
      • Mood Booster: Feeling a bit down? A spritz of rose water can work wonders. Its calming scent has been shown to reduce anxiety and lift your spirits. Who knew a simple flower could have such a profound impact on your mood?
      • Anti-inflammatory Hero: Whether you’re dealing with sunburn, redness, or just a little irritation, rose water has your back. Its anti-inflammatory properties help to cool and calm the skin, making it perfect for those with sensitive skin.

      The Beauty of DIY: Pure and Simple

      One of the best things about making your own rose water is knowing exactly what’s in it—no hidden chemicals, no artificial fragrances, just pure, natural goodness. Plus, it’s a sustainable choice! Instead of buying bottled rose water, which often comes in plastic, you’re reusing and recycling what you have at home.

      And let’s not overlook the joy of creating something yourself. There’s a special satisfaction in taking a handful of fresh rose petals and turning them into a skincare product that rivals anything you’d find at a high-end spa. It’s a bit of garden alchemy, and the results are simply the best.

        How to Make Your Own Rose Water

        What You’ll Need:

        • Fresh rose petals (from about 2-3 roses)
        • Distilled water
        • A small pot with a lid
        • A spray bottle or jar

        Steps:

        1. Start by gently rinsing the rose petals to remove any dirt or bugs. It’s a good idea to use roses that haven’t been treated with pesticides—your skin will thank you!
        2. Place the petals in the pot and cover them with just enough distilled water. You don’t want to drown them, just give them a nice soak.
        3. Cover the pot with a lid and bring the water to a simmer. Let it simmer for about 15-20 minutes, or until the petals lose their color. You’ll notice the water taking on a lovely rosy hue—this is your rose water in the making!
        4. Once it’s ready, strain the liquid into a spray bottle or jar. Let it cool before using, and store it in the fridge for up to a week.

        There you have it—your very own DIY rose water, ready to refresh and rejuvenate your skin. Use it as a toner, a hydrating mist, or even a gentle perfume. It’s like a little bottle of summer, perfect for those moments when you need a quick pick-me-up.

        And remember, while it may take only 20 minutes to make, the benefits will last long after the roses have faded.

        So go ahead, and indulge in this natural skincare treat—you deserve it!

        0
          0
          Your Cart
          Your cart is emptyReturn to Shop