DIY Skincare: How to Make Homemade Radiance Cream for Glowing Skin

DIY Skincare: How to Make Homemade Radiance Cream for Glowing Skin

Hello, gardeners! Today, I’m going to share a page from my personal journey. A journey filled with the soothing essence of coconut cream, rosemary, the calmness of lavender, and the healing touch of calendula, all culminating in a luscious DIY cream that’s been our savior.

Living in the UK, with the brutality of winters, me and my fiance used to suffer from dry, chapped hands. Other family and friends also suffered from acne and irritated skin so I thought there had to be something in my garden that would help our concerns.

One day, while walking in my garden, (which I always do – you know that) I looked at the flourishing rosemary bush and a thought struck me. For some unknown reasons, it came to my mind that combining coconut oil with medicinal oils like rosemary, lavender, and calendula would help me create my own cream.

And so I tried!

Build Your Own Beauty – Key Ingredients for Your DIY Skincare Cream

  • Store-bought coconut oil
  • Homegrown rosemary, lavender, and calendula oils
  • E-oil for extended shelf life

Creating your skincare concoction is a straightforward process, offering plenty of benefits:

  • Say goodbye to store-bought creams and their baffling ingredients.
  • Welcome nature’s gifts that your skin will love.
  • Enjoy the pleasure of utilizing fresh, homegrown ingredients.

Ready to dive into the world of DIY beauty? Follow my easy recipe to create your very own Homemade Radiance Creams.

ROSEMARY CREAM

500ml virgin pure coconut oil
2 tbsp rosemary oil (3-4 if you prefer)
1 tbsp E-oil

optional: 5 drops of any essential oil you prefer

ROSEMARY OIL

dry rosemary
castor oil
fill up a jar with rosemary and top up with castor oil
let it infuse for around 3-4 weeks
it will last one year or more
keep it in an airtight container
we’ve chosen castor oil as it’s an antibacterial and it also deep penetrates the skin. Iasmina is using it also to help with ovary pain and aid in the management of PCOS and Endometriosis.

Mixed with rosemary they both have 5 times the usual rate of boosting hair growth.

Iasmina massages her scalp with this cream and keeps it on overnight to improve her hair growth.

LAVENDER CREAM

500ml virgin pure coconut oil
2 tbsp lavender oil (3-4 if you prefer)
1 tbsp E-oil
optional: 5 drops any essential oil you prefer

LAVENDER OIL

dry lavender flowers
argan oil
optional: essential oil
fill a jar with lavender flower stems including if you want and top it up with argan oil
let it infuse for around 3-4 weeks
it will last one year or more
keep it in an airtight container
we’ve chosen argan oil as mixed with lavender can reduce inflammation increases skin elasticity and it has a great perfume

This is also one of the 3 creams that we prefer to use as a hand cream for beauty purposes more than medicinal.

CALENDULA CREAM

500ml virgin pure coconut oil
2 tbsp calendula oil (3-4 if you prefer)
1 tbsp E-oil
optional : 5 drops of any essential oil you prefer

CALENDULA OIL

dry calendula flowers
olive oil
optional: orange essential oil
Fill a jar with calendula flowers and top it up with olive oil
let it infuse for around 3-4 weeks
it will last one year or more
keep it in an airtight container
We’ve chosen olive oil because it helps relieve dry skin and like calendula it helps with eczema and psoriasis for us it’s just the perfect combo but you can use any oil that you prefer.

This cream is our favourite as a hand or body / face medicinal cream as it helps a lot especially Iasmina with her acne and rushes.

STEP BY STEP

  • in a double boiler melt the coconut oil
  • you can use virgin coconut oil or cold compress coconut oil any other coconut oil is fine but it won’t give the same texture
  • of the fire add the E-oil (keeps it preserved)and one of your chosen herbal oil
  • optional: if you prefer a strong fragrance add some drops of essential oil
  • remember that this cream is not edible
  • mix the ingredients well
  • let it cool until completely hard
  • now slowly break it with a spoon and then use a hand mixer to whip it up
  • once reached a creamy consistency add to an airtight jar or any jar that you prefer.
  • it lasts long as it says on your coconut oil container when you bought it

TIP: if your coconut oil is liquid it won’t whip, or if it’s hard and you’re still not reaching the consistency you like, keep it in the freezer for a few minutes so it sets again, and then whip it again.

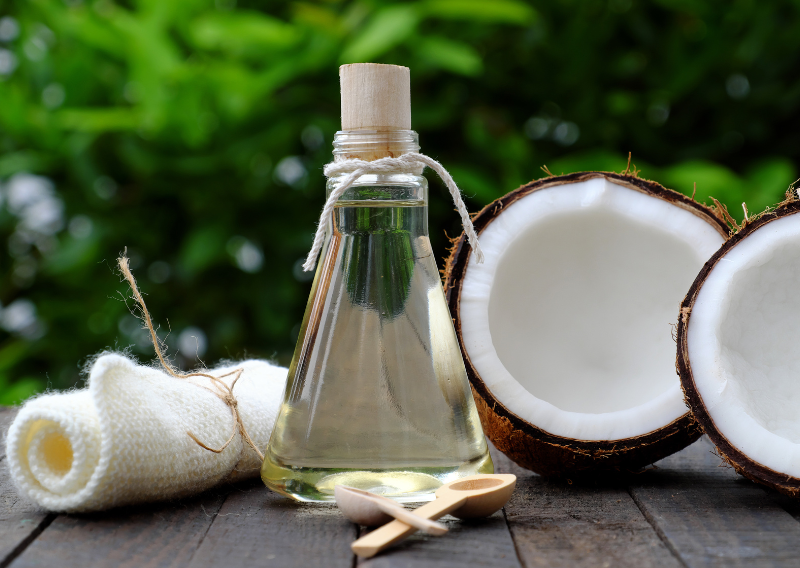
The Magic of Coconut

This creamy natural extract, crafted from the flesh of ripe coconuts, is a potent ingredient filled with nourishing fats, vitamins, and minerals. As I delved deeper, I learned that not only did it hydrate the skin, but when combined with other powerful ingredients like rosemary, calendula, and lavender, it created the perfect DIY hand cream.

Whipping the Coconut Cream: Why Do We Do It?

Whipping the coconut oil is a critical step in our DIY cream-making process. Typically, the fat molecules in coconut oil are too large to penetrate the pores, leading to the oil remaining on the surface of the skin. However, when whipped, these molecules break down, transforming the oil into a creamy consistency that’s easily absorbed by the skin.

At last, you have your homemade radiance cream! Like all our DIY creations, these creams make wonderful gifts for friends and family.

So here’s to celebrating the power of DIY and the magic of gardening. Here’s to glowing, soft, nourished skin and hair naturally.

Simple Potato Recipes from 1960: Easy and Classic Dishes to Try

Simple Potato Recipes from 1960: Easy and Classic Dishes to Try

Potatoes are one of our favorite vegetables. It’s an ideal crop for beginner gardeners and those interested in sustainable living. They are adaptable, easy to cultivate, and provide an excellent opportunity for practicing zero-waste cooking.

I found a potato recipe in a book from 1960 from my great grandma and it has been passed on from generation to generation. My grandmother used to make it quite a lot, especially on a Sunday when my whole family was meeting up to enjoy lunch. I’ll share the recipe and let’s also talk about growing potatoes.

Anyway, I obviously added my own twist like saving the potato skin to make crispy potato skin but the rest are all my grandma’s recipe!

Growing Potatoes with Zero Waste

Growing potatoes is a satisfying and sustainable practice for any aspiring gardener. It’s pretty simple and you can begin by choosing seed potatoes from a reputable source and planting them in well-drained soil with lots of sunlight. Potatoes are low-maintenance, making them excellent for new gardeners.

For harvesting, you’ll know it when the plants have flowered and the leaves start to yellow, it’s time to dig up the tubers. Handle them lightly to prevent bruising. To increase the shelf life of your gathered potatoes, store them in a cool, dark place.

    My Great Grandma’s Recipe

    Plant-based Mayo

    • 1 cup of olive oil
    • 1 cup of soy milk
    • 1 tbsp of white vinegar
    • 1 tbsp of mustard
    • 1 tbsp of lemon juice
    • 1 tsp of salt
    • 1 garlic clove

    Instructions:

    Mix 1 cup of olive oil, 1 cup of soy milk, 1 tbsp of mustard, 1 tbsp of white vinegar, 1 tbsp of lemon juice, and 1 garlic clove in a large bowl. Transfer them into a blender and blend until it reaches the desired mayo thickness and consistency.

    Potato Salad

    • 6 medium-sized potatoes (or twice the amount of small potatoes)
    • Chives
    • 1 red Onion
    • Pickles
    • Parsley
    • Salt & pepper
    • 2-3 tbsp of plant-based mayo

    Instructions:

    1. Wash and dice the potatoes into small or bite-sized pieces
    2. Fill a pot with 1 inch of water. Place a steamer basket on top, make sure the water doesn’t touch the basket, and bring the water to a boil.
    3. Add the diced potatoes to the steamer basket and steam for 15-20 minutes, or until fork-tender.
    4. Once the potatoes are cooked, carefully transfer them to a bowl or plate
    5. Add the pickles, parsley, onion, chives, and salt & pepper
    6. Let the potatoes cool slightly to prevent the mayonnaise from separating then add 2-3 tbsp of plant-based mayo before mixing

    Crispy Potato Skin

    • Olive oil
    • Salt & pepper
    • Onion and garlic powder
    • Paprika

    Instructions:

    1. Peel potatoes and set aside the skin
    2. Once done, moisturize with olive oil and add condiments to the skin such as salt & pepper, onion, garlic powder, and paprika
    3. Bake at 150C for 20 – 30 minutes to achieve the crispiness

    Practicing zero-waste principles with potatoes benefits both your health and the environment. Consuming every part of the potato plant reduces waste and promotes a more sustainable lifestyle.

    As a gardener, planting and cooking potatoes to their maximum capacity is a rewarding way to practice sustainability. So, plant those seed potatoes, care for your plants, and enjoy the abundant crop.

    Happy gardening!

    How To Grow Your Own Food Using The Square Foot Gardening Technique

    How To Grow Your Own Food Using The Square Foot Gardening Technique

    Growing your own food not only provides a variety of benefits to your health but also creates a very special link with nature, even if you live in the middle of the city!

    And if you’re worried because you’re in the city with limited space, or you only have a small space for your garden, it’s never a problem! You can still plant multiple veggies, fruits, or plants if you follow the square-foot gardening technique.

    Personally, I don’t have any kids, but planning and transplanting your seedlings in the garden feels like your kids are ready to leave the nest and you need to make this transition as easy as possible for theirs and your future.

    The Benefits of Square-Foot Gardening

    1. Space Efficiency: By arranging plants in compact squares, you may grow a surprising amount of product in a little space. This strategy is ideal for urban gardeners or anyone wishing to increase their production from a small allotment.
    2. Easier Maintenance: Square-foot planting greatly minimizes the burden. Smaller, more defined spaces require less weeding, watering, and maintaining. Plus, close planting helps to crowd out weeds, which reduces the amount of effort spent on garden maintenance.
    3. Better Soil Management: By concentrating on small parts, you can adapt the soil composition to the demands of individual plants. Adding compost, fertilizers, and other amendments makes the process more manageable, resulting in healthier plants and increased production.
    4. Increased Plant Variety: You can experiment with different crops in each square, resulting in a diverse range of produce. This not only makes your garden more fascinating, but it also aids in pest management because different plants attract different beneficial insects and repel pests.
    5. Environmentally Friendly: Smaller garden plots use less water and need fewer resources overall. And because you’re making the best use of every available space, there’s less waste of both seeds and harvestable produce.

    How To Do Square Foot Gardening

    1. Using a shovel and rake, top-up raised bed with organic compost and level it to make it flat
    2. Get wooden slats and mark it every 12”
    3. Put 1 nail on every mark
    4. Secure yuta rope on the nail and overlay a square-foot grid
    5. Gather your plants and poke holes for your plants
    6. Gently prepare your seedlings and drop them in a hole
    7. Press them and don’t cover
    8. Put the same plants in the same squares and water them

      Best Plants for Square-Foot Gardening

      Here’s the list of the plants that you can consider planting using square-foot gardening technique.

      1. Lettuce: Quick-growing and space-efficient, lettuce is perfect for filling in gaps and providing a continuous harvest throughout the growing season
      2. Carrots: These root vegetables thrive in loose, well-drained soil and can be planted close together, making them ideal for square-foot gardening.
      3. Tomatoes: Compact bush varieties, also known as determinate tomatoes, are excellent choices. They produce a bounty of fruit without taking up too much space.
      4. Radishes: One of the fastest-growing vegetables, radishes are perfect for filling small spaces and can be harvested in just a few weeks.
      5. Herbs: Basil, cilantro, parsley, and other herbs thrive in small spaces and can be planted densely to maximize your yield.
      6. Spinach: Another quick grower, spinach can be harvested multiple times throughout the season and grows well in tight quarters.
      7. Peppers: Both sweet and hot varieties of peppers do well in square-foot gardens, providing a colorful and productive addition to your garden.

      Square foot gardening is an incredible method to maximize the production of food in a small area! You’d need a raised bed of 4 by 4 feet to make it right. However, my raised bed was a bit smaller, but that’s the beauty of gardening, always evolving and adapting to different situations!

      Happy growing!

      DIY Recycled Trellis: How to Make a Rustic Garden Structure

      DIY Recycled Trellis: How to Make a Rustic Garden Structure

      Growing your own food could be cheap and fun if you reinvent yourself and recycle common materials lying around your house. That’s what I did when I experimented and made a recycled trellis.

      A trellis, typically used to support climbing plants, can be made from various recycled materials. Old wooden pallets, discarded metal frames, and even repurposed plastic can become sturdy structures for your garden. The charm of a recycled trellis is not just in its function but in its unique, rustic appearance that adds character to your garden.

      How I Made My Recycled Trellis

      Materials Needed:

      • Old bike wheel rim
      • Jute rope
      • Oak barrel or plastic pot
      • Organic compost
      • Peas or bean seedlings

      Step-by-Step Procedure:

      1. Fill up the oak barrel with organic compost
      2. Drill holes around the border
      3. Stick in drainage hole using an old broom handle
      4. Place the Old bike wheel rim on the end of the broom handle and fix it
      5. Using a jute rope, make vertical lines connected to the wheel and to the holes in the border
      6. Plant peas seedlings behind the jute rope and twist peas around the rope
      7. Water well and watch it grow

      NOTE: Make sure to secure the broom handle in one of the drainage holes at the bottom to add stability!

      This system it’s the perfect example as I managed to fit around 20 plants of peas which will produce a good amount of food and I still have space in the middle to plant something else. You could use a plastic pot if you don’t have an oak barrel.

        Benefits of Using Recycled Trellises

        • Environmental Impact: By repurposing materials, you reduce the demand for new resources and minimize waste. This simple act of recycling helps cut down on landfill waste and reduces your carbon footprint.
        • Cost-Effective: Gardening can be an expensive hobby, but using recycled materials for your trellis can save you a significant amount of money. Instead of buying a new trellis, you can create one from materials you already have or find for free, like old furniture or scrap metal. 
        • Unique Aesthetic: Each recycled trellis has its own story and character. No two trellises will look the same, giving your garden a unique and personalized touch.
        • Durability: Often, materials like wood and metal, which are used in recycled trellises, are extremely durable. When properly treated and maintained, these materials can last for many years, providing long-lasting support for your plants.
        • Creative Satisfaction: Building your own trellis from recycled materials can be a fun and rewarding project. It’s an opportunity to flex your creative muscles and turn something old into something new and useful. The satisfaction of seeing your plants thrive on a trellis you built yourself is incomparable.

        Plants That Thrive on Trellises

        Many plants benefit from the support of a trellis. Climbing plants like tomatoes, cucumbers, beans, and peas can grow more efficiently and produce higher yields when supported by a trellis. Even flowering plants like roses and clematis can flourish with the added structure.

        Creating the right support for your plants it’s essential for a healthy and productive garden. So, next time you consider throwing out that old wooden pallet or metal frame, think twice. It might just be the perfect piece for your next recycled trellis project.

        Happy gardening!

        Turmeric Powerhouse: DIY Paste and Immunity-Boosting Shots (Easy to Make!)

        Turmeric Powerhouse: DIY Paste and Immunity-Boosting Shots (Easy to Make!)

        What do you usually do when you’re feeling under the weather or have a terrible cold? For us, drinking turmeric paste and shots is one of our go-to things. There are times when no matter how much rest I got or how much tea I drank, I just couldn’t shake it. And turmeric is definitely your best friend during these times. It’s a super powerful natural medicine with a ton of benefits including being one of the most powerful natural anti-inflammatory and antioxidants but it could also improve your heart health. You can also use the peel and pulp to make these 2 easy zero-waste boosters!

        How To Make Turmeric Paste and Shots

        Turmeric Paste Ingredients

        • 1/2 cup of ground turmeric
        • 1 tbsp of ground cinnamon
        • 1 tsp of fresh grated ginger
        • 1 tsp of black pepper
        • 1/4 cup of coconut oil
        • 1 cup of water

        *Why use black pepper? Piperine (found in black pepper) enhances the absorption of curcumin (found in turmeric) and its potency.

        Step-by-step Procedure

        1. Slice and dehydrate turmeric roots
        2. Pour 1 cup of water into a large pot and add 1 tbsp ground cinnamon
        3. Crush 1 tsp of black pepper using a mortar and pestle
        4. Peel the skin of the ginger and grate it
        5. Add the turmeric powder, 1 tsp of crushed black pepper, and 1 tsp of grated ginger into the mixture and simmer
        6. Stir well to form a paste. Cook over low heat, stirring frequently, until it forms a thick paste. This should take about 7-10 minutes
        7. Once your paste has thickened, add 1/4 cup of coconut oil
        8. Mix well and cook for another 2-3 minutes

        NOTE: Store in the fridge for up to 2 weeks in an airtight container. Mix 1 x tsp with 1 x cup of hot plant-based milk.

        Turmeric Shots Ingredients

        • 2 oranges
        • 2 lemon juice
        • 5 fresh turmeric roots
        • 1 ginger root (the size of a finger)
        • 1 tsp black pepper
        • 1/2 liters of water

        Step-by-step Procedure

        1. Peel 2 oranges and slice 1 ginger roots
        2. Squeeze 2 lemon juice and slice 5 fresh turmeric roots
        3. Add 1 tsp of black pepper and ½ liter of water
        4. Blend until all the ingredients mix well and strain the juice
        5. Transfer the juice to a bottle (airtight container) and store it in the fridge

        TIP and NOTE: Store in the fridge for up to 3 days. Save the peel of oranges, lemons, etc to dehydrate and make flavored salt or use for cakes.

          Health Benefits of Turmeric

          Now that your turmeric paste and shot are ready, let’s explore how it can become a powerful addition to your daily routine.

          1. Anti-Inflammatory Properties: Turmeric is a natural anti-inflammatory agent. This makes it beneficial for conditions like arthritis and other inflammatory diseases.
          2. Antioxidant Boost: Turmeric is rich in antioxidants, which help protect your body from free radicals. This can slow down the aging process and reduce the risk of chronic diseases, including heart disease and cancer.
            3. Enhances Digestive Health: Turmeric can aid digestion and reduce symptoms of bloating and gas. Its anti-inflammatory properties also help soothe the digestive tract.
            4. Boosts Immune System: Regular consumption of turmeric can strengthen your immune system, helping your body fight off infections and illnesses more effectively.

          Making these two homemade natural remedies at home is super easy and rewarding. Whether you’re a gardener who is looking for ways to use ginger or a person who would love to take care of your health, you will never go wrong with these two.

          Happy growing!

          0
            0
            Your Cart
            Your cart is emptyReturn to Shop