 COLOR2")

How To Make Summer Roll Using Leftover Vegetables At Home
Have you ever opened your refrigerator only to see a pile of leftover vegetables looking back at you? I can relate and sometimes it happens to us too. But instead of wasting them, why not transform them into something tasty and nutritious? Cooking using leftover vegetables not only helps to reduce food waste but also has a number of surprising health benefits. So, before you throw those vegetables away, try giving them a second life with the recipe that I’ll share with you.
This is an amazing recipe that you can make using any sort of leftover vegetable in your fridge and reduce your wastage!
")

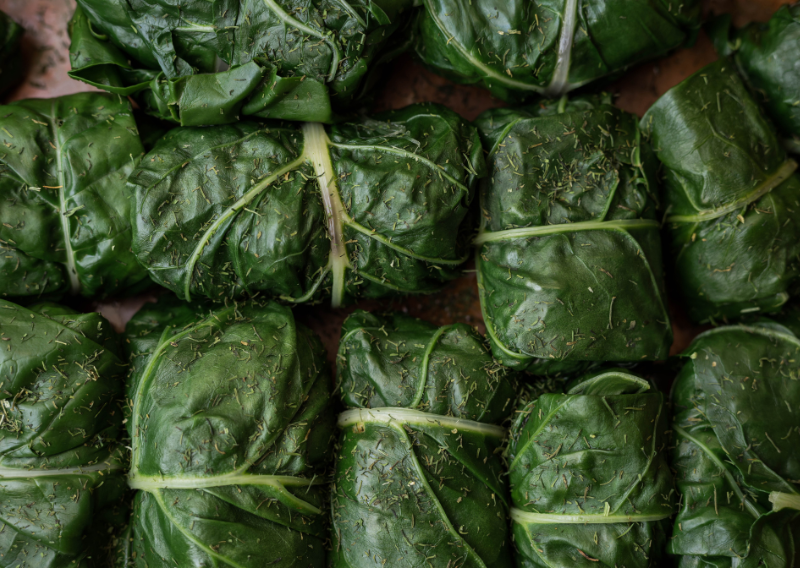
Veggie Roll
Veggie Roll Ingredients:
- Any vegetables leftover in your fridge
- Herbs like coriander, mint, parsley
- Rice noodles
- Rice sheets
Sauce Ingredients:
- 1 x Garlic clove
- 1 x Teaspoon grated Ginger
1 x Tbsp soy sauce - 1 x Tbsp sesame oil
- 1 x Tbsp rice vinegar
- 2 x Teaspoon peanut butter
*you could also add tempeh or tofu to give it a bit more texture!
Vegetable Recipe:
- Dice any vegetables left over in your fridge (carrot, spring onion, cabbage, cayenne chili)
- Boil rice noodles, strain the excess water, and wash with cold water
- Soak the rice sheet in water and remove it immediately
- Put the diced veggies and rice noodles and wrap them up
- Cut into two or any size that you like and enjoy with the sauce
Sauce Recipe:
- Grate ginger and garlic
- Add peanut butter and soy sauce
- Add sesame oil and rice vinegar
- Mix well
We had a lot of fun cooking and filming this recipe! I’m so happy to get closer and closer to the kitchen as I feel like gardening and cooking fresh produce are highly connected and one should complement the other!
Aside from the recipe that I’ve shared above, these are some of the recipes and creative ways to use leftover vegetables at home you can try:
Stir-Fries: Combine leftover vegetables with some protein (like homemade tofu) and a flavorful sauce for a quick and easy stir-fry.
Soups and Stews: Throw your leftover vegetables into a pot with some broth and spices for a hearty and nutritious soup or stew.
Roasted Vegetables: Toss your leftovers with some olive oil and spices, then roast them in the oven for a tasty side dish.
Vegetable Quiche: Use leftover vegetables as a filling for a delicious quiche.
Health Benefits of Cooking with Leftover Vegetables
Nutrient Retention: Cooking leftover vegetables can actually enhance the availability of certain nutrients, making them more beneficial for your body.
Fiber Boost: Most vegetables are rich in fiber, which is essential for digestive health and can help you feel full longer, aiding in weight management.
Vitamin and Mineral Intake: Vegetables are packed with vitamins and minerals that are vital for overall health, including immune function, skin health, and energy production.
Antioxidant Power: Many vegetables contain antioxidants that help protect your cells from damage and reduce the risk of chronic diseases.
If we use our creativity, no leftover food or vegetables will go to waste. Get creative in the kitchen and transform them into delicious dishes that not only taste great but also offer a range of health benefits.
Happy cooking!

")
")
")

")


")


