Easy And Delicious: How To Bake Nettle Plant-based Cake With Just A Few Easy Steps

Easy And Delicious: How To Bake Nettle Plant-based Cake With Just A Few Easy Steps

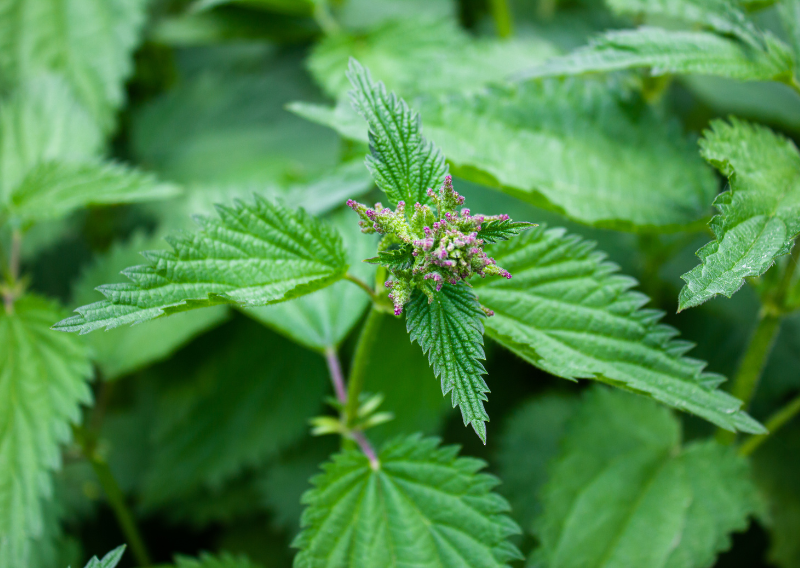
As someone who practices a plant-based diet, I was really happy when I discovered that I could make a plant-based cake out of one of the most edible weeds. Yes, you read that right! I’m talking about stinging nettles, a nettle plant-based cake! After a quick 30-second blanch, they lose their stinginess. Nettles are packed with nutrients and benefits for your body, and you can use them to make delicious dishes like this healthy vegan cake!

The Health Benefits of Nettles

Before we dive into the recipe, let’s take a moment to appreciate the numerous health benefits that nettles bring to the table.

  1. Rich in Nutrients: Nettles are a fantastic source of vitamins and minerals, essential for overall health and well-being.
  2. Anti-Inflammatory Properties: Nettles contain compounds that reduce inflammation, making them beneficial for those with arthritis and other inflammatory conditions.
  3. Supports Digestive Health: High in fiber, nettles aid digestion and promote a healthy gut.
  4. Boosts Immune System: The high vitamin C content helps strengthen your immune system. 
  5. Detoxifying: Nettles are known for their detoxifying properties, helping to cleanse the body of toxins. 
  6. Improves Skin Health: The anti-inflammatory and antioxidant properties of nettles contribute to healthier skin.

    Nettle Vegan Cake Recipe

    Base Ingredients:

    • 1 x Cup Walnut
    • 1/2 x Cup Pumpkin Seeds
    • 1 x Pinch of sea salt
    • 5-6 x Tsp date paste
    • 1 x Tsp maple syrup

    Nettle Layer Ingredients:

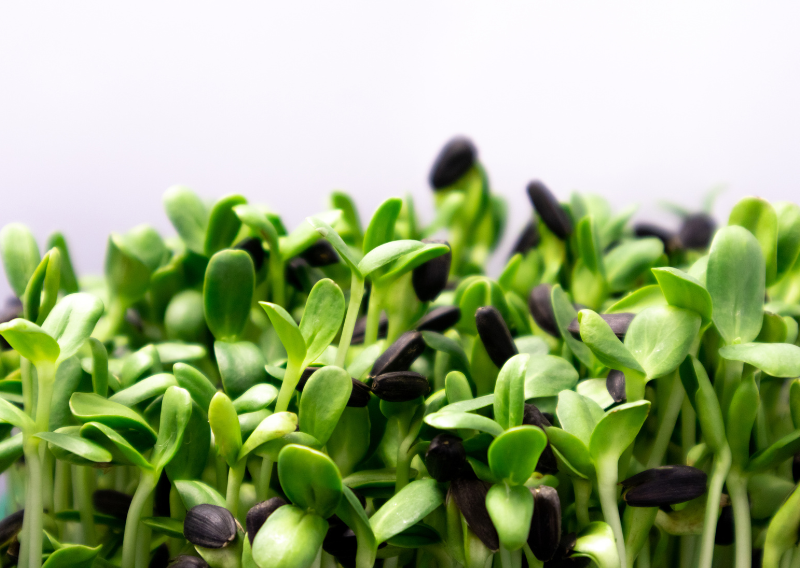
    • 2 x Cups nettle shots
    • 1 x Cup cashews soaked for 4 hours
    • 1/4 x Cup maple syrup
    • 1/4 x Almond milk
    • 1/2 x Lemon zest
    • 1/2 x Lemon juice
    • 1/2 x Cup melted coconut butter

    Blueberry layer Ingredients:

    • 1 x Cup frozen blueberries
    • 1 x Cup cashews soaked for 4 hours
    • 1/4 x Cup maple syrup
    • 2 x Tbsp almond milk
    • 1/2 x Lemon zest
    • 1/2 x lemon juice
    • 1 x Tsp Vanilla
    • 1/2 x Cup melted coconut butter

    Base Recipe:

    1. Collect nettles (I usually forage them along the river)
    2. Blanch nettles for 30 seconds and rinses in cold water
    3. Drain them and set aside
    4. Mix 1/2 x Cup Pumpkin Seeds and 1 x Cup Walnut and blend them using a blender
    5. Add 5-6 x Tsp of date paste and 1 x Tsp maple syrup
    6. Mix by hand spread evenly in a container and place in the fridge

    Nettle Layer Recipe:

    1. Soaked 1 x Cup cashews for 4 hours and put in a blender then add nettles
    2. Add 1/2 x Lemon juice and 1/2 x Lemon zest
    3. Add 1/4 x Cup maple syrup and 1/4 x Almond milk
    4. Add 1/2 x Cup melted coconut butter
    5. Blend all together and spread evenly into the base
    6. Cover and freeze then add a blueberry layer

    NOTE: make sure each layer is set before adding a new one

    As gardeners, we have the unique opportunity to connect with nature and bring its gifts into our kitchens, and this nettle vegan cake is the perfect example. It’s also a great activity to do with your family and friends to show each others’ baking skills. So why not enjoy a slice of cake that’s as good for your health as it is for your taste buds?

    Happy baking!

    Preserving Stone Fruit: An Easy Guide to Zero Waste

    Preserving Stone Fruit: An Easy Guide to Zero Waste

    I love preserving stone fruit and storing it for the winter as it reminds me of my grandparents’ pantry downstairs in the basement which I was always scared to visit because of the spiders lying around. However, every time you eat or preserve fruit, you are left with a plethora of stone fruit pits and stems which would be a shame to waste!

    In this blog, I’ll show you how to preserve stone fruits and not waste a single part of it.

    Why Preserve Stone Fruit?

    Stone fruit has a short shelf life, so it can be difficult to eat it all before it spoils. Preserving these fruits allows you to enjoy their flavor and nutritional advantages all year. Also, storing stone fruit reduces food waste, which is an important part of sustainable gardening. Whether you’re canning (this is what I’ll teach you in this blog), drying, or making jams and jellies, preserving stone fruit is a pleasant activity that honors the entire cycle of growing, harvesting, and savoring your garden’s abundance.

    Canned Stone Fruit Ingredients

    • Stonefruits / Wild cherry and Apricots (enough to fill a jar)
    • Canning jars
    • 5 1/2 cups of water
    • 2 1/4 cups of sugar

    Procedure

    1. Remove and save the stems of the wild cherry for the tea
    2. Remove and save stone pits of apricots for the vinegar
    3. Clean the fruits and sterilize old jars
    4. Mix 2 1/4 cups of unrefined sugar and 5 1/2 x cups water and bring it to boil
    5. Add the fruits to jars (different fruit, different jars)
    6. Cover with the sugar mix
    7. Clean the rim of the jar with vinegar
    8. Boil to seal

    Note: It takes 1 1/2 cups of syrup per quart-sized jar and your canned stone fruit will last for about a year

    Stone Fruit Pit Vinegar

    • 1 cup of stone fruit pits
    • 4 cups of champagne or rice vinegar

    Procedure

    1. Gently smash the stone and collect the kernel
    2. Put inside a vinegar jar and cover with rice vinegar

    Cherry Stem Tea

    • Wild cherry stems

    Procedure

    1. Add fruit stems of the wild cherry to the dehydrator until crispy
    2. Infuse in hot water and enjoy

    Cherry stems are fantastic to promote proper kidney functions and you simply have to dry them and infuse them like tea. They also taste delicious!

    The fruit kernels are also called noyaux with a sweet and intense almond flavour and slight notes of fruit! They contain a really small amount of amygdalin which could be toxic in high levels but you would need a huge amount to actually do something.

    Using every bit of the fruit not only extends its lifespan but also contributes to a more sustainable way of life. So, the next time you have plenty of stone fruit, consider preserving them. Your future self (and the environment) will thank you.

    Also, thank you to my fiance Iasmina (@lajatattoo) for helping me clean the fruit and filming!

    Happy growing!

    Level Up Your Salads & More! How to Grow Microgreens Indoors All Year Round

    Level Up Your Salads & More! How to Grow Microgreens Indoors All Year Round

    Do you want to reduce waste at home and upcycle any kind of container, like milk cartons? I have an ideal DIY Microgreens project for you. (Special thanks to my dearest friend, Jacks Patch, @jacks_patch for the brilliant idea!)

    DIY Microgreens are young vegetable greens that are approximately 1–3 inches (2.5–7.5 cm) tall. They are packed with nutrients, and they come in many different varieties. It’s nature’s way of showing us that good things really do come in small sizes. These tiny greens might be small in stature, but they are bursting with flavor, nutrition, and endless possibilities. If you’ve been looking for a new gardening adventure or a way to elevate your culinary creations, microgreens are here to take your gardening game to new heights.

    Also, once you harvest them, you can compost the substrate, as it contains nutrients and roots!

    If you’re still not convinced, here are more reasons why you need microgreens at home:

    1. Quick growth and big rewards- Most varieties are ready to harvest in just 1-3 weeks, depending on the type of seed you choose. Imagine the satisfaction of harvesting your first batch of fresh, homegrown greens in less than a month! This is also the reason why microgreens are known as the “The Flash” of the plant world.

    2. Very Nutritious- Don’t let their small size fool you. Studies have shown that these tiny greens can contain up to 40 times more nutrients than their mature counterparts. For example, red cabbage microgreens are packed with vitamins C, and K, and antioxidants, while broccoli microgreens are loaded with sulforaphane, a compound known for its anti-cancer properties.

    3. Year-Round Gardening- With microgreens, you can harvest the fruit of your labor all year round. No matter the weather outside, you can grow fresh greens indoors! A sunny windowsill or a simple grow light is all you need to keep your microgreens happy and thriving. This means you can enjoy a continuous harvest of fresh, homegrown goodness, even in the winter season.

      Things That You Need to Start Growing Your Microgreens:

      • Bulk seeds (organic seeds)
      • Upcycled containers, like milk cartons
      • Light soil
      • 1 cup of water
      • Grow lights (or sunlight)

      How To Grow Microgreens:

      1. Prepare organic seeds and any light soil
      2. Get your recycled milk carton and put 1 cup of water
      3. Top up with soil and gently level it flat
      4. Sprinkle high-density of seeds (don’t get too crazy!)
      5. Mist water and cover with an empty tray
      6. Lights on when they pop roots (you can also use sunlight)
      7. Watch them grow
      8. Cut and enjoy

      Do you see how easy it is to grow them? It doesn’t matter where you live. Microgreens are incredibly easy and fast to grow, making them ideal for beginners or anyone looking for a quick gardening win (even if you only have a small space or even without a garden). It is also a cool way to introduce gardening to your siblings or children. I’m sure that they will enjoy the process. 

      Experiment with different varieties (like cress, cilantro, kale, parsley, and many more), mix and match flavors, and let your culinary creativity run wild. Sprinkle microgreens atop salads, sandwiches, soups, and basically any food that you like. Not only will it make your dishes more delicious, but you’ll also reap the nutritional rewards of incorporating these microgreens into your diet while helping Mother Earth by using your upcycled containers!

      Happy growing!

      Brew a Better You: DIY Corn Silk Tea for Health and Wellness

      Brew a Better You: DIY Corn Silk Tea for Health and Wellness

      Did you know that corn silks are a gem in our bodies? Some people discard them as trash, but they, in fact, have very nutritious content. We love to eat corn, and we never throw away the corn silks because we use them as a natural medicine.

      Aside from the silks, corn leaves can play a key role in your kitchen, serving as a wrapper for steaming and grilling meat, fish, and vegetables.

      Meet the Corn Silks

      Those fine, hair-like threads that elegantly embellish ears of corn, known as corn silks, are packed to the brim with crucial nutrients and compounds that give a lot of health benefits. Traditionally cherished in various cultures for their medicinal properties, corn silks are filled with vitamins, minerals, and antioxidants, thus earning their status as a worthy natural remedy against numerous health issues.

      Health Benefits of Corn Silks

      1. Urinary Tract Health: Corn silks have long been used to promote urinary tract health. They possess diuretic properties, which help in flushing out toxins and excess fluids from the body, potentially reducing the risk of urinary tract infections (UTIs) and kidney stones.

      2. Blood Sugar Regulation: Research suggests that corn silks may help in regulating blood sugar levels. They contain compounds that may improve insulin sensitivity, making them a potential aid for individuals with diabetes or those at risk of developing the condition.

      3. Anti-Inflammatory Properties: Corn silks are rich in antioxidants, such as chlorogenic acid and quercetin, which have anti-inflammatory effects. Incorporating corn silks into your diet may help in reducing inflammation and its associated risks.

      4. Digestive Health: The fiber content in corn silks can aid in promoting healthy digestion. Fiber helps regulate bowel movements, preventing constipation, and supporting overall gut health.

      5. Antioxidant Boost: Antioxidants play a crucial role in protecting the body against free radical damage. Corn silks are rich in antioxidants, which can help in neutralizing free radicals and reducing oxidative stress.

      Your Corn Silk Recipes:

      • FOR DRY/FRESH SILKS: Make yourself a soothing Corn Silk Tea. Simply use 1 – 2 teaspoons of Corn Silk Tea for every cup of boiling water. Allow it to steep for 10 – 15 minutes. Sit back, relax, and savor the taste.
      • FOR DRY SILKS: Dehydrate your corn silks in the oven or a dehydrator until they’re crispy to the touch. Grind them manually or using a blender or dehydrator and pack the resulting powder into vegan film capsules. Take one capsule daily as a health supplement.

      Who knew that such a simple plant could offer loads of health benefits? Try the natural medicine power of corn silks to enhance your well-being. Whether you’re looking to support urinary tract health, regulate blood sugar levels, or simply boost your antioxidant intake, corn silks offer a natural and effective solution.

      Go ahead and give these cornsilk recipes a try, you won’t regret it!

      Level Up Your Meals: Easy Homemade Vegetable Stock Powder Recipe

      Level Up Your Meals: Easy Homemade Vegetable Stock Powder Recipe

      Have you ever tried making a DIY vegetable stock powder? If the answer is no, then get ready to embark on this delicious culinary journey. DIY vegetable stock powder is a staple in our kitchen. We have different veggies made into stock powder, and it’s an absolute gem in all of our dishes.

      Our soups, stews, sauces, and even rice dishes get so much better whenever we add vegetable stock powder because it enhances the flavor and boosts the savory “umami” taste. You can use basically any vegetable, but our favorites are stock powder made from carrots and celery stems.

      DIY? Here’s Why!

      Sure, store-bought vegetable stock powders are time-savers, but they often pack preservatives, additives, and a worrying amount of sodium. When you roll up your sleeves and make your own vegetable stock powder, you have control over the ingredients, resulting in a healthier and zestier alternative. What’s more, it’s an exciting opportunity to turn vegetable scraps, which would otherwise find their way into your compost, into flavorful dishes. That’s right, we’re talking about a significant reduction in food waste!

      Experience the Flavor Boom

      Imagine having your own secret stash of flavor magic for your cooking, all thanks to your garden! DIY vegetable stock powder is the key. It’s a blend of veggies and herbs that you can easily make at home. This powder gives your soups, stews, and sauces a burst of flavor that beats anything store-bought. It makes every meal tastier and healthier. Plus, it’s super easy to store and use whenever you need to whip up a quick and delicious meal.

        Let’s Get Cooking

        My Go-to Recipe:

        • 4-5 Carrots
        • 4 Celery Stems
        • 4-5 Onions
        • 1 Garlic Bulb
        • 2 Leeks
        • 300g Mushrooms
        • Ginger (amount to taste)
        • Parsley (amount to taste)
        • Rosemary (amount to taste)
        • Thyme (amount to taste)

        Procedure:

        • Begin by washing and peeling your chosen vegetables. Feel free to experiment and add any veggies that tantalize your taste buds. Chop them up into small pieces for easier processing.
        • Spread a layer of parchment paper on each tray of your dehydrator and distribute your vegetables evenly. Set the temperature to a mild 70°C (158°F) and let the dehydrator work its magic for 10-12 hours. You’ll know they’re ready when they turn crispy to the touch!
        • Next, transfer everything to a blender, along with 1 Tbsp of salt and (optional) 1 Tbsp of nutritional yeast. Blend until it becomes a fine powder, your homemade vegetable stock powder is now ready!
        • Add 1 Tbsp of this power-packed powder to each liter of water, and voila! You have a mouthwatering, healthy broth ready to accompany your favorite meal.

        Just follow the procedure that I’ve shared above and get ready to have fun in the kitchen by making your own vegetable stock powder. This simple ingredient can really elevate your cooking, adding a delicious flavor and extra health benefits to your dishes. You’ll surely impress the taste buds of your family and friends with this special powder.

        Let’s get cooking and enjoy every delicious moment!

        0
          0
          Your Cart
          Your cart is emptyReturn to Shop