6 Easy Steps To Understand Your Garden’s Soil Type: A Must Knowledge For Every Gardener

6 Easy Steps To Understand Your Garden’s Soil Type: A Must Knowledge For Every Gardener

Have you experienced a stressful event where you’ve carefully selected the perfect plants for your garden, nurtured them from seeds, and eagerly planted them in your soil, and then weeks pass, and instead of a lush, thriving garden, your plants struggle to grow, their leaves become yellow, and their growth is very slow? What went wrong? The answer might be the soil type. Every gardener has experienced this (yes, including me!) especially those who are just starting.

Don’t worry, because you can test your soil type and structure in just a few easy steps that I will share. Learning what kind of soil you have in your garden will help you understand what soil amendments are needed to grow your own food and how to water your plant—it’s like unlocking a secret code to gardening success.

How To Test Your Soil

This is one of the cheapest and easiest tricks anyone can do to learn more about your growing space and soil structure! Remember that there are no gardening mistakes; just experiments that might lead to failure, but still offer a valuable lesson!

  1. Collect some soil samples from a few different areas of your garden to get a good idea of the overall quality of your soil.
  2. Fill up a jar halfway through with a soil sample from your garden.
  3. Fill the rest of the jar with water leaving one inch cup from the top.
  4. Shake the jar for at least one minute. Set them on a flat for a minimum of 24 hours.
  5. Large particles will be at the bottom, silty particles in the middle, and clay will settle at the top of your soil.
  6. The ideal ratio for your soil is loamy at 40% sand, 40% silt, and 20% clay! Amend your soil based on the test result.

Why You Need To Understand Your Soil Type

  • Optimal Plant Growth: Different plants thrive in different soil types. Some love sandy, well-draining soil, while others prefer the moisture-retaining properties of clay. Knowing your soil type allows you to choose plants that will flourish in your garden.
  • Nutrient Availability: Soil provides essential nutrients for plant growth. By knowing your soil type, you can amend it with organic matter or fertilizers to ensure your plants receive the nutrients they need.
  • Water Management: Soil type also affects water retention and drainage. Understanding your soil’s water-holding capacity allows you to water your plants appropriately, preventing over or under-watering.
  • Pest and Disease Management: Soil health is closely linked to plant health. Poorly drained soil can create conditions favorable for root rot and other diseases and certain soil types may attract specific pests. Knowing your soil type allows you to take preventive measures, such as improving drainage or selecting pest-resistant plants.
  • Environmental Impact: Understanding your soil type can also help you make more environmentally friendly gardening choices. For example, planting native plants that are well-suited to your soil type can reduce the need for chemical fertilizers and pesticides, benefiting the local ecosystem.

Understanding your soil type is one of the keys to successful gardening. It forms the basis for a healthy garden, leading to vibrant plants and abundant harvests. Before starting your garden, take the time to discover your soil type by following the steps above.

Happy growing!

Level Up Your Dishes: Year-Round Herb and Flower Bombs (Fun & Easy!)

Level Up Your Dishes: Year-Round Herb and Flower Bombs (Fun & Easy!)

My fiance @lajatattoo and I hit upon this awesome idea – the Herb and Flower Bomb! We thought, why not find a savvy, creative way to enjoy fresh herbs and blooms even in the off-season?

You know how it is, right? Herbs and edible flowers are seasonal beauties, they bloom only for a while each year. But even though they are seasonal, they’re a sight in our gardens! And when plucked fresh and used in our kitchens, their flavors are simply unbeatable.

Nature is amazing because these herbs and edible flowers create a symphony of colors and fragrances that are not just a feast for the eyes, but also pack a punch when it comes to health benefits and culinary uses. If you’re a new green thumb or a seasoned one wanting to explore new avenues, the world of herbs and edible flowers is a treasure chest waiting to be opened!

Here’s the step-by-step procedure:

Now picture this. Summer’s drawn to a close, and your herb garden slowly starts to disappear from your produce collection. Of course, you can always buy them, but they never taste quite the same, do they?

So, how about we help you preserve that homegrown goodness? All you need is a silicon ice cube tray, some good quality extra virgin olive oil, and your favorite herbs and flowers. The best part? You can use any herbs and any oil you fancy!

  1. Start by carefully snipping your chosen herbs and flowers with a sharp pair of scissors.
  2. Next, you’ll need to chop them into small bits using a sharp knife. We love to add a twist with some garlic from the last season and nasturtium for a pop of color!
  3. Mix your herbs and olive oil in a bowl and let it infuse for a few hours.
  4. Next, pack everything into your ice cube mould, ensuring that all the herbs and flowers are completely covered in oil.
  5. Freeze until solid. These cubes can last for months in your freezer! You can add them directly from the freezer to your cooking or store them in a plastic bag or container.

These bombs are also great for last minute cooking. If you’re in a rush and you need to cook, it’s easier when you have them in freezer. It’ll be easy to cook stir-fry, bread and butter, pasta, or any quick meal. Just grab one cube and your dish will be extra flavorful.

For those just starting their gardening journey, herbs and edible flowers are perfect. They’re fairly easy to grow, demand minimal space and care. Even if you live in the city, a small pot on a windowsill can bring you an abundant harvest. Plus, they’re versatile and adapt to various climates and conditions, making them a gardener’s best friend!

So, are you ready to try out the Herb and Flower Bomb? We can’t wait to see your cooking creations with these flavor-packed cubes.

From Trash To Treasure: Simple Steps of DIY Soy Wax Food Wraps

From Trash To Treasure: Simple Steps of DIY Soy Wax Food Wraps

Do you have some old clothes lying around that you need help with? Why not turn them into something practical and eco-friendly?

As someone who loves cooking and trying out new recipes, I’m aware that the number of plastic wraps people use to store and preserve food is staggering. I’d always been uncomfortable with the amount of plastic waste people’s kitchens were generating.

So I created this DIY project. I’ll show you how to make soy wax food wraps using used clothing and fabric scraps. Not only is this a fun and creative way to spend an afternoon with your loved ones, but it also helps to decrease waste and produce a long-lasting alternative to plastic wrap. This is so simple to prepare that I even made some for my family and friends.

I still remember being amazed the first time I used my new food wraps to cover a bowl of leftover salad. The salad remained fresh, and the wraps added a bit of rustic beauty to my refrigerator.

The process of making these wraps is as easy as pie. All you need is some cloth, soy wax, and a willing heart. It’s not just about being eco-friendly. It’s about being economical too. Instead of buying rolls and rolls of plastic wrap, why not use what you already have at home? This project is a fantastic way to breathe a second life into those clothes that have been neglected for far too long! Now, isn’t that the perfect fusion of nostalgia and sustainability?

Let’s get started!

Materials Needed:

-Old clothing or 100% cotton fabric

-Soy wax pellets (or bees wax/vegetable wax)

-Baking paper sheet

-Scissors

-Brushes

-Laundry pegs

The Process: Turning Old to Gold

  1. Prep the Fabric: Begin by washing, drying, and ironing your fabric. Then cut it into your desired sizes using scissors.
  2. Melt the wax: Use a double boiler to melt your wax on low heat until the solids are completely dissolved
  3. Prepare the Baking Sheet: Line your baking sheet with parchment paper. This will protect the baking sheet and make cleanup easier.
  4. Coat the fabric: Place a piece of cut fabric on the parchment paper and evenly coat your melted soy wax pellets over the fabric.
  5. Iron it: Set your iron to the lowest temperature and iron your fabric covered by parchment paper for about 30 seconds.
  6. Remove and Dry: Carefully remove the baking sheet from the top. Lift the fabric by two corners and wave it gently in the air for a few seconds to help it cool and harden. The wax will set quickly.
  7. Repeat: If the wrap seems too thin or not fully saturated, you can repeat the process by adding more melted wax.
  8. Cool and Store: Allow the wraps to cool completely before using them. Store them flat, folded, or rolled in a drawer or a basket for easy access.

How to Clean Your DIY Soy Food Wraps:

Cleaning your DIY soy food wraps is similar to caring for store-bought beeswax wraps, but there are some significant differences due to the wax type.

Cool water only: Soy wax melts dissolve more easily than beeswax, so use cool water instead of warm or hot, and add a moderate, environmentally friendly dish soap.

Wipe or rinse: For minor spills, simply clean the wrap with a moist cloth and cool, soapy water. Rinse well with cool water. For larger messes, carefully rinse the wrap under the faucet.

Stubborn residue: f the residue lingers, use a soft sponge or dishcloth to gently clean it with cool, soapy water. Avoid using abrasive scrubbers, which could damage the cloth.

Air dry: Place the wrap flat on a drying rack or hang it to dry completely. Do not use a dryer or microwave since they will melt the wax.

    Additional Tips:

    After you use your DIY soy food wraps for a long time, you may notice some tears or damage. Don’t worry because there is a solution to that.

    Small Tears

    Try re-sealing: Melted soy wax flakes can be used to re-seal minor tears on the edges. Melt the wax flakes with a double boiler, then carefully dip a brush or toothpick in the wax and dab it along the tear edges. Gently press the fabrics together to seal. Allow it to cool and firm entirely before use.

    Reinforce with fabric: If there are little tears in the middle of the wrap, consider using a fabric patch. Cut a tiny piece of the same fabric as the wrap and lay it over the tear. To adhere the patch from the back, use a fabric-safe heat transfer glue. You may need to re-wax the area around the patch for improved sealing.

    Large Tears or Holes

    Repurpose: If the damage is extensive, consider cutting the wrap into smaller pieces. You can cut it into various sizes to wrap smaller objects such as cheese, fruits, and snacks.

    Start anew: If the damage is severe, you may need to reconstruct the wrap. This entails re-waxing a new piece of fabric with soy wax flakes using your original technique.

    Benefits of Soy Wax Food Wraps:

    Soy wax food wraps provide several advantages, making them a popular choice among environmentally aware consumers (like us!). They are environmentally friendly, helping to reduce plastic waste and battle pollution. In addition, they are environmentally friendly because they may be produced from old clothing and fabric scraps, reusing resources that would otherwise be thrown. Soy wax wraps are also less expensive than pre-made plastic wrap over time. They are adjustable, allowing you to make wraps in a variety of forms, sizes, and patterns to meet your specific needs. Also, they are a healthier option because they are natural, non-toxic, and suitable for food packaging.

    When you’re searching for a unique approach to cut waste and create something helpful, consider making your own soy wax food wraps. It’s a simple and satisfying DIY project that’s both environmentally friendly and cost-effective!

    How to Grow and Care for Mint: Tips and Varieties

    How to Grow and Care for Mint: Tips and Varieties

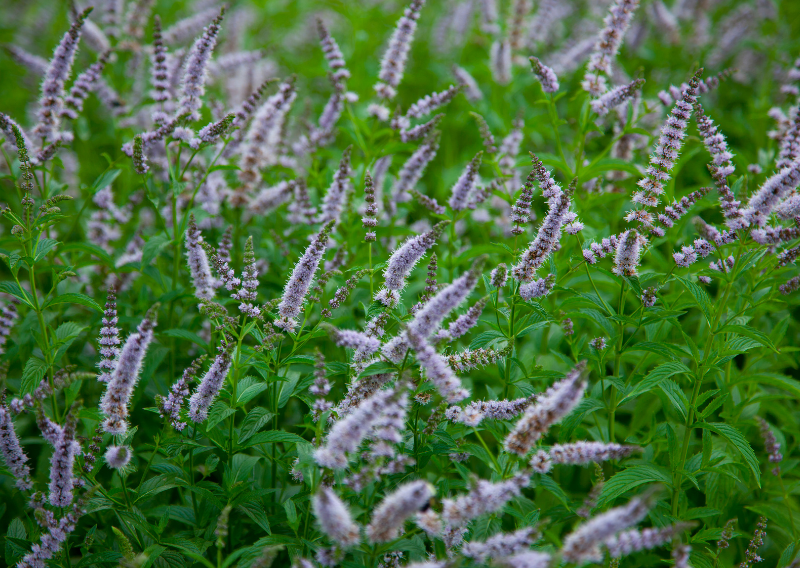
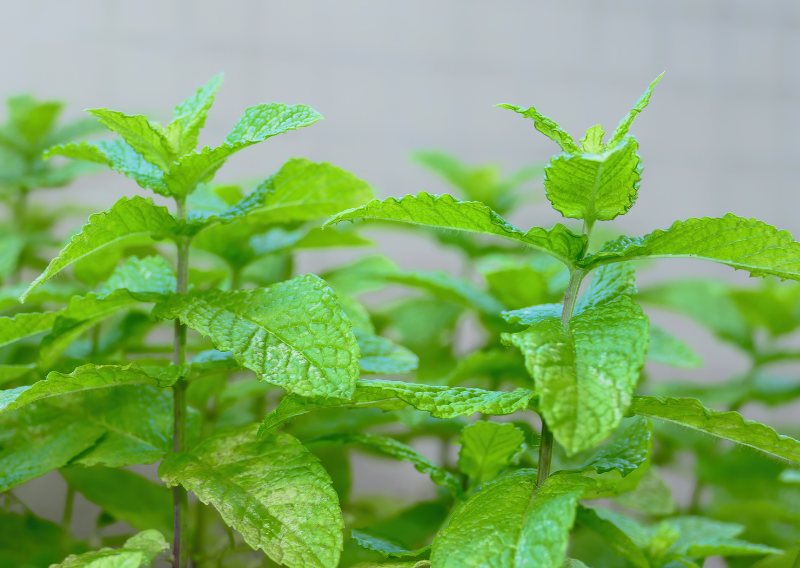
    Did you know that you can grow an unlimited supply of mint? However, you need to follow the right steps to take care of it or it could easily invade and take over your whole growing space! We are growing many varieties like pineapple mint, strawberry mint, chocolate mint, banana, and peppermint, and all of them are our favorite tea flavors. In this blog, I’ll share how we’re taking care of them. Mints are plants that you could potentially buy once and grow forever, as they’re extremely easy to clone and/or overwinter.

    Easy Steps To Take Care of Your Mint

    Taking care of your mint is pretty easy. You can either:

    1. Cut above side shoots regrowth. The plant will redirect the energy to side shots and produce two main stems.

    2. Cut a long stem at the base and remove all the lower leaves. Stick in a cup with water and wait for a few weeks for the roots to develop.

    Just remember to always grow your mint in a container or the roots will take over your whole garden. They are an underground stem that produces roots and new shots so be careful to not plant them in open ground or it will be a real pain to remove them. Even a single small bit of stem could produce a new plant! Also, don’t worry about pruning your mint, it will benefit the plant and encourage new growth. (You can also clone your mint for an unlimited supply.)

    Choosing the Right Variety

    There are several varieties of mint to choose from, including peppermint, spearmint, and chocolate mint. Each has its unique flavor profile, so consider what you’ll use it for. Peppermint is great for teas, spearmint for cooking, and chocolate mint for desserts.

      Why Mint?

      Mint is an amazing and versatile plant. It is known for its refreshing taste and medicinal properties. Here’s why you should consider adding this amazing plant to your garden:

      • Culinary Delight: Mint leaves can elevate your culinary creations, from salads and sauces to beverages and desserts. Imagine a mojito on a summer day or a mint-infused salad dressing to add a burst of flavor.
      • Health Benefits: Mint is renowned for its digestive benefits. A cup of mint tea can help soothe an upset stomach and improve digestion. It’s also packed with antioxidants, which help protect your body from free radicals.
      • Aromatherapy: The refreshing scent of mint is known to reduce stress and improve mental clarity. Simply brushing against the plant can release its refreshing aroma, providing a natural boost to your day.
      • Natural Pest Repellent: Mint is a natural deterrent for pests like ants, mosquitoes, and aphids. Planting mint around your garden can help protect your other plants without the need for harmful chemicals.

      Mint is a beautiful addition to any garden. Its easy-growing nature, coupled with its uses and advantages, makes it a favorite among gardeners. Mint is the plant for you if you want to add flavor to your dishes, improve your health, or simply enjoy its pleasant aroma. At the end of the growing season, simply cut the plant at the base and it will regrow the next year!

      So why not try it? Plant some mint today to experience the enchantment of this multipurpose herb in your yard.

      Happy growing!

      Make Your Own Homemade Calendula Salve: Easy To Follow Steps!

      Make Your Own Homemade Calendula Salve: Easy To Follow Steps!

      We love calendula flowers, and we grow them in our garden not only because they’re an incredible companion plant but also because they’re full of medicinal properties. I’m impressed by its benefits, and I was so happy when I found the perfect way to store and use them from past seasons.

      You’d be amazed to know that calendula, also known as pot marigold, is more than just a pretty face in the garden. These beautiful flowers pack a major punch when it comes to health and wellness. But for today, let’s focus on how calendula will help your skin stay hydrated and remove dead skin cells.

      Health Benefits of Calendula Skin Salve:

      • Skin Saver: Calendula is like a superhero for the skin. It’s well-known for its soothing and healing prowess. The anti-inflammatory properties make it a handy remedy for diverse skin issues like cuts, scrapes, eczema, and even acne.
      • Healing Herb: People have been using calendula for centuries in traditional medicine. It’s a natural healer that promotes the regeneration of skin cells, making it ideal for treating wounds, burns, varicose veins, and more.
      • Immune Booster: Calendula, rich in antioxidants, strengthens the immune system. It’s a useful ally during the cold and flu season.
      • Digestive Aid: Calendula has a long-standing reputation as a digestive tonic. It can help soothe upset stomachs, reduce inflammation in the digestive tract, and promote healthy digestion.
      • Anti-Cancer Potential: Some studies suggest that calendula might have anti-cancer properties due to its ability to curtail the growth of specific cancer cells.

      How To Do Your Own Calendula Skin Salve (My Personal Recipe):

      • I infuse my favorite oil with calendula for one month (I tend to use cold-pressed Moroccan argan oil).
      • I add local Beeswax. I usually extract and filter it, but you can also buy it premade, organic.
      • In the top part of a double boiler, I add 1 cup of my calendula-infused oil and roughly 200g of beeswax. You can also add any essential oil, but I love keeping it as natural as possible. I fill the bottom section of the double boiler with water to melt the mixture without burning it.
      • While it’s still hot, I carefully pour the mix into containers and let it cool down until completely cold. Then, just apply a thin layer to your skin and enjoy the benefits of this incredible skin salve.

      The magic of nature is really amazing, and calendula is one of the living proofs of it. Give it a try, and let me know how you find it. Let’s chase health and wellness together, one flower at a time.

      Happy growing!

      0
        0
        Your Cart
        Your cart is emptyReturn to Shop