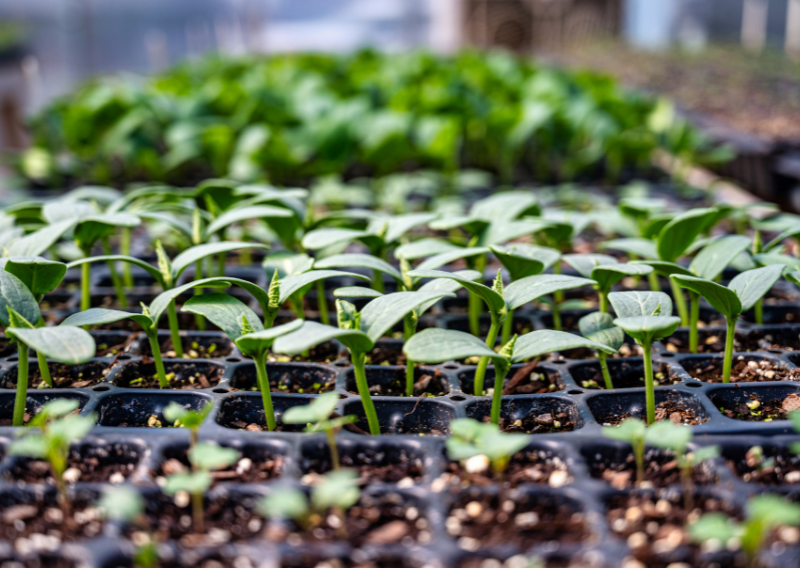
Grow Fresh Ginger at Home: Easy Steps for Beginners

Grow Fresh Ginger at Home: Easy Steps for Beginners

As a person who practices a plant-based diet, I love to experiment and cook different kinds of cuisine. Ginger has always been a favorite ingredient and a staple in our kitchen. Today, I’ll share some tips on how you can easily grow ginger and why you must have it in your garden.

Regardless of whether you’re a gardener or someone who loves to cook, incorporating ginger into your recipe and garden is a decision you won’t regret. It’s a fragrant, spicy root that not only adds zest to your culinary creations but also boasts a lot of health benefits. Let’s go into it and discover why ginger deserves a spot in your garden.

Why You Should Consider Growing Ginger In Your Garden

Health Benefits: Ginger is known for its medicinal properties. It’s a natural remedy for nausea, aids in digestion, making it a go-to remedy for stomach troubles, and has pain and anti-inflammatory properties that can help with various conditions such as headaches and arthritis.

Culinary Delight: Fresh ginger adds a unique taste and aroma to dishes because of its warm and spicy flavor, making it a staple in cuisines around the world. From curries to teas, ginger is a versatile ingredient that can elevate any recipe. You can even add 

Easy to Grow: Ginger is surprisingly a simple and low-maintenance plant that thrives in warm, humid conditions. It can be grown from rhizomes, which are readily available at garden centers, or can be sourced from mature ginger roots. With the right care, you can easily grow ginger in your garden or even in containers indoors.

Sustainable Living: By growing your own ginger, you reduce the need for store-bought produce, which often comes with a high carbon footprint due to transportation and packaging. Homegrown ginger is also free from pesticides and other chemicals, promoting a healthier lifestyle for you, your family, and the environment.

Aesthetic Appeal: Ginger plants have lush, green foliage and delicate flowers that add beauty to your garden. They can be grown as ornamental plants or as a functional addition to your herb garden.

Materials and Easy Steps for Growing Your Own Ginger

  • To plant your ginger, you’d need well-draining, loose soil, rich in Organic matter. A mix of garden soil and well-rotted compost (50/50) is best. Use soil mixed with perlite – this will keep the soil light, provide plant roots with air, and promote drainage.
  • Add a homemade compost
  • Use a wide pot rather than deep as the Rhizome grows horizontally and it needs space for the side shots. Simply dig a hole 1-1.5 inches and place your ginger flat.
  • Maintain 20cm (8 inch) space between each piece of ginger.
  • Cover it with soil and water until fully hydrated. Keep it covered to keep high humidity in a sunny spot. Ideally, keep a temperature between 22-25C (71 to 77 F).

Ginger will take 8 months until it’s fully mature. But the process is easy and simple. So whether you’re looking to improve your health, expand your recipes, or simply add a touch of beauty to your garden, ginger is sure to delight your senses and enrich your gardening experience. I do hope that you plant some ginger today and discover the flavor and benefits this magical root has to offer.

Happy growing!

Keep Your Plants Safe: How To Use Ladybugs As A Pest Control

Keep Your Plants Safe: How To Use Ladybugs As A Pest Control

Have you seen tiny, polka-dotted insects roaming around your garden? Those insects can save your garden from destructive pests (like aphids and blackflies), and they are called ladybugs.

Aphids and black flies are recurring issues every year, and they could cause serious damage to your garden if not controlled. So if you are struggling with pest control management, this is a perfect tip to keep the situation manageable without using chemicals!

Why Pest Control Matters

Pests can wreak havoc on your garden, destroying plants and fruits, and disrupting the ecosystem you’ve worked so hard to cultivate. Traditional methods of pest control often involve harsh chemicals that can harm beneficial insects and wildlife and even pose risks to human health. However, there is a natural, safe, and effective solution: ladybugs.

What Are The Benefits Of Using Ladybugs As A Pest Control

Ladybugs develop into 4 different stages: eggs, larvae, pupa, and ladybugs. Eggs are usually yellow, small, and oval and you can find them on the underside of plants’ leaves. Larvae can eat up to 350-400 aphids in their life spawn. The pupa remains still, attached to a leaf, throughout this stage. As adults, most ladybugs live 1 year and can eat 5,000 aphids in their lifetime.

Environmental Friendly- Unlike chemical pesticides, which can linger in the environment and harm non-target species, ladybugs pose no threat to humans, pets, or beneficial insects.

Embracing Nature’s Balance- By using ladybugs as a natural pest control method, you’re not only protecting your garden but also promoting a healthy and balanced ecosystem. Ladybugs play a crucial role in maintaining biodiversity

Quick Tip

You can purchase a larvae box online or in the local store. They come in small boxes and release bags that could be hung around your garden. It takes between 7-10 days for them to emerge and start eating pests. Make sure to source native ladybugs to avoid introducing species that will unbalance the natural ecosystem.

So if you’re tired of battling garden pests with harmful chemicals, it’s time to try the power of ladybugs in your garden. These tiny predators offer a safe, sustainable, and environmentally friendly solution to pest control, allowing you to protect your plants while promoting a thriving ecosystem. Let’s grow healthy plants together!

Happy growing!

Bigger, Better Tomatoes: The Easy Guide to Pruning Your Plants

Bigger, Better Tomatoes: The Easy Guide to Pruning Your Plants

Who else here loves tomatoes? There’s something magical about growing your own tomatoes. But what if I told you that you could unlock even more flavor and yield from your tomato plants?

It’s called tomato pruning – a simple and great technique that every gardener should learn.

I’m here to share a quick and easy tip to prune your tomatoes to keep them under control and also, clone them to have new plants!

2 Varieties of Tomatoes

Tomatoes are classified into determinate and indeterminate varieties that you can easily check on your seed packet.

Determinate means that they grow to a fixed mature size and they ripe all the fruit in a short period of time so they won’t need pruning.

Indeterminate means that they are more like vine tomatoes and continue to extend in length throughout the season until the frost kills the plant. I usually prune indeterminate varieties but not completely as I like to leave one or two suckers to grow and support to produce more fruit.

Why do we need to learn tomato pruning? Here are a few reasons why:

1. Maximize Yield: By removing excess foliage and suckers, you direct the plant’s energy towards fruit production. This means more tomatoes for you to enjoy throughout the season. A bountiful harvest indeed!

2. Improved Air Circulation: Dense foliage can create a haven for pests and diseases. Pruning opens up the plant, allowing air to circulate freely and reducing the risk of common tomato ailments such as blight and mold. Say goodbye to those pesky garden pests!

3. Enhanced Fruit Quality: Ever bitten into a tomato only to find it watery and lacking in flavor? Pruning helps concentrate the plant’s nutrients, resulting in juicier, more flavorful tomatoes. Your taste buds will thank you!

Learn The Basics Of How To Prune Tomatoes Properly

  1. Identify Suckers: Suckers are the small shoots that develop in the crotch between the main stem and branches. While they may seem harmless, they divert energy away from fruit production. You can simply cut them off with a clean pair of scissors or garden snips. (However, don’t throw them away but place them in a cup with water, replace the water every 2-3 days, and in about 7 days you’ll have a new tomato plant that will be genetically identical to the mother plant!)


  2. Remove Excess Foliage: Take a close look at your tomato plant and identify any overcrowded areas. Trim away unnecessary leaves to allow sunlight to reach the developing fruit. Remember, a little pruning goes a long way!


  3. Stake and Support: Proper support is essential for healthy tomato plants. Use stakes or cages to keep your plants upright and prevent sprawling. This not only improves air circulation but also makes pruning and harvesting a breeze.


  4. Timing is Key: It’s best to prune your tomatoes early in the morning or late in the afternoon when the sun isn’t too harsh. Be gentle and avoid pruning during extreme heat or humidity to minimize stress on the plants.

As you try the process of tomato pruning, don’t be pressured, and remember that practice makes perfect. Don’t be afraid to experiment and adapt your techniques to suit your garden’s unique needs. Not only will you enjoy a bountiful harvest of delicious tomatoes, but you’ll also cultivate healthier, happier plants. With time and patience, you’ll become great in no time and your garden will surely thrive.

Happy gardening!

Quick Tip And Easy Steps Of How To Prick Out Seedlings

Quick Tip And Easy Steps Of How To Prick Out Seedlings

How many times did you plant more than one seed In a cell or pot and you didn’t want to nip off the weaker one to give space to the stronger one? It might be just me but I feel really bad every time I need to kill a plant even if really small!

I’ve been using this quick pricking tip to separate plants since I was taught by my grandpa. But first, what exactly does “pricking out” mean? Pricking out is the process of transplanting seedlings from a seed tray or germination container into individual pots or trays. This technique allows seedlings to develop strong root systems and prevents them from competing with each other for nutrients and space.

You will have a nice backup in case things go wrong and you can still gift it to neighbors, friends, and family in case you don’t have enough space.

Reasons You Need To Learn Pricking Out The Seedlings

  • Avoid overcrowding- When seedlings are left in overcrowded conditions, their roots can become tangled and restricted. Transplanting them into individual pots allows their roots to spread out freely, encouraging healthy root development.
  • Improve air circulation- Overcrowded seedlings are more prone to fungal diseases, such as damping-off, which can quickly wipe out an entire tray of seedlings. By spacing out your seedlings, you reduce the risk of disease and ensure that each plant has access to plenty of fresh air.
  • Allows you to select the strongest and healthiest plants- When you transplant seedlings, you can choose to keep only the most vigorous specimens, culling any weak or diseased seedlings. This selective process can help you grow healthier plants and improve the overall productivity of your garden

How To Separate Plants Growing In The Same Pot

  1. Squeeze around the pot and gently slide off the root mass
  2. Submerge the roots in water and gently pull them apart
  3. Get a new pot (recycled is better) of at least double the size of the old pot you used
  4. Add 50% potting soil, 40% organic compost, 10% worm casting, and a few handfuls of perlite (you can adjust the ratio based on your plant)
  5. Dig a 1-1.5 inch deep hole
  6. Optional: sprinkle mycorrhizae (it improves absorption of nutrients and water)
  7. Place your plant in the hole and gently press around it
  8. Label with a waterproof marker and water your plant

Follow this method, and you’ll have all your plants without any issues. And if you master this technique, I’m sure that you will soon have a thriving garden!

The most rewarding aspect of pricking out seedlings is the sense of pride and accomplishment that comes with watching your tiny seedlings grow into flourishing plants. There’s something truly magical about nurturing life from its earliest stages, knowing that your efforts will soon bear fruit – quite literally!

I swear that there’s no greater joy than watching your garden come to life, one seedling at a time. Just add a little patience, practice, and a whole lot of love.

Happy growing!

How To Make A Raised Bed Hugelkultur: Neighbourhood DIY Project

How To Make A Raised Bed Hugelkultur: Neighbourhood DIY Project

Previously, I had a fantastic adventure with my neighbor – I helped him create a raised garden beds for his yard. It was such an enriching and engaging experience that I couldn’t help but share it with you. So, I quickly put together a video detailing the steps we took on how to make a raised bed hugelkultur (which can be found here on my Instagram). If you’ve ever dreamt of starting your own garden with easily available materials, then this is your chance!

In this project, I chose to create raised beds for my front yard, transforming it into a beautiful community garden. A place where all my neighbors can revel in the joy of gardening.

The technique we used is a combination of no dig and another technique known as Hugelkultur. Originating from German words meaning “mound culture,” involves creating raised beds filled with decaying wood and organic matter.

If you’re wondering what it is, it’s simply creating raised garden beds filled with materials locally available. It’s a centuries-old technique that’s very popular among modern gardeners for its efficiency and sustainability. This provides a nutrient-rich, organic environment for the plants to thrive. It’s like gifting your plants with bioavailable nutrients that they can use whenever they need them. Your raised bed will be packed with organic materials and air pockets for the roots to breathe. And the benefits don’t just end here!

During the initial years, the composting process slightly warms the soil. This means you get a slightly longer growing season for your plants. How cool is that?

Also, when you bury wood, it aids in carbon sequestration. This process helps to hold nutrients and carbon into the earth, making them readily available for your plants.

For our soil mix, we used a generic brand of organic soil, but any other soil could work just fine. But if you could use organic soil, that would be great.

To further enhance our soil, we added perlite to improve water retention and aeration.

Things Needed and Simple Steps:

  • 2x Pallet Collar (they are stackable)
  • Enough cardboard to cover the area where your raised bed goes with some excess around the raised bed
  • Cardboard will provide light exclusion for the weeds to grow and that’s why you want some excess even around your raised bed
  • Put some wooden branches at the bottom
  • Add twigs, ideally apple tree but almost any twigs work 
  • Add spoiled hail, grass trimmings, food scraps 
  • Add a top layer of  soil (any organic soil works fine)
  • Add perlite for aeration (optional)
  • Horse manure if it’s available in your area
  • Worm casting (optional)
  • Comfrey as we have it growing around the garden, nettles could also work
  • Cover the cardboard around your raised bed with wood chips as they help nurture the life in your soil
  • You can walk over it to flatten out the materials and it will be ready to plant up immediately!

Benefits of a Raised Bed Hugelkultur:

1. Improved soil fertility:
The decaying wood adds nutrients to the soil, promoting healthy plant growth.

2. Water retention:
Hugelkultur beds retain moisture, reducing the need for frequent watering.

3. Minimal maintenance:
Once established, hugelkultur beds require less maintenance than traditional gardens.

4. Sustainable gardening:
Hugelkultur utilizes organic materials that would otherwise go to waste, making it an eco-friendly gardening method.

Creating your own raised bed garden is super easy, and it’s a fun and rewarding way to start growing your own food. I hope you’re inspired to start your own gardening journey and I can’t wait to see what plants and veggies you’ll grow in your new raised beds.

Happy growing!

0
    0
    Your Cart
    Your cart is emptyReturn to Shop