Tips and Tricks To Grow Your Own Food: An Easy Way For A Homegrown Diet

Tips and Tricks To Grow Your Own Food: An Easy Way For A Homegrown Diet

Imagine preparing a meal with ingredients that you have grown from seed to harvest, including crisp lettuce, juicy tomatoes, and fragrant herbs, all of which are grown directly outside your door. Farmers and individuals with large backyards are not the only ones who envision a homegrown diet, in which fresh produce is readily accessible. Anyone can enjoy the flavor and advantages of homegrown food with a minimal amount of time, effort, and even a small plot of soil or a few containers on a balcony. This method of eating enhances the flavor of your meals, provides a substantial nutritional boost, and enhances the personal and thrilling experience of mealtime.

But a homegrown diet isn’t just about food. It helps you get back in touch with nature, eat better, and live in a way that is better for you, the earth, and your pocket. Not only does growing some of your own food guarantee that it is chemical-free and fresh, but it also saves you money on food, lowers your carbon footprint, and gives you a pastime to enjoy. A homegrown diet can provide all that and more whether your interests are in enhancing your diet, helping to create a better planet, or just in discovering the pleasures of gardening. In this article, we’ll dive into the many ways a homegrown diet can enrich your life and why this sustainable lifestyle is worth the effort.

A Fresh Approach to Nutrition

One of the biggest draws of a homegrown diet is the nutritional boost it brings to your meals. Produce bought at a grocery store often travels long distances, sometimes weeks from farm to shelf. This journey inevitably reduces the nutritional value of the food, especially delicate vitamins like C and B-complex, which degrade over time. With a homegrown diet, you harvest and eat your food at its peak ripeness, ensuring it’s packed with all the nutrients intended by nature.

Why It Matters:

  • Higher Nutrient Levels: Freshly picked veggies and fruits are richer in vitamins, minerals, and antioxidants compared to store-bought produce.
  • Improved Flavor and Texture: Homegrown foods are picked when they’re naturally ripe, enhancing both their taste and texture. If you’ve ever tasted a tomato picked straight from the vine, you know it’s a world away from its grocery-store counterparts.
  • Freedom from Chemicals: When you grow your own food, you control what goes into it. You can avoid pesticides, synthetic fertilizers, and wax coatings, which are often used to preserve supermarket produce for transport and shelf life.

Environmental Impact: A Green Choice

Eating food that you grow yourself is not only better for you, but it’s also better for the environment. Modern farming uses a lot of energy and resources, from the fuel used for long-distance shipping to the chemicals and packaging needed to get food to people who want it to look fresh. By growing your own food, you can skip a lot of this system that uses a lot of resources. This lowers your carbon footprint and makes the world healthier.

Here’s How It Helps:

  • Reduced Food Miles: The distance your food travels from garden to plate is practically zero, which translates to a lower carbon footprint.
  • Less Plastic Waste: Homegrown produce eliminates the need for single-use plastics like bags, wraps, and containers commonly found in grocery stores.
  • Preserving Soil Health: Small-scale gardening allows for sustainable practices that enrich rather than deplete the soil. Techniques like composting, crop rotation, and using natural fertilizers keep soil ecosystems healthy, supporting biodiversity.

Financial Savings with a Homegrown Diet

While the initial costs of starting a garden can include seeds, soil, and perhaps a few tools, the long-term financial savings are impressive. Herbs alone can be a budget-buster at the grocery store, yet they’re some of the easiest and fastest crops to grow at home. As your homegrown diet expands, you’ll find yourself buying less and less produce, saving money on every trip to the store.

Quick Financial Wins:

  • Year-Round Herbs: Growing kitchen staples like basil, mint, and parsley means you’ll always have fresh flavors on hand without paying premium prices.
  • Seasonal Vegetables: Lettuce, spinach, tomatoes, and peppers are cost-effective to grow and yield high harvests, cutting down on frequent produce purchases.
  • Bulk Savings: Over time, the investment you make in growing your own food is repaid many times over, especially as you learn to preserve foods for later use through methods like freezing, drying, or canning.

Health Benefits Beyond the Plate

Shifting to a homemade diet isn’t just about the food; it’s also very good for your mental and physical health. Gardening has been shown to boost happiness, lower stress, and help people concentrate better. The physical action of taking care of plants can help you stay fit, and growing your own food can give you a sense of purpose and community.

Health Gains:

  • Physical Activity: Taking care of a garden is a moderate form of exercise that can help your flexibility, strength, and stamina. Many different muscles are used when gardening, from bending to pick weeds to moving watering cans.
  • Mental Wellness: Gardening is known to reduce anxiety and improve mood. It’s grounding, rewarding, and a natural way to reduce stress. Studies have even shown that spending time in green spaces can improve focus and reduce symptoms of depression.
  • Better Eating Habits: A diet based on foods grown in the area helps people eat better. When you have a lot of fresh, tasty vegetables on hand, you’re more likely to add them to your meals, which leads to a healthier diet generally.

    Deepening Your Connection to Food

    Connecting deeply with the food you eat is one of the less obvious but very satisfying benefits of a homegrown diet. From planting seeds to harvesting food, you need to be patient, aware, and careful. By making you feel proud of what you eat and grateful for the work that went into making it, this process changes the way you think about meals.

    Personal Benefits:

    • Mindful Eating: When you’ve grown the food yourself, every bite feels more meaningful, encouraging slower, more appreciative meals.
    • Waste Reduction: When you know how much work it takes to grow your own food naturally, you are less likely to throw away food. Instead of letting food go bad, you’ll be more likely to store it, share it, or find clever ways to use it up.
    • Learning and Growth: You learn something new about yourself, your crops, and even the weather every time you plant. This circle of learning makes the homegrown experience better and more interesting every year.

    The Community Connection: A New Kind of Sharing

    It’s easier to meet new people when you grow your own food. A homegrown diet builds community by letting people share extra food with neighbors and friends and trade gardening tips with other farmers. A lot of people are motivated to join community gardens, seed swaps, or neighborhood garden groups. This creates a network of people who are all working toward living more sustainably.

    Ways to Build Connections:

    • Swapping and Sharing: Many gardeners love to share their bounty, exchanging veggies, herbs, and fruits with neighbors. This sharing culture fosters stronger community bonds.
    • Garden Groups and Clubs: Many cities and towns have groups or clubs where gardeners share advice, swap seeds, and learn from each other’s experiences.
    • Supporting Local Initiatives: Community gardens and urban farms offer people a way to access fresh food and connect with others who share a passion for sustainable, local food sources.

    Homegrown Diet as a Lifestyle

    Going on a homegrown diet isn’t just a choice of food; it’s a change in how you live. It tells us to take things more slowly, enjoy the natural curves of growth, and plan our days more carefully. It gives you power over your food sources and helps you become self-sufficient. Plus, this diet supports eating in line with the seasons, which lets you enjoy fruits and vegetables at their best and helps you get better at cooking and be more creative.

    As you get used to this way of life, you’ll probably start trying out new recipes, ways to keep food fresh like cooking and fermenting, and maybe even plant-based foods you hadn’t thought of before. The homemade diet can make people want to live a simpler, more mindful life in general.

    You don’t have to grow all of your own food or become completely self-sufficient to adopt a homemade diet. What matters is that you make a change, even if it’s just a few pots of herbs to begin with. Growing your own food is a good idea because it is good for your health, saves money, has a positive effect on the environment, and gives you a feeling of pride. You’ll eat healthier, fresher food, have less of an effect on the environment, and maybe even get other people to join you.

    That being said, a homegrown diet is a satisfying, long-lasting, and tasty way to improve your diet, save money, or just try something new. Plant a seed as your first action, and see how it changes the way you eat.

    How to Create a Productive Garden in Just 15 Minutes a Day

    How to Create a Productive Garden in Just 15 Minutes a Day

    Gardening can feel like a hobby that takes a lot of time and work and needs hours of commitment. But having a successful garden doesn’t mean you have to spend all your free time taking care of plants. What if you could grow a garden that produced food in just 15 minutes a day? It sounds too good to be true, but if you do it the right way, you can grow a beautiful garden that you enjoy without making it your full-time job. You can grow a garden that gives you fresh food, pretty flowers, and a sense of success, even if you have a very busy schedule, as long as you stick to the plan and break the work up into manageable chunks.

    Today, I’m going to show you how to make the most of a daily 15-minute routine that will keep your garden healthy, useful, and fun. You can grow flowers, veggies, and herbs with little work and a lot of success, whether you have a small balcony or a backyard. You can make a low-maintenance, high-reward garden that fits into your life by following these steps, one short session at a time. I’ll show you how to set up the garden and do daily maintenance jobs.

    Why 15 Minutes a Day Works

    Consistency is the key to making a garden that grows things without being too busy. Slow but steady work does add up over time, just like working out or learning. You can keep up with your garden without having to stress about working on it for hours at a time if you set aside 15 minutes a day. Focusing on short periods of time helps you stay on task and lowers the risk of getting tired, which can happen when you have a lot of work to do. The 15-minute method helps you stay on top of things every day, so you don’t have to wait for the weekend to take care of your garden. This keeps problems from getting worse and turning into bigger, more time-consuming jobs.

    One more reason why 15 minutes works is that it makes people more productive. You’ll focus on the most important jobs, like watering, weeding, or harvesting, because you only have so much time each day. You can then focus on what you need to do to keep your garden healthy without getting too stressed out trying to do everything at once. By gardening for a short time every day, you can turn it into a habit that becomes a normal part of your schedule. This will help you get things done without any stress. Also, making small efforts over time will help your plants grow regularly, which will mean long-term success with less work.

    1. Choose the Right Spot and Containers (Initial 15 Minutes)

    Spending just 15 minutes to find the right location will save you a lot of effort later on.

    • Sunlight: Most productive plants like vegetables and herbs need about 6-8 hours of sunlight daily. Find a spot that gets plenty of sun, even if it’s on a balcony or windowsill.
    • Accessibility: A garden close to your kitchen or backdoor is easier to check on and manage quickly.
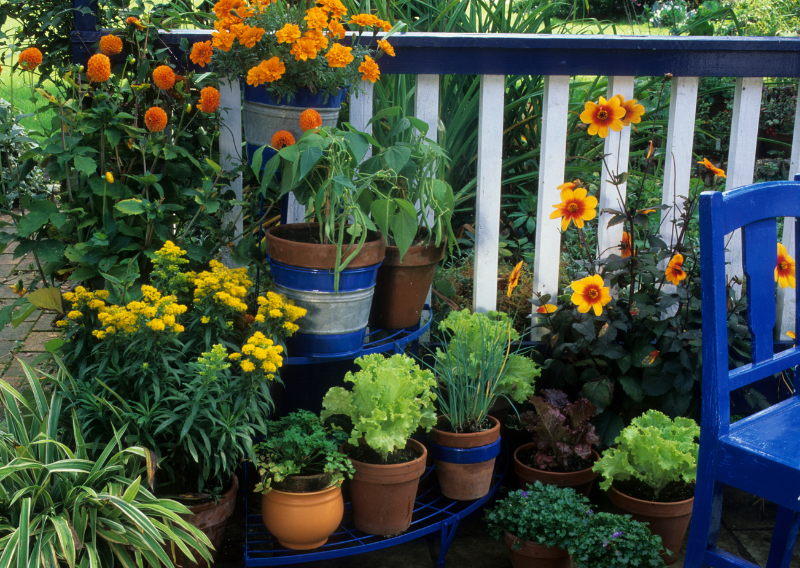
    • Containers or Raised Beds: If space is limited, go for containers — they’re perfect for small spaces and make watering and weeding a breeze.

    If you want to plant in soil, raised beds are a great choice because they let water drain better and make pulling weeds easier. Giving yourself a big boost by setting up the right place in the first 15 minutes of your session.

    2. Plan Your Plants (Initial 15 Minutes)

    Now for the fun part: what do you want to grow? Keep things simple and focus on plants that do well in your area and don’t need much care.

    • Herbs: Basil, mint, parsley, and chives are rockstars in the garden. They’re easy to grow, can be harvested frequently, and are great in the kitchen.
    • Vegetables: Cherry tomatoes, radishes, lettuce, and zucchini are fantastic for small spaces and easy to manage.
    • Companion Planting: This is when you plant crops that benefit each other nearby. For example, basil can help repel pests from tomatoes, and beans fix nitrogen in the soil for other plants to use.

    Plan your plants ahead of time to get better results in the long run!

    3. Set Up a Watering Routine (15 Minutes a Day Task)

    A garden that grows well needs to be watered regularly. This is where those 15 minutes a day really help.

    • Morning Watering: Watering in the morning lets the plants absorb moisture before the heat of the day, minimizing evaporation.
    • Skip Watering Devices: If you’re short on time or sometimes forget to water, a drip irrigation system or self-watering pots are total lifesavers.

    Spending just a few minutes a day watering your plants will keep them moist and lower the risk of watering them too much or too little.

    4. Quick 15-Minute Daily Tasks to Keep Your Garden Productive

    To keep your garden in great shape, do these quick and easy things every day in those 15-minute slots:

    • Weeding: Pick a couple of weeds each day instead of letting them take over. It’s quick, easy, and a great habit to get into.
    • Deadheading and Harvesting: Deadheading (removing dead flowers) encourages new blooms. Meanwhile, harvesting vegetables regularly helps plants produce more.
    • Pest Patrol: Give a quick look-over to spot any pesky bugs or damage. Picking off a few caterpillars or spraying a little organic pest control can save your plants from being devoured.

    By doing these small things every day, you can keep everything under control and stop problems from getting worse over time.

      5. Create a Composting Spot (One-time 15-Minute Task)

      It might sound hard to compost, but it’s really easy, and it gives your garden the nutrients it needs.

      1. Choose a Bin or Pile: You don’t need anything fancy—just a corner of your yard or a small container.
      2. Add Kitchen Scraps and Yard Waste: Toss in food scraps (no meat or dairy) and yard waste like leaves and small branches.
      3. Turn It Occasionally: Every week or so, give it a quick turn to help with decomposition.

      After a few months, you’ll have rich compost that makes an incredible natural fertilizer for your garden. And composting is low-maintenance after setup, only requiring occasional attention.

      6. Mulch for Moisture Control (Quick 15-Minute Setup)

      Mulch is one of the best ways to reduce weeds, keep the soil moist, and give your garden a clean look.

      • What to Use: You can use wood chips, straw, or even shredded leaves as mulch.
      • How to Apply: Spread a 2-3 inch layer around your plants, being careful not to smother the stems.

      Mulching might take one dedicated 15-minute session, but it’ll save you loads of time later by reducing the need for frequent watering and weeding.

      7. Pruning and Trimming (A Quick 15-Minute Weekly Task)

      Pruning helps your plants grow better and look neater. For vegetables, pruning can actually increase your yield by allowing more sunlight to reach the plants.

      • Tomatoes: Remove “suckers”—the small shoots that grow between the main stem and branches. They can hog energy from the main fruit.
      • Herbs: Trim your herbs regularly to encourage bushy growth and prevent them from flowering, which keeps their flavor strong.
      • Fruit Trees and Bushes: Light pruning helps with airflow and sun exposure, reducing the risk of disease.

      Set aside one day a week for a quick prune, and your garden will thank you with bigger and healthier yields.

      8. Record Your Progress (5 Minutes a Day)

      Take a couple of minutes each day to jot down what’s happening in the garden. It’s easy, and you’ll notice patterns over time.

      • Note: What you planted, how much you harvested, any pests you found, and changes in the weather.
      • Photos: Snap a few pictures! It’s fun to look back on your garden’s progress and see how much it’s grown.

      This also helps you track what works and what doesn’t, making it easier to plan next season’s garden.

      9. Rotate Your Crops (Seasonal 15-Minute Planning)

      If you’re serious about productivity, crop rotation is a game-changer. Certain plants use up specific nutrients, while others replenish them. Rotating your crops each season keeps your soil healthier.

      • Example Rotation: After growing leafy greens (which consume a lot of nitrogen), plant something like beans, which add nitrogen back to the soil.
      • Quick Planning: A simple chart or notes will help you keep track. Don’t stress — this isn’t an exact science, and even rough crop rotation helps!

      Every season, spend 15 minutes deciding where to plant each crop to maximize productivity.

      10. Stay Consistent and Have Fun!

      Be consistent if you want your garden to grow well. Those fifteen minutes might not seem like much, but they add up fast. Don’t forget that gardening is fun! Enjoy the process as you mess around and try out new plants.

      You will be amazed at how much you can get done in just 15 minutes a day. Your garden will grow well, and you’ll have fresh herbs and vegetables and a little more peace of mind. Plus, it feels pretty great to know that you grew everything with just a little daily care. Start the 15-minute-a-day garden, even if you’re not very good at gardening. You’ll be amazed at how your space changes!

      Happy gardening!

      How to Build a Natural Stone Garden Path: A Step-by-Step Guide

      How to Build a Natural Stone Garden Path: A Step-by-Step Guide

      No matter how big or small your garden is, a natural stone garden path can be the beautiful center of attention. It can lead people through your plants and make the space feel calm. Any scene looks better with a stone path that blends in with the natural settings. It will always look stylish and classy with its classic style and earthy charm. It also doesn’t need much care and lasts a long time, making it the best choice for both looks and comfort.

      It’s easier than you think to build a natural stone path. With a little help, you can make a path that looks great and will last for a long time. Whether you’ve done a lot of DIY projects before or just want to try something new in your garden, this step-by-step guide has everything you need to know. You’ll learn how to design a path that complements the style of your garden and improves its overall appearance, from selecting the proper stones to laying the perfect base. Now is the moment to make your garden even more lovely and inviting.

      Why Choose a Natural Stone Path?

      Before we go into how to build your way, let us first discuss why natural stone is such an excellent material. To begin, it is extremely durable and weather-resistant. Natural stone does not shatter as quickly as concrete, and it looks fantastic as it ages, frequently becoming more unique with time. Garden grounds look great with stones like flagstone, slate, and limestone because they have a rough, earthy look.

      Besides being beautiful, natural stones are often good for the environment. Many stones come from nearby, which cuts down on pollution from shipping, and they let water flow through, so there aren’t any problems with flooding or erosion. If you care a lot about the sustainability, a stone garden path is a good choice.

      Tools and Materials You’ll Need

      You should get your tools together before you start working. To get started, here is a simple list of what you’ll need:

      • Natural stones (flagstone, slate, or limestone)
      • Measuring tape
      • Shovel
      • Wheelbarrow (for transporting stone or gravel)
      • Garden rake
      • Level
      • Landscape fabric
      • Gravel or sand (for base layer)
      • Sand or stone dust (for jointing)
      • Rubber mallet (to set the stones)
      • Gloves and knee pads (for comfort and protection)

      Now that you have these things, you can start making your garden path!

      Step 1: Plan Your Path

      Planning is the first thing that needs to be done in any landscaping job. Think about how you want the path to flow through the garden and how it is laid out. The best natural stone paths are those that follow the natural shape of the garden or make it easy to get to different areas, like flower beds, seating areas, or a gazebo.

      You should think about whether you want a straight road or one that goes in circles. A path that winds around will look more natural and fit in better with the yard. On the other hand, a path that runs straight might make things look more formal. Mark your way on the ground with a garden hose or string. This lets you see what the path looks like and helps you decide if it fits in the area.

      Step 2: Prepare the Ground

      You need to prepare the ground after making a plan for your route. Place stakes and string along the road to start making it. Then, dig down about 3 to 4 inches all the way along the road. You need to dig a hole that is level so that the stones can sit flat on the ground. Getting rid of any grass, roots, or other debris in the area is important because they can make your road less stable.

      Step 3: Add a Base Layer

      After that, you should add a strong base for your stones. You could use gravel or sand here. Make a bed of sand or rock that is about 2 to 3 inches thick. This will help the stones stay put and drain water. Level the gravel with a rake so that it’s the same all the way along the road.

      You can put landscape cloth on top of the gravel to make it more stable. And weeds won’t be able to grow through your way, which would ruin the clean look of your stones. Before you put down the stones, you should cut the fabric to fit the path’s width and lay it flat.

        Step 4: Lay the Stones

        The fun part now is putting the stones down. Place your stones starting at one end of the road and work your way up. First, lay them down without securing them. This way, you can move them around and see how they fit. There are many shapes and sizes of natural stones, so try to pick pieces that fit together well, leaving some room between them for joints. This is the key to making a pattern that looks good.

        Make sure that each stone sits flat against the base layer as you put it down. To make it level, you might need to move the grit or sand under the stone. You can use a rubber hammer to tap stones into place and make sure they are stable and not broken.

        Step 5: Fill the Joints

        Filling in the gaps is what you do after all the stones are in place. To fill in the spaces between the stones, you can use sand or stone dust. Put the stuff on top of the stones, and then use a broom to push it into the cracks. The stones will stay in place better, and the way will look nicer overall.

        Make sure to tightly pack the joints so they don’t move later. A light spray of water on the road will also help the sand or stone dust settle into the cracks. This will help pack down the material and make it less likely that weeds will grow between the stones.

        Step 6: Final Adjustments

        Check your way one last time after the stones are in place and the gaps are filled. Make sure everything feels level and strong as you walk along the path. Now is the time to move or level any stones that look uneven or loose. You could also fill in the gaps with more sand if they’re too low.

        Some of the stones might not line up exactly with the ground. You can fix this by adding some more gravel or sand under them. A good rule of thumb is that your path should look good and work well. If you need to, take the time to make small changes to your path so it fits perfectly in your garden.

        Step 7: Edging Your Path (Optional)

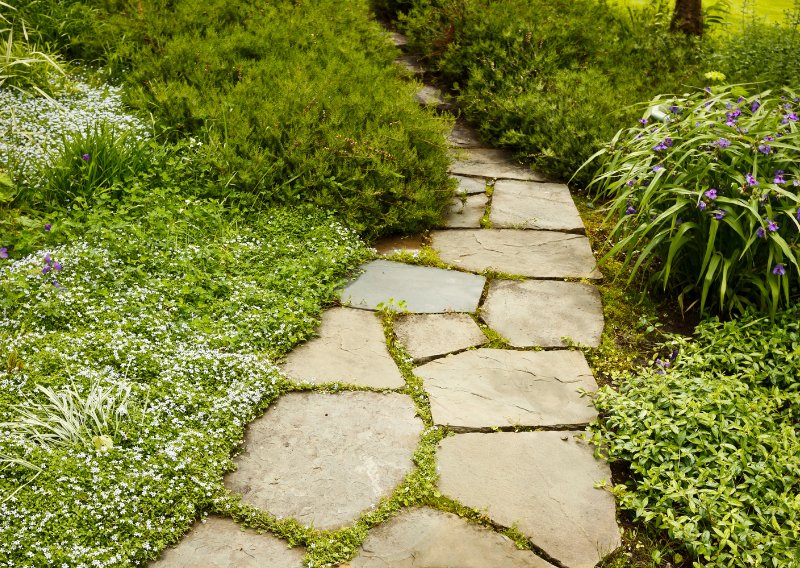
        Even though a natural stone garden path doesn’t always need edging, it can look better and keep the stones from moving over time if you do. Line your way with smaller stones, bricks, or even plants that grow low to the ground, like groundcovers.

        You could frame the path with stone edges for a more finished look. This will make a clear line between your path and the flower beds around it. Putting up stone edges also keeps the sand or gravel from leaking out of the cracks over time.

        Step 8: Maintain Your Path

        When done, it is important to keep up on your path. Even while natural stone paths are low-maintenance, they still require it on occasion. There should be no need to reapply sand or stone dust to the joints after many months. Clear the area of debris and sweep the path on a regular basis to prevent moss or dirt from accumulating between the stones.

        There are some weeds growing. You can pull them out by hand or use an eco-friendly weed killer. By checking on your path often, you can make sure that it stays beautiful and useful for many years to come.

        Additional Ideas for Your Garden Path

        If you want to take your garden path to the next level, here are a few ideas to personalize it:

        • Add Lighting: String lights or solar-powered lanterns along the path can create a magical ambiance, especially in the evenings.
        • Incorporate Plants: Planting creeping thyme, moss, or small flowers in the cracks between stones will add a natural, lush look to the path.
        • Use Multiple Stone Types: Mix and match different stone varieties for a more eclectic and textured look.
        • Create a Zen Garden Path: Add pebbles, bamboo, or minimalist sculptures to create a serene, Japanese-inspired garden path.

        Building a garden path out of natural stone doesn’t have to be hard. If you plan, get ready, and are creative, you can make a pretty path that makes your garden look better. A stone path can add a classic look to your garden, whether you use it to guide people through your flower beds or just because it’s pretty.

        Get ready to build a path in your garden that will look even better. Gather your tools and your favorite natural stones. Happy gardening!

        9 Gardening Myths Debunked: Tips for a Thriving Garden

        9 Gardening Myths Debunked: Tips for a Thriving Garden

        Growing plants is one of the oldest and best hobbies in the world. We can get closer to nature, grow our own food, make beautiful places, and relax after a long day. Watching your plants grow is the best feeling in the world, whether you’re taking care of a small balcony garden in the city or a huge veggie patch in your backyard.

        But like many other hobbies, gardening has a lot of advice out there, and not all of it is right. Some of this advice has been passed down for generations, which has made it into strongly held myths. Some myths are safe, but others can keep your plants from growing as much as they can. It’s important to tell the difference between facts and lies, no matter how much experience you have as a gardener. Let’s look at some popular gardening myths, dispel them, and get to the real story.

        Myth 1: You Should Water Your Plants Every Day

        This may be one of the most popular pieces of gardening advice you’ve heard, but it’s not quite right. A lot of people think that plants will grow better if they get more water. You can see how this idea came about: plants need water to live, so why not give them as much as you can? It turns out that watering every day can hurt plants more than help them.

        The Truth:

        If you water your plants too much, they can get diseased roots and dirt that is too wet, both of which can kill them. Most plants don’t need to be watered every day unless they’re in very hot weather or are very thirsty, like ferns. It’s better to water deeply but less often. This makes the roots grow lower to find water, which makes the plant more resistant to drought in the long run.

        Putting your finger a few inches into the ground is an easy test. It’s time to water if it feels dry. Don’t do it yet if it’s still wet. To keep your garden healthy, you need to know when to water it. With a little practice, you’ll get the hang of it.

        Myth 2: Talking to Plants Helps Them Grow

        This is a fun myth that has been around for a long time. Some farmers even swear by it! You might even be able to play music or talk to your plants to help them grow faster and stronger. What about science? Does it back up this claim?

        The Truth:

        It would be great if plants could reply to positive words, but they can’t. There is some proof, though, that plants can sense vibrations from sound. For instance, some studies have shown that plants that are introduced to music or soundwaves may grow a little faster. Still, it’s more likely that the real benefit comes from the farmer paying more attention to their plants. If you talk, sing, or play music while you work in the garden, you may notice problems like pests, diseases, or dry spots earlier and be able to fix them before it’s too late. Even though talking to your plants might not make them “listen,” it can help you pay more attention in the garden!

        Myth 3: All Insects Are Bad for Your Garden

        It’s only natural to think that bugs are up to no good when you see them moving all over your plants. A lot of gardeners grab the poison that’s closest and start spraying right away. But wait! Some bugs aren’t trying to hurt your garden, and using too many chemicals can throw off the environment of your garden.

        The Truth:

        Many insects are good for you and are very important for keeping your garden healthy. As an example, ladybugs are known for eating aphids, which are bad for plants. Earthworms make your soil better by breaking down organic matter and letting air into the ground as they move through it. Pollinators like bees and butterflies are very important for flower and veggie fruit production. Instead of spraying bug spray as soon as you see a bug, try to figure out if it’s a friend or foe.

        If you do find bugs like aphids or caterpillars that are bothersome, you might want to try natural ways to get rid of them. Good bugs, like ladybugs, can often keep bad bugs in check. Growing certain plants close to each other, also known as partner planting, can also help keep bugs away.

        Myth 4: Bigger Pots Mean Bigger Plants

        If you put something in a bigger pot, you might think it will get bigger. Roots should be able to grow faster if there is more space, right? This isn’t really how plants work, though.

        The Truth:

        Putting a plant in a pot that is too big for it can actually stop it from growing. If you put a plant in a pot that is too big for it, the dirt may hold more water than the roots need. This can cause mold on the roots and other problems. The plant may be spending too much energy on its roots instead of growing up and focusing on leaves or flowers. The key is to pick a pot that is just a little bigger than your plant’s root ball. This helps the plant grow in a healthy way without giving it too much room or water.

        For instance, if you want to plant tomatoes, begin with a small pot and move them to bigger ones as they get bigger. This way, they won’t get “pot-bound,” and you won’t have to worry about over-potting them either.

          Myth 5: Add Sand to Clay Soil to Improve Drainage

          Clay soil can be hard to work with in the garden because it tends to hold on to water and get compacted, which makes it hard for plants to grow. A common tip is to add sand to clay dirt to make it drain better. But this method might not work.

          The Truth:

          Mixing sand and clay soil can make the soil feel like concrete, which makes it even harder for plants to grow. Small pieces of clay and bigger pieces of sand mixed together make a dense, compact mixture that can trap water and stop air from moving. The best way to make clay dirt better is to add organic matter, like compost or manure that has been broken down. Organic matter breaks up the heavy clay and lets earthworms and other helpful bugs naturally open up the soil. Over time, this will help the dirt drain better and hold its shape better, which will help your plants grow.

          Myth 6: Coffee Grounds Are a Miracle Garden Amendment

          In the past few years, coffee grounds have gotten a lot of attention as an eco-friendly way to improve gardening. So it makes sense that people think coffee grounds are good for plants. They are organic and full of nutrients like nitrogen. There is more to this story than meets the eye, though.

          The Truth:

          If you use coffee grounds the right way, they can be good for your garden. Because fresh coffee grounds are acidic, they can lower the pH of your soil, which some plants don’t like. If you use too many coffee grounds, the soil can get too packed down, which stops roots from getting enough air. But coffee grounds that have been recycled are a much safer choice. They can give your soil a small boost of nutrients if you put them in a waste pile and let them break down.

          If you do decide to use coffee grounds, make sure to mix them with other types of waste and not pile them up around plants, especially ones that like neutral or alkaline soil, like tomatoes or beans.

          Myth 7: Planting by the Moon Improves Plant Growth

          Some gardeners still like the idea of planting by the moon, even though it comes from ancient times. The idea is that the moon’s pull on the earth affects the water in the soil in the same way that it affects the tides. Planting during certain stages of the moon can help plants grow better.

          The Truth:

          There isn’t much scientific proof that putting plants near the moon makes them grow faster or slower. The moon does have an effect on oceans and other big bodies of water, but not much on the moisture in the soil. Anyway, planting by the moon is kind of poetic, and it can be a fun way to plan your farming time. If this practice makes you feel closer to nature, there’s no harm in doing it. Just don’t expect magic to happen.

          Myth 8: Pruning in the Fall Is Best

          Fall often feels like the perfect time to prune trees and shrubs. The weather is cooler, the leaves are falling, and the garden is winding down for the year. But pruning in the fall can actually do more harm than good.

          The Truth:

          When you prune, you encourage new growth, which is not what you want right before winter. Frost damage can harm or kill a plant because new growth is soft and easy to hurt. It’s better to prune most trees and bushes in late winter or early spring before they start to grow. In this way, the plant can get better and grow quickly when it gets warmer.

          Myth 9: You Can’t Grow Plants in the Shade

          A lot of new gardeners think that they won’t be able to grow much if their garden doesn’t get full sun. Even though most plants need sunshine, there are many types that can do well in some shade or even full shade.

          The Truth:

          In places with little sunlight, shade-tolerant plants are your best friends. Some plants, like spinach, kale, and lettuce, do well in partial shade. For color in a shady garden, hostas, ferns, and astilbes are great choices. You can still make a beautiful, healthy garden even if you don’t have much sun. Just make sure the plants you pick can handle the amount of light your garden gets.

          Don’t Believe Everything You Hear

          When you get down to it, gardening is a process full of mistakes, learning, and a lot of patience. It can be tempting to follow every piece of gardening advice that has been passed down over the years, but it’s important to remember that gardening is also a way to learn. There is beauty in the fact that each garden is unique and each gardener has their own unique experiences. It’s okay if a tip or method that works great for one person doesn’t work as well for someone else.

          The myths we looked at can help you remember that not all advice is good, even if a lot of people believe it. We get angry sometimes when we believe these myths and wonder why our plants aren’t doing as well as we had thought. However, planting is a process that doesn’t always work out. Like people, plants have their own specific needs, and it can be very satisfying to learn what works for them. Every mistake you make is a chance to learn more about your plants and make your methods better.

          As you garden, know that it takes time for both you and your plants to grow. Take your time, be kind to your garden, and don’t be afraid to dig a little deeper (both actually and figuratively) as you follow your gardening journey!

          How to Create a Moon Garden for Evening Relaxation and Enjoyment

          How to Create a Moon Garden for Evening Relaxation and Enjoyment

          A moon garden is a special kind of garden that is meant to be enjoyed at night. While a normal garden shows off its bright colors during the day, a moon garden is designed to bloom and shine when the moon is out. A moon garden is a nice place to relax under the stars because it has soft-scented flowers, golden leaves, and light-colored flowers that bloom at dusk.

          Here is a full guide on how to make your own moon garden, which will turn your outdoor space into a peaceful, magical place to relax at night.

          Why Create a Moon Garden?

          So why make a garden that you only use at night? Moon gardens are a fun way to enjoy the night. They focus on the moonlight and add to its beauty with plants that reflect it, soft colors, and relaxing smells that are best enjoyed at night. They are low-maintenance and easy to take care of, and they’re a nice change from daytime gardening.

          Planning Your Moon Garden

          The place you choose is one of the most important parts of setting up your moon garden. Picking a spot that gets a lot of sunlight is important for a moon garden to do well. You want an area that isn’t too shady from trees or tall buildings and doesn’t have any lamps or other artificial lighting. Most of the time, a garden looking south is best because it lets you see the moon the best. You can still make a beautiful garden even if your place isn’t good for moonlight, though. You just need to plan carefully.

          At night, walk around your garden and look at where the light is strongest. If there are a lot of streetlights or buildings nearby, you should stay away from those places because the moonlight will be too bright. If you are working with a balcony or small patio, think about how the moonlight will bounce off the walls or railings around it. You can make a cute moon garden even if you don’t have a lot of room. All you need is a cozy part of your garden, the edge of a patio, or a window box full of plants.

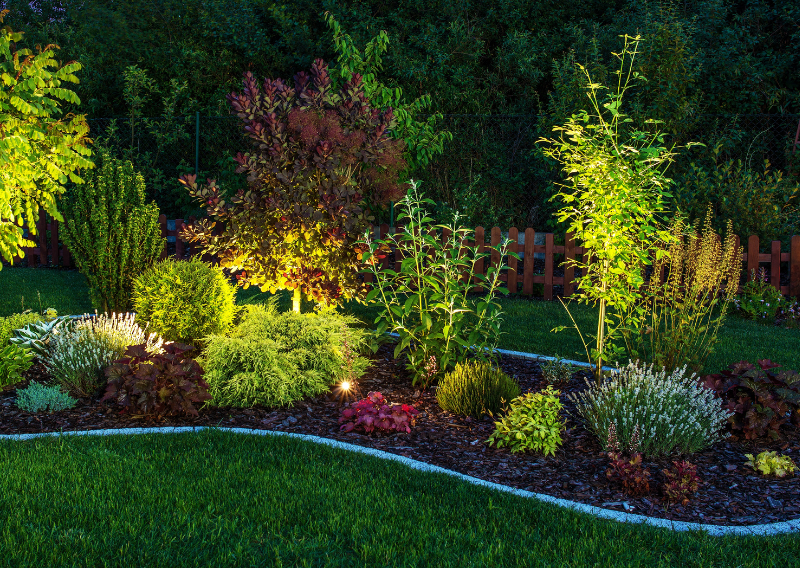
          After you pick a spot, you need to think about how it will be laid out. There should be a clear focal point in your yard, like a place to sit, a fountain, or a group of lovely plants. Also, think about how to get people to move around the area. A winding path, small stepping stones, or low edges can help make a natural flow while still letting you see the plants from different angles. Light is another important thing to think about. Lanterns or solar-powered lights can help draw attention to paths or certain plants, but keep in mind that the goal is to improve the natural light, not overpower it.

          Best Plants for a Moon Garden

          When you’re choosing plants, pick ones that either reflect light or give off a scent at night. Moon gardens look great with flowers and plants that have silver leaves and flowers that are white or soft colors.

          Flowers for a Moonlit Glow

          Flower petals that are white or light-colored reflect the moonlight, making your garden look soft and bright at night.

          • Moonflower – The moonflower gets its name from the fact that it blooms at night. Its big, white flowers glow in the dark and smell nice.
          • Evening Primrose – A flower with a sweet smell that blooms at night and adds color and scent to your moon garden.
          • Angel’s Trumpet – They look like trumpets and add a touch of the tropics to your garden. Keep in mind that this plant is dangerous for kids and pets.
          • White Jasmine – White jasmine flowers are great for creating a dreamy atmosphere because they smell so sweet.

          Silvery Foliage for an Ethereal Effect

          During the night, plants with silver or gray-green leaves reflect light, making them look like they are made of air.

          • Dusty Miller – A classic plant for a moon garden, and its silver-gray leaves look beautiful at night.
          • Lamb’s Ear – There is texture in this soft, fuzzy plant, and the moonlight gives it a soft, silver color.
          • Artemisia – Artemisia is known for being hardy, and its golden leaves look beautiful at night.

          Adding Fragrance for a Multi-Sensory Experience

          A moon garden needs plants that smell good. If you choose plants that release their scent at night, you can make the room smell nice with soothing flower scents.

          • Night-Blooming Jasmine – This type of jasmine gives off a strong, sweet scent at night, which makes it a choice in moon gardens.
          • Four O’Clocks – They have a unique fruity smell and open later in the day.
          • Honeysuckle – A plant that grows up walls and gives off scents and textures. It makes every garden smell like the past with its sweet scent.

            Subtle Lighting Ideas

            Even though the moonlight gives your garden its main glow, adding extra lighting can help draw attention to paths and certain areas without taking over the space. To keep the natural feel, choose lighting that is warm and soft.

            Lighting Options:

            • String Lights: For a sparkling look, tie thin string lights around trees, fences, or arbors.
            • Pathway Lights: There are solar-powered lights along the walks that give off a soft glow that makes it easy to find your way.
            • Floating Candles: Put floating candles in a small fountain or birdbath to make a beautiful light source that reflects light.
            • Lanterns: A few old lanterns placed in the yard in an organized manner can make it feel cozier while also lifting the mood.

            Creating a Comfortable Space

            Making sure that your moon garden is not only beautiful but also comfortable is important if you want to enjoy it. Since moon gardens are meant to be enjoyed at night, you should make a comfortable space where you can sit back, unwind, and enjoy the peaceful atmosphere. Start by adding some comfortable chairs. You can feel at home in your garden with a bench, a hammock, or even just a few airy cushions on the ground. When you want to make the room feel even cozier, think about adding pillows or throw blankets.

            I also think a small table would be nice. You could use it to set down your drink, a book, or your tea. You can also make a small meeting spot with chairs and soft cushions, which is great for having conversations in the evening or taking some time to think. To get the most out of the peaceful garden atmosphere, put the chairs near the plants that smell the best. That way, you can enjoy the scent while you relax.

            To give your sitting area a soft, magical glow, you might want to add things like a fire pit, lanterns, or even small lights that twinkle. Adding these things will help set the mood for your evening, so you can stay longer in your moon garden’s beauty and peace.

            It’s important to think about how you want to use the space, not just as a pretty garden, but also as a place to relax, think, and connect with nature. You can make a real haven to enjoy under the stars by adding seats, thoughtful lighting, and sensory elements.

            Easy Maintenance Tips for a Low-Stress Moon Garden

            A lot of the plants in the moon garden are perennials, which means they come back every year with little care. To keep your moon garden looking new and friendly, here are some simple tips:

            Seasonal Guide for a Year-Round Moon Garden

            You can enjoy your moon garden all year long if you choose the right plants:

            • Spring: For a nice start to the season, plant early bloomers like daffodils and white tulips.
            • Summer: Honeysuckle and jasmine, which bloom in the summer, smell great on warm nights.
            • Fall: With their soft color and texture, white asters and dusty millers bloom well into fall.
            • Winter: Add evergreen plants with silver or gray leaves to make a moon garden that looks good all year. Plants that can handle frost and dusty weather also help keep your garden looking nice in the winter.

            Enhancements to Make Your Moon Garden Unique

            You can make a moon garden as easy or sophisticated as you want. Adding some unique features can make it even more fun. Here are some things to think about:

            • Reflective Surfaces: Adding mirrors or other glass decorations to your garden can make reflections that are fun and give it more depth.
            • Wind Chimes: A soft chime can add a relaxing sound to your yard, making it even more relaxing.
            • Water Features: Small fountains or birdbaths look beautiful when lit up at night and add a soothing sound of water to your space.

            Embracing the Tranquility of a Moon Garden

            When you make a moon garden, you can enjoy the peace and beauty of the evening. It’s a way to get in touch with nature, calm down, and have fun after a long day. An evening with a book, meditation, or just relaxing in a moon garden are all great ways to spend time outside.

            Moon gardens are great because they don’t need much care, don’t cost a lot, and can be changed to fit almost any outdoor area. By picking the right plants, lighting, and furniture, you can turn your backyard into a cozy, private space that changes the way you spend your nights and adds a touch of magic.

            0
              0
              Your Cart
              Your cart is emptyReturn to Shop