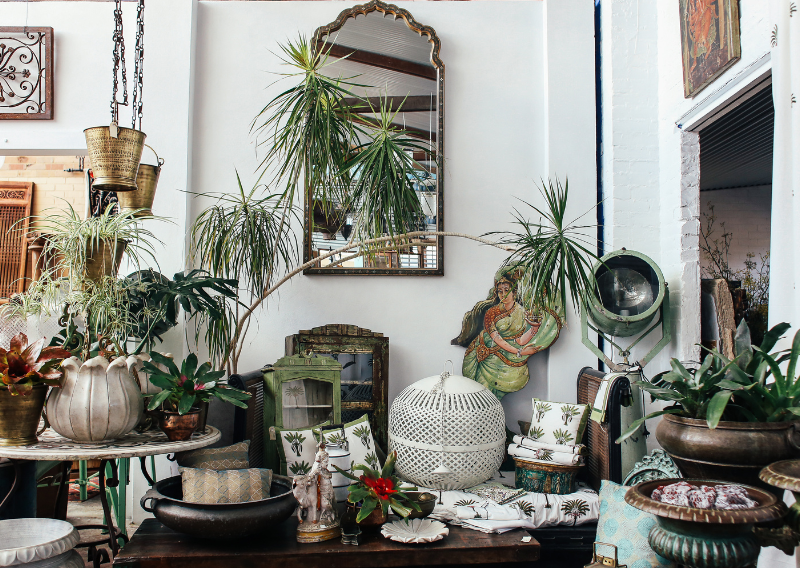
How to Prepare Your Plants Before Going on Vacation: Essential Care Tips

How to Prepare Your Plants Before Going on Vacation: Essential Care Tips

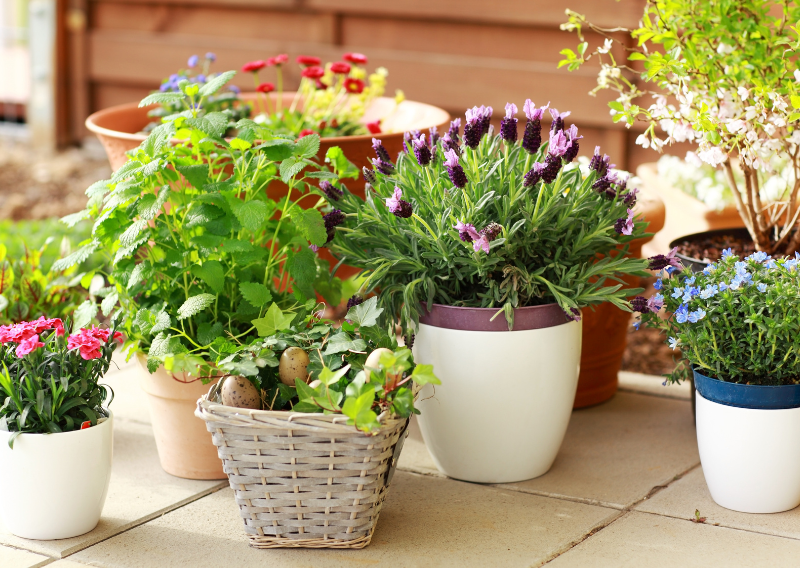
For those who have already got plants, you know they’re more than just pretty things to look at. They need a fair amount of care to do well as little green roommates. It’s like finding the perfect mix between art and science to keep plants happy. You have to give them just the right amount of water and make sure they get just the right amount of sunlight. But what do you do when you need to go on vacation? Even if it’s just a short weekend trip, a long road trip, or your long-awaited dream holiday, you still want to make sure your leafy friends will be alive and well when you get back.

It can be scary for even experienced plant parents to leave their plants alone for days or weeks at a time. “Will they dry out?” is probably what you’re thinking. Do they have too much sun? Or even worse, will they die while I’m not there?” That’s okay, there are lots of ways to get your plants ready for a break, so you can take a trip without feeling bad and come back to healthy, happy plants. If you plan ahead and use these tips, you can make sure your plants stay happy, hydrated, and look great while you’re away. Now let’s talk about what you need to do to take care of your plants while you’re away!

Plan Ahead for Your Plants

You’re just asking for trouble if you leave your plants without a plan. When you’re on a short holiday, you might only need to water and pat the leaves. You should show them more love before you leave if you’re going to be gone for a longer time. How ready you are should depend on how long you’ll be gone and what your plants need.

  • 1-3 days: Before you leave for a short trip, giving most plants a good drink of water should be enough. At least an inch down, check the dirt to see if it’s wet. This is especially important if you have plants that like it dry, like cacti or succulents.


  • 4-7 days: Your plants will need more care when you take longer breaks. To keep moisture levels steady, you could use self-watering options like water globes, water wicks, or do-it-yourself water bottle systems. Some plants, especially tropical ones, will do better with more humidity. To make a mini-humid environment, group them together or put a small bowl of water nearby.


  • 8+ days: You’ll need a mix of methods when you’re away for more than a week. First, give your plants a good soak in water. Then, set them up with a self-watering system, such as a DIY drip system, or put them in a small water tray so they can slowly take in water. If you want plants that love light to stay healthy, make sure you put them somewhere with partial sunlight.

Assessing Your Plants’ Needs


Each plant has different needs when it comes to light, water, and temperature. Here is a quick list of some common “care profiles” you may see:

  • Cacti and succulents: These plants don’t need much care and can go weeks without water, so they won’t be upset about a break.
  • Ferns and tropical plants: High-maintenance types that like humidity and will need more care.
  • Flowering plants: These can be different for each plant, so make sure you know what it needs. African violets, for instance, like it warm and with light coming from the side.

Self-Watering Techniques: Keep That Soil Moist


If you have plant friends that need to be watered regularly, try these ways to keep things running smoothly:

  • Water Wicking Method: Get some cotton string, wire, or even old shirt strips. Put one end in a big bowl of water and bury the other end a few inches into the ground. Over time, the line will slowly bring water to your plant. It doesn’t cost much and works well for a few days.


  • DIY Self-Watering System with Bottles: Use an old drink or water bottle for this. Put soil around the outside of the cap, fill it up, and then put it upside down in the ground. The water will slowly drain away, but the dirt will stay moist.


  • Water Globes or Bulbs: These orbs made of glass or plastic slowly add water to the ground. They’re simple, can be used again, and look pretty cool.

Adjusting Your Plant’s Environment

Light and humidity are very important for plant growth, especially when you’re going to be away for a long time.

  • Move Them Away from Intense Sun: If your plants are close to a window that gets full sunlight, you might want to move them farther away. Less light can help plants grow more slowly and need less water.


  • Group Plants Together: Because plants give off water, putting them together makes a micro-humid setting that is great for tropical plants.


  • Raise Humidity with a Pebble Tray: If your plants like it damp, put a tray with rocks and water under them. Your plants will be happy as the water disappears and raises the humidity around them.

Plant-Sitting Services: Get a Friend Involved!

Sometimes, the easiest thing to do is to ask for help. To make it easy, do this:

  • Make a Quick Guide: Write down how often to water each plant, what lights it likes best, and any other care instructions.
  • Add a Reward: Give your friend a small gift, like a thank-you gift or their own nice plant.
  • Communicate Clearly: Show your friend around your “plant nursery” before leaving. You’ll feel better knowing they know exactly what to do.

Best DIY Alternatives for Plant Care

If you like to do things yourself and like to make, here are some more plant self-care hacks:

  • Plastic Bag Greenhouse: It may sound silly, but putting a clear plastic bag over your plant (with holes in it to let air flow) can make it feel like a mini-greenhouse, keeping the wetness in and reducing the need for water. It works especially well for plants that like damp.


  • Bath Time for Big Plants: If you have big plants, you can leave them in the bathroom with a little water on the bottom. This lets the plant take in water through the drainage holes, keeping them moist without making the dirt too wet.

How to Handle Plant Emergencies on Return

You may return to a scenario that requires some rescue work after your much-needed rest. If your plants don’t appear as vibrant as you had planned, don’t worry; travel can also throw off their rhythm. Here’s a simple guide to help your plants return to their normal selves and deal with any problems that may come up when you arrive home:


  1. Water Thoroughly if the Soil is Dry: If the soil is very dry, give the plants a good drink—but not all at once. If you get home and see that the plants are drooping and the soil is very dry, you should water them well. To keep the plant from being shocked, add water slowly at first. Check the soil after 15 minutes and add more if it’s still dry. Usually, it’s best to water plants at different times so that the roots can slowly get water again.


  2. Check Leaf and Stem Health: Check the leaves and roots for signs that the plant is either too dry or too wet. If the leaves on your plant turn yellow or become crispy, it may have dried out too much. Cut off any leaves or stems that are hurt so that the healthy parts have room to grow back. If the plant has mushy leaves or darkened roots, on the other hand, it may have had too much water. Cut back any areas that are hurt and wait a few days before watering again.


  3. Inspect for Pests: Bugs and other pests may move into an empty house, so look under the leaves and around the soil’s edge to see if any have already settled in. If you see any unwanted guests, use a good pesticide on the plant, like neem oil, or use a damp cloth to wipe down the leaves if it’s just a small problem.


  4. Ease Back into the Light: Because they’re used to being in bright light, plants that have been sitting out of direct sunlight for a while may be a little sensitive to light now. Instead of putting them in a bright light all at once, move them closer and closer to where they usually are. So they don’t get “sun shock” and have time to get used to the light again.


  5. Revive Humidity-Loving Plants: You can quickly raise the humidity for plants that need it, like ferns and calatheas. This will help them wake up. To let them soak up water from the air, mist them lightly or leave them in the bathroom while you shower.

Getting your plants ready for vacation might sound like extra work, but it will help you relax and enjoy your trip more. Just remember that every plant has its own needs. If you get ready, whether you do it yourself or hire a reliable plant sitter, your green friends will be happy to see you when you get back.

Have a great trip!

The Ultimate Guide to Repotting Plants: A Step-by-Step Journey to Healthier Greens

The Ultimate Guide to Repotting Plants: A Step-by-Step Journey to Healthier Greens

If you own plants, you may have thought when it’s time to repot them. It might seem hard to repot plants if you’ve never done it before. But the truth is that it’s one of the best things you can do for your favorite veggies. Not only does it help them get bigger and stronger, but it also lets you change how your home garden looks.

If you want to know how to repot plants and when it’s time to do it, read this article. It will also give you some great tips and tricks for a good experience. You can learn useful tips to keep your plants healthy for years to come, no matter how much experience you have with taking care of plants.

Why Repotting Matters

You might be thinking why you need to move your plants to new pots in the first place. After all, things look good for them, right? For starters, repotting is important to make sure your plant has enough space to grow and build strong roots. Plants that stay in pots that are too small for too long can get root-bound, which makes it harder for them to take in water and nutrients. The plant won’t grow well no matter how much you water or feed it if it doesn’t have enough room to do so.

It’s not just about the size of the pot, though. Repotting also lets you change the soil. Food in the soil breaks down over time, so your plant may not be getting what it needs. New soil has more nutrients, better drainage, and more airflow, all of which are good for the health of your plant.

Signs It’s Time to Repot

It’s important to know when to repot your plants so they do well. If any of these things happen, it may be time for a new pot:

  1. Roots Are Poking Out of the Drainage Holes: When roots start to show through the bottom of the pot, you know the plant is too big for its present container.
  2. Water Drains Too Quickly: The water doesn’t soak into the soil when plants have roots that are crowded together. This means that the plant isn’t getting enough water.
  3. The Plant Is Top-Heavy: Your plant may be too big for its pot if it keeps falling over or grows in a strange direction. It will be easier for it to grow straight up in a bigger pot.
  4. Soil Looks Compact or Depleted: Any cracks in the soil or a loss of texture on the top could mean that your plant needs new, nutrient-rich soil.
  5. Slow or Stunted Growth: A plant’s growth can slow down if its roots get crowded or if the soil runs out of nutrients. It could mean that your plant is ready for a new home if you’ve noticed that it’s not growing as fast as it used to.

Choosing the Right Pot

It is important to pick the right pot for your plant before you start the repotting process. The new pot should have a width that is two to three inches bigger than the old one. If the plant is too big, it might get too much water because it can’t take it up fast enough.

When choosing a pot, here are some things to think about:

  • Material: Pots can be made of plastic, clay, pottery, or ceramic, among other things. For plants that like soil that drains quickly, terracotta and clay pots are great. Plastic pots, on the other hand, are lighter and help plants keep water in. When picking a material, think about what your plant needs.
  • Drainage: Make sure the new pot always has holes in it for water to drain. Without good draining, the ground can get too wet, which can cause root rot.
  • Shape and Size: For plants with roots that spread out, a wide, shallow pot works well. For plants with roots that go deeper, a higher pot works well. Just make sure the pot you pick has enough room for the roots to grow.

    How to Repot Your Plant: A Step-by-Step Guide

    It’s not as scary as it sounds, don’t worry. It won’t take long to make your plant happy once you’ve done a little work.

    What You’ll Need:

    • A new pot (with drainage holes)
    • Fresh potting soil
    • A trowel or small shovel
    • A watering can
    • Gloves (optional)
    • A saucer to catch excess water

    Step 1: Prepare Your Work Area

    Set up your area first. Put down some newspaper or a plastic sheet to soak up any dirt that gets on the floor. Everything you need should also be easy to get to, so everything is ready to go.

    Step 2: Take the plant out of its pot

    Help the plant’s base stay put as you tilt the pot to the side. To make it easier for the plant to come out, you can tap the sides of the pot or run a knife around the edges. Do not pull too hard, as this could hurt the roots.

    Step 3: Examine the Root System

    Check the plant’s roots after taking it out of the pot. Root-bound plants have roots that circle around the outside of the root ball. You’ll need to open them up if you see this. With your fingers, gently pull the roots apart. If they won’t come apart, use a small knife to cut through them. Clean scissors or trimming shears should be used to cut off any roots that are dead or coming apart.

    Step 4: Fill the new pot with fresh soil

    Put some fresh potting soil in the bottom of the new pot before you put the plant in it. This lets water run away and gives the roots a good place to grow. When you put the plant in the pot, make sure the soil is at a level that leaves about an inch of space around the top of the root ball.

    Step 5: Put the plant in the new pot

    Now, carefully put your plant where it needs to be. Add more fresh potting soil around the roots, making sure not to pack it down too much as you go. Too much soil should not be packed down because the roots need room to breathe and grow. Leave some space at the top of the pot so you can water it.

    Step 6: Water the Plant Thoroughly

    Give the plant a lot of water once it’s set up. This makes the soil more stable and gets rid of any air pockets around the roots. There should be no water in the bottom of the pot. Also, make sure the plant is sitting level in the pot.

    Step 7: Find the Right Spot for Your Repotted Plant

    Your plant may feel a little stressed after being moved to a new pot. Put it in a place with the right amount of light for its species to help it get used to the new changes. After repotting, don’t put it in full sunlight right away because it might be too strong for the plant. Over the next few days, slowly bring it back to a brighter light.

    Step 8: Monitor and Maintain

    Watch your plant carefully for a few weeks. It’s normal for it to feel a little shocked when you move it, but as long as you give it the right care, it should get better. To give the plant time to get used to its new pot, don’t fertilize it for the first month. Just water it as needed.

    Repotting Tips and Tricks


    • Don’t Overwater: After being moved, your plant may need more water, but don’t give it too much. Sometimes, the plant will rot if it gets too much water while it’s getting used to its new pot.
    • Avoid Fertilizing Immediately: Most of the time, new soil has all the nutrients a plant needs for a while, so don’t add any fertilizer for about a month. This lets the plant get used to its new environment.
    • Keep It Stress-Free: After being moved, plants can go into shock, so don’t bother them too much for the first few days. Allow them some time to heal and get used to their new home.
    • Repot During the Growing Season: Most plants grow best in the spring or early summer, which is also when you should repot them. Don’t move the plant to a new pot in the winter because its growth slows down.

    Repotting your plants in new pots may seem like a lot of work, but it’s one of the best things you can do for them. It not only helps them grow, but it also makes sure they stay healthy and happy for years to come. You’ll be great at repotting in no time if you have the right tools, stick with it, and a little practice. Don’t be shy about giving your plants the new homes they deserve. They’ll do great in them.

    Happy planting!

    Natural Lawn Care: How To, Eco-Friendly Tips for a Healthy, Green Yard

    Natural Lawn Care: How To, Eco-Friendly Tips for a Healthy, Green Yard

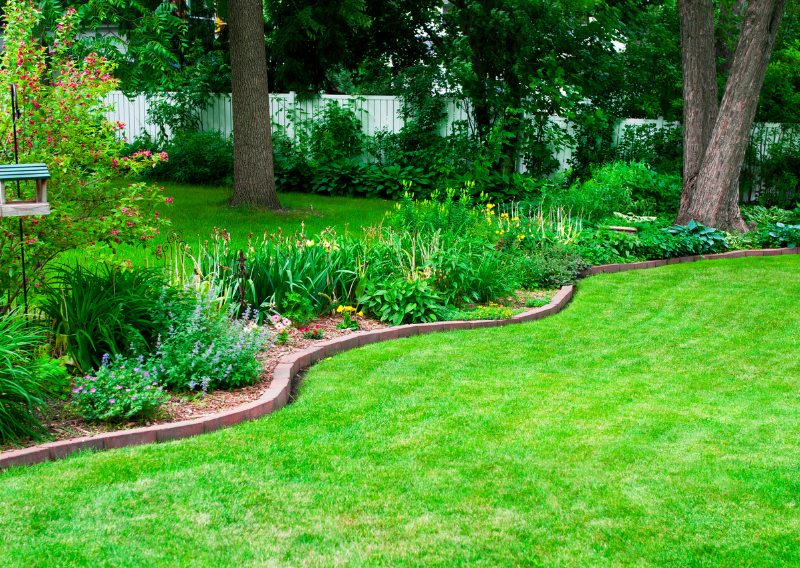
    Most of us think of lush, green grass that makes everyone else in the neighborhood green with envy when we think of lawn care. However, what if you could reach your goal while also helping the earth, saving cash, and even making your own health better? This is where natural lawn care comes in, an eco-friendly way to take care of your lawn that doesn’t use chemicals.

    No longer do people have to use harsh chemicals on their lawns to keep them looking great. Natural lawn care is becoming more popular as more people look for eco-friendly ways to take care of their lawns. This article will teach you everything you need to know about taking care of your lawn the natural way, whether you’re a pro or just want to try something new. Let’s jump right in!

    Why Go Natural?

    Let’s talk about why natural lawn care is a good idea before we get into how to do it. A lovely garden isn’t the only benefit; there are more than that. Not only are you helping your yard, but you’re also helping the planet by switching to more eco-friendly ways.

    1. Healthier Soil
      Having healthy soil is the first step to having a good lawn. Synthetic pesticides and fertilizers can hurt worms, microbes, and other good creatures in the soil. This wears down the soil over time, which makes it harder for your grass to grow. Natural ways improve the structure of the soil and help the ecosystem below the surface to grow.
    2. Safer for Your Family and Pets
      Chemicals that are used in regular lawn care can be bad for people and animals. The U.S. Environmental Protection Agency (EPA) has even linked some popular lawn chemicals to health problems like cancer and damage to the nervous system. By going natural, you lower your chances of being exposed to harmful chemicals, which makes you feel better.
    3. Environmental Benefits
      Common ways of taking care of lawns often pollute the environment and cause waste that can pollute nearby water sources. Pesticides, herbicides, and fertilizers can get into rivers and lakes and hurt the wildlife that lives there. Using natural means helps protect the health of local ecosystems and the quality of the water.
    4. Saves You Money
      We all know that maintaining a traditional lawn can cost a lot of money. The costs quickly add up when you buy things like fertilizers and pesticides and hire experts to care for your lawn. You can cut down on these costs with natural lawn care by using easy, cheap methods like compost and mulch that not only improve your yard but also cut down on waste.
    5. It’s Easy and Low Maintenance
      You won’t believe it, but taking care of your lawn naturally can save you time and work. You’re making your process easier by not having to worry about as many chemicals and products. Plus, stronger grass grows in healthy soil, so you’ll need to mow, water, and kill more pests over time.

    Step 1: Building Healthy Soil

    Taking care of the soil is the first thing that needs to be done to make a natural lawn. A garden needs healthy soil to grow, so let’s talk about how to make it better and keep it that way.

    Aerate Your Lawn

    One of the best ways to help roots grow in a healthy way is to aerate your lawn. Soil gets packed down over time, making it hard for air, water, and nutrients to get through. By making small holes in the dirt, aeration lets these important things reach the roots of your grass. An aerator can be bought, rented, or used by hand. If you’re not sure how to do it, you can also hire a professional.

    • When to Aerate: Because grass grows best during the growing season, aerating your lawn is best done in early spring or fall.
    • How to Aerate: Walk across the lawn in a crisscross pattern with a manual aerator, making sure the holes are about 2 to 4 inches apart. If you are using a motorized aerator, make sure you follow the directions that came with it.

    Use Compost

    Compost is like fertilizer for plants. It’s made from natural things like grass clippings, leaves, and food scraps, and it helps the structure of the soil. Compost, unlike synthetic fertilizers, gives the lawn nutrients slowly, which helps it grow better over time.

    • How to Apply Compost: Cover the lawn with a thin layer of compost, about 1/4 inch thick. You can use a wide spreader or do it by hand. When the grass is growing, like in the spring or fall, is the best time to do this.
    • Why It Works: By adding organic matter, compost improves the structure of the soil. This makes it better at holding water, less dense, and more active with microbes.

    Add Organic Fertilizers

    If the soil needs more nutrients, you could use fish emulsion or alfalfa meal as organic fertilizers. These fertilizers release nutrients more slowly than manmade ones, so you are less likely to use too much and hurt the environment.

    • When to Apply Organic Fertilizers: When your lawn is actively growing, like in the spring or fall, it is the best time to use organic fertilizers.
    • How to Apply: You can use a broadcast spreader or just sprinkle the fertilizer on the lawn to cover it evenly. Make sure to follow the application rates given by the maker.

    Step 2: Choosing the Right Grass


    There are different kinds of grass, and the right one for your lawn will depend on where you live, the weather, and the soil. You won’t have to use as much water, fertilizer, and pesticide if you choose a type of grass that does well in your area.

    • Cool-Season Grasses: If you live in cooler climates, grasses like Kentucky bluegrass, ryegrass, or fescue are ideal. These varieties thrive in temperatures between 60 and 75°F and stay green year-round in cooler regions.
    • Warm-Season Grasses: For warmer climates, Bermuda, Zoysia, and St. Augustine grass are great choices. These grasses thrive in temperatures between 80 and 95°F and go dormant during the winter, which means less maintenance in cold months.

    Step 3: Watering Your Lawn Naturally

    Most people waste a lot of time and money when they water their lawn, even though it’s one of the most important parts of lawn care. A natural way of gardening focuses on being efficient and saving water.


    Water Deeply, but Infrequently

    Instead of watering your lawn every day, try to water it deeply and not very often. This helps your grass grow deep roots, which makes it better able to handle dryness. Soil needs just the right amount of water to reach the roots, but not too much so that the soil gets too wet.

    • How Often to Water: Lawns typically need about 1 to 1.5 inches of water per week, either from rainfall or irrigation. During hot, dry periods, you may need to water more frequently but avoid over-watering.
    • Best Time to Water: Water your lawn in the early morning or late evening to reduce evaporation and prevent fungal diseases. Avoid watering during the heat of the day, when much of the water will evaporate before it reaches the soil.

    Use a Smart Irrigation System

    If you have a watering system, you might want to switch to a smart irrigation system. These systems change when and how much to water your lawn based on the weather. This makes sure that your grass gets the right amount of water at the right time. Some models even have sensors that can tell when your lawn needs water, which makes them more eco-friendly and efficient.


    Step 4: Organic Weed Control

    Weeds are one of the most annoying things about taking care of a lawn, but the best ways to get rid of them are to avoid them in the first place and use organic methods.

    Prevent Weeds with Mulch

    Putting mulch over the soil is one of the best ways to keep weeds from taking over your lawn. Organic mulches, such as grass clippings, shredded leaves, or wood chips, help keep the soil wet and stop weed seeds from sprouting.

    • How to Apply Mulch: Spread a thin layer (about 2-3 inches) of mulch around your lawn. Be sure not to pile it up around the base of trees or plants, as this can promote rot.

    Spot-Treat Weeds Naturally

    If weeds do show up, use natural ways to get rid of them. It’s always best to pull weeds by hand, especially ones with deep roots. For bigger places, try natural herbicides made from things like citric acid, vinegar, or clove oil.


    Step 5: Mowing the Natural Way

    Mowing the grass is an important part of taking care of your lawn, but you need to do it right to keep it healthy.

    Mow High

    Not only is mowing your lawn high easier, but it’s also better for it. Cutting your grass too short can stress it out and make it more likely to get bugs or dry out. When you mow, try to leave about 3 inches of grass on top. This lets the grass grow thicker roots and shades the soil, which keeps weeds from growing.

    Keep Your Mower Blades Sharp

    If your mower blades are dull, they can tear the grass and leave jagged lines that make your lawn look bad. On the other hand, a sharp blade cuts the grass smoothly, which helps it stay healthy and heal faster.

    Natural lawn care is a fun and long-lasting way to take care of your lawn and be good to the earth at the same time. Focusing on healthy soil, picking the right grass, watering wisely, and getting rid of weeds naturally can help you make a lawn that not only looks great but also makes the environment better. You can make your lawn healthier and better for the environment by following these tips.

    Happy gardening!

    Starting a Hydroponic Garden at Home: A Complete Guide for Beginners

    Starting a Hydroponic Garden at Home: A Complete Guide for Beginners

    Do you want to grow your own food but don’t have a yard or garden area? Perhaps you are searching for a less messy and water-efficient gardening method. Maybe hydroponics is the ideal solution for you! This creative gardening approach lets you right inside your house grow plants without soil. Starting a hydroponics garden not only offers an interesting hobby but also fresh food and might possibly save money.

    From knowing what hydroponics is to selecting the correct system, choosing the best plants, and maintaining your garden for healthy development, this article covers the fundamentals of beginning a hydroponics garden at home. Let’s start right now.

    What is Hydroponics?

    Growing plants without soil is possible in hydroponics. Plants develop in a nutrient-rich water solution instead of soil, which straight delivers all the necessary minerals they require right to their roots. Because it lets you grow plants in smaller areas and under better control, this method has become well-known as it results in often larger yields and faster development rates.

    Water efficiency is crucial in hydroponics, so plants get just the correct dosage without waste. Moreover, as there is no soil, you avoid most typical pests and diseases.

    Benefits of Hydroponic Gardening

    Let’s review some reasons why hydroponics could be a revolution for home gardening:

    • Space-saving: Hydroponics allows you to avoid requiring a large outside space. Actually, with the correct lights, you could set up a hydroponics system in a small apartment, basement, or even closet.
    • Water-efficient: Because the water in hydroponics gardens is recirculated in a closed system, they consume up to 90% less water than conventional soil-based gardens.
    • Faster plant growth: Nutrients are directly accessible to plants, so they do not have to “search” in the soil. Faster growth follows from this, often up to 25% faster than in soil gardening!
    • Less mess: There is no soil involved, hence you can mostly avoid dirt and trash. Less chance of soil-based pests or illnesses harming your plants benefits as well from this.
    • Grow all year round: Systems of hydroponics allow one to plant all year long. Just be sure your plants receive the correct temperature and enough of light.

    Types of Hydroponic Systems

    There are several kinds of hydroponics systems, each with special advantages and degree of difficulty. These are among the most often used ones for beginners:

    1. Deep Water Culture (DWC): Plants are suspended in this system in a nutrient-rich water solution under an oxygen-supplying air pump. Perfect for leafy greens like lettuce and spinach, it’s among the easiest and most beginners’ friendly techniques.
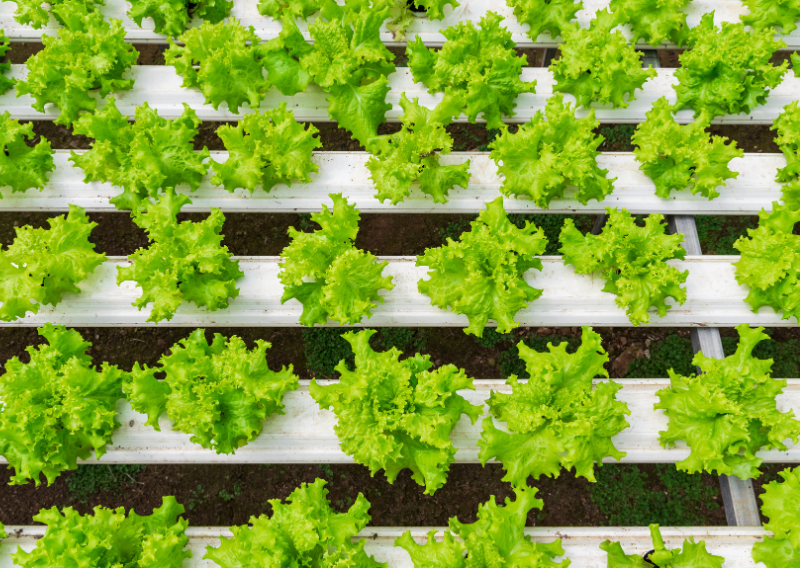
    2. Nutrient Film Technique (NFT): Channels hold plants, and a thin film of nutritional solution runs across their roots constantly. Popular in commercial hydroponics, this method might be difficult for beginners because of its continuous water flow consumption.
    3. Ebb and Flow (Flood and Drain): This technique floods the plant roots with nutritional solution then drains it back. For bigger plants especially, it offers a nice mix of oxygen and water.
    4. Wick System: The simplest solution, the wick system requires no pump at all. Plants actually suck water up via a wick. Though it’s cheap and simple, it’s slow and doesn’t help bigger plants, particularly.
    5. Aeroponics: Plants floating in the air in aeroponics have nutrition solution misted roots. Although this approach offers amazing rates of growth, it calls for somewhat more careful maintenance.
    6. Drip System: Under this technique, a pump continuously supplies nutritional solution to the plants in little “drips.” Drip systems are flexible and fit for a great range of plants.

    Setting Up Your Hydroponic Garden at Home

    Although starting a hydroponics garden can seem daunting, if you divide it into stages it will be under control. The following is a quick guide to help you:

    1. Choose Your System

    Choosing a hydroponics system that fits your comfort level, space, and money starts the process. Starting with a Deep Water Culture or Wick System will be a smart idea if you are new to hydroponics since they are simpler and call for little equipment.

    2. Pick Your Plants

    Select plants that flourish in water-based systems since not all plants do in hydroponics. Some of the friendly plants for beginners are:

    • Leafy greens (lettuce, spinach, kale)
    • Herbs (basil, mint, cilantro)
    • Strawberries (for those who want a sweet harvest)
    • Tomatoes and peppers (great for vertical systems with ample light)

    Avoid root vegetables like carrots or potatoes, as they generally need soil for better structure and growth.

    3. Gather Your Materials

    Usually, hydroponics systems require similar basic components:

    • Containers or grow trays for holding the plants
    • Net pots to suspend the plants in the nutrient solution
    • Grow lights (LED lights work well for indoor gardening)
    • Air pump and air stone for oxygenating the water (essential for DWC systems)
    • pH testing kit and pH adjusters to maintain optimal nutrient uptake
    • Hydroponic nutrient solution specifically formulated for soilless growing
    • Growing medium like rockwool, coconut coir, or perlite to support the plant roots (optional for some systems)

    4. Assemble and Test

    If you are choosing the do-it-yourself route, be sure to verify every component to guarantee proper functioning; otherwise, set up your system as directed with your kit. Add the fertilizer solution, then arrange your air pump and lighting and fill the water reservoir. Let the system run a day to guarantee stability before introducing plants.

    5. Add Your Plants

    Adding your plants comes once your system has been set up and tested. Beginning with seedlings or young plants cultivated in a growth medium such as perlite or rockwool, arrange each seedling in a net pot so that, although not totally submerged, the roots come into touch with the nutrient solution.


    Lighting Your Hydroponic Garden

    Particularly if you grow indoors, light is absolutely essential for hydroponics. Though natural light is perfect, LED grow lights are an excellent choice if you lack enough of it. They are low heat emitters, energy-efficient, and come in full-spectrum models that resemble sunlight. Depending on the demands of your plants, try for 12 to 16 hours of light every day.


    Nutrients and pH Levels

    Since hydroponics plants absorb nutrient solutions, it is essential to utilize a quality solution designed for hydroponics. Most store-bought remedies include the correct mix of micronutrients and macronutrients—that is, nitrogen, phosphorous, and potassium.

    Nutrient absorption depends on maintaining the pH of your nutrient solution within a reasonable range. Most plants find their ideal pH range between 5.5 and 6.5. Using pH up or pH down solutions sold in garden stores, routinely test your solution and make any adjustments.


    Maintenance Tips for a Thriving Hydroponic Garden


    Although keeping a hydroponics garden requires constant maintenance, it requires less work than conventional gardening. Here are some basic maintenance pointers:

    • Regularly check the water level: Add water as needed to maintain the right level in your reservoir.
    • Monitor nutrient levels: Over time, nutrients can become depleted, so refresh your nutrient solution every two to three weeks.
    • Keep an eye on plant growth: Prune plants as needed to avoid overcrowding and ensure they get enough light and airflow.
    • Look for signs of pests or disease: Although hydroponics reduces these risks, it’s still essential to inspect your plants for any signs of trouble. Remove any infected leaves immediately.
    • Clean your system regularly: Algae and bacteria can build up over time, so clean your hydroponic system every month or two, especially in the reservoir.

    Common Hydroponic Issues and How to Fix Them

    As with any type of gardening, hydroponics comes with its challenges.

    • Algae growth: Algae love light, so if you spot green slime on your water or surfaces, it’s likely algae. Cover any exposed water surfaces and keep your reservoir in a dark container.
    • Nutrient deficiencies: Yellowing leaves can indicate nutrient issues. Check your pH level first, as an imbalanced pH often blocks nutrient absorption.
    • Root rot: If roots are brown and slimy, they may be rotting due to a lack of oxygen. Make sure your water has enough dissolved oxygen, especially in Deep Water Culture systems. An airstone and pump can help with this.

    Hydroponic Gardening on a Budget


    Starting a hydroponic garden doesn’t have to break the bank! Here are some tips for creating a hydroponic setup without spending too much:

    Starting a hydroponics garden at home can be really rewarding. From an indoor garden, fresh herbs, greens, and even fruits are accessible year-round with some preparation and consistent upkeep. Try different setups and plants as you grow comfortable, as hydroponics growing is a learning and experimental trip.

    How to Create a Wildlife Shelter in Your Garden: A Step-by-Step Guide

    How to Create a Wildlife Shelter in Your Garden: A Step-by-Step Guide

    Building a wildlife shelter in your garden isn’t just a good way to help animals in the area; it’s also a great way to create a live ecosystem in your own backyard. One day you might go outside and see butterflies flying between flowers, bees blooming, birds sitting in trees, and maybe even a few hedgehogs running around at dusk. By being careful about how you plan and take care of your garden, you can make it a safe and welcoming place for local wildlife that often has trouble finding food and shelter because of habitat loss and urbanization.

    We’ll go over everything you need to know to build a wildlife house in your garden now. We’ll talk about how to make your garden come to life with color, life, and balance, from planning and picking the right plants to making cozy spots for birds, bees, hedgehogs, and more. If you’re new to gardening or just want to improve an area you already have, these tips will help you turn your backyard into a wildlife refuge that is good for you and the environment.

    Why Build a Wildlife Shelter?

    Gardens are often made so that people can enjoy them. However, parks are also home to many animals, from hedgehogs and frogs to birds and insects. Many species have lost their homes because of urbanization, and parks can be great places for them to stay safe. Also, letting animals into the garden is good for it because many animals help keep ecosystems balanced, eat pests, and pollinate flowers. Of course, seeing a butterfly fly by or hearing a bird chirp makes it all worth it!

    Step-by-Step Guide to Building Your Wildlife Shelter

    1. Planning the Layout

    Think about what kinds of animals you want to attract before you jump in. Setting up different areas is helpful because birds, small animals, amphibians, and insects all have different needs. As an example:

    You will be successful if you map these places and plan the plants, shelters, and water sources that will work best for each species.

    2. Building Shelter for Birds

    Having a safe place for birds to rest and nest is important because they bring life to any yard.

    Create birdhouses:

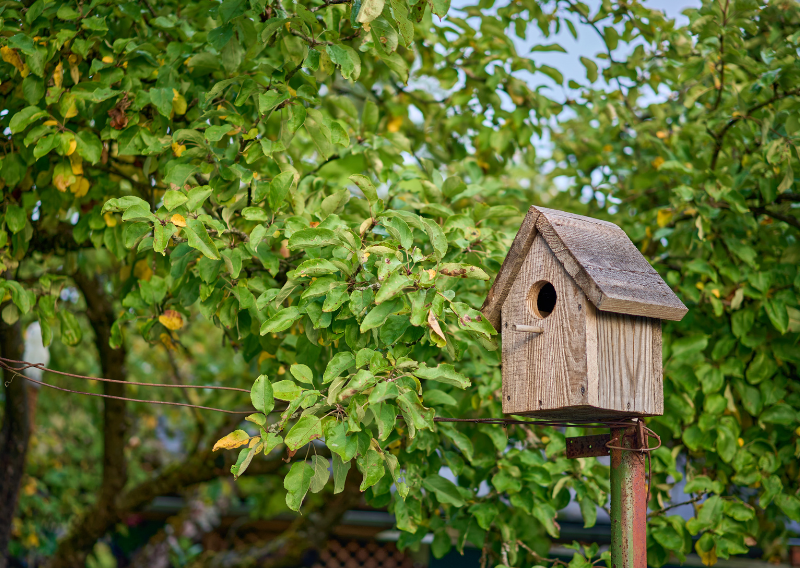
    • Birdhouse basics: To keep predators out, choose birdhouses with small openings and make sure they have enough air flow. Put them up high in trees or on posts out of the way of trouble spots.
    • Nest material stations: Put some feathers, sticks, and moss near the birdhouses to help the birds build their nests.

    Add a birdbath:
    There must be birdbaths! Birds need water for bathing and drinking. Bathing helps their feathers stay clean and able to do their job.

    Plant bird-friendly trees and shrubs:
    Planting a mix of evergreens and deciduous trees offers year-round cover for birds. Holly, elderberry, and hawthorn are good choices as they provide berries and cover for nesting.

    3. Inviting Pollinators: Bees, Butterflies, and More

    To make plants reproduce, pollinators are very important. They also add color to your yard. Here’s how to get their attention:

    Create a “pollinator garden”:

    Plant native flowers in this yard that bloom at different times of the year so that there is a steady supply of nectar. Some great choices are:

    • Spring blooms: Lavender, foxglove, and bluebells
    • Summer blooms: Sunflowers, daisies, and cosmos
    • Fall blooms: Goldenrod, asters, and sedum

    Provide bee hotels:
    It’s easy to make a bee hotel, which gives lone bees a safe place to nest. Make small holes in a block of wood or stack hollow bamboo canes in a waterproof box. Then, put it somewhere warm.

    Keep some “wild” areas:
    Insects like places that aren’t taken care of as much, with weeds or long grass growing in spots. That’s why letting one part of your plant go wild is a great way to get more pollinators.

    4. Creating a Haven for Hedgehogs

    Hedgehogs are excellent pest controllers, feeding on garden slugs, snails, and other pests.

    Set up a hedgehog house:
    You can buy a hedgehog house already made, or you can stack logs and cover them with soil and leaves to make your own. Make sure there is a small hole for the hedgehog to go through.

    Keep passageways open:
    Hedgehogs roam far and wide, often up to a mile each night! Leaving small gaps in fences will help them explore without getting stuck.

    Avoid using pesticides:
    These chemicals can harm hedgehogs and other beneficial insects. Organic pest control methods, like introducing natural predators, will keep your garden safer.

      5. Welcoming Frogs, Toads, and Other Amphibians

      Amphibians control insects in your garden and need specific conditions to feel at home.

      Create a pond:
      It’s amazing how much a small pond can change things. A shallow, sloping pond is best because many frogs have trouble with sharp edges. Don’t add fountains or pumps because they might disturb the environment.

      Provide shelter:
      Amphibians need cool, damp areas. Stack rocks, logs, and leaves around the pond to give them a place to hide during the day.

      Avoid fish in the pond:
      Fish will often eat tadpoles and other small aquatic animals, so if you’re aiming to attract amphibians, it’s best to keep the pond fish-free.

      6. Insect Hotels for Friendly Bugs

      Creating an insect hotel will give beneficial bugs, like ladybugs and lacewings, a safe space to rest and breed.

      What to include in an insect hotel:
      You can make insect hotels with layers of different materials like straw, pine cones, cardboard tubes, bamboo, and dry leaves.

      Where to put the hotel:
      Place it in a sheltered spot near flowers and plants to maximize its attraction to beneficial insects. Insects will appreciate the extra shelter, especially over the winter months.

      7. Adding Native Plants

      Native plants have adapted to the temperature where you live and will help wildlife the most. They are easier to take care of and give birds, pollinators, and small mammals a more stable food source.

      Focus on variety:
      Try to plant a diverse mix of native grasses, flowering plants, shrubs, and trees to encourage a range of wildlife species.

      Include some berry bushes:
      Plants like hawthorn, blackberries, and elderberries are fantastic food sources for birds and other animals in colder months when food can be scarce.

      Here are some essential tips to keep in mind when building your wildlife shelter to ensure it’s safe, sustainable, and welcoming to a variety of species:

      • Avoid chemicals: Using pesticides, herbicides, and man-made fertilizers on your plants and animals can hurt them. Focus on natural options instead, such as compost, companion planting, and natural ways to get rid of pests. These choices are better for the environment and help plants, animals, and even soil microbes that make your garden better live in a healthier setting.

      • Provide fresh water sources: It is very important for wildlife to have a stable water source, like a birdbath, shallow bowl, or pond. It will become a haven for insects and amphibians that need water to grow. Birds and small mammals will also be drawn to it. To make sure it’s safe and fresh for everyone, remember to clean and refill it often, especially when it’s hot outside.

      • Respect nature’s cycle: Some animals may only show up at certain times of the year, like migrating birds or insects that come out at certain times of the year. Enjoy how the rhythms of your garden change as different plants bloom and animals come and go, making it a living, changing place that works for everyone. You need to be patient because it can take a few seasons for a wide range of wildlife to settle down.

      • Add leaf litter and compost: Leaves should gather in some parts of your yard, and compost should be added where it can be used. Bugs, earthworms, and other invertebrates are drawn to things that are breaking down. Birds and small mammals then eat these animals. Compost and leaf piles also provide cover and nesting materials, which is a small but important way that they support biodiversity.

      • Keep some areas “wild”: Put native grasses, shrubs, and plants in a corner of your yard where it can grow a little wilder. This will make a small environment that looks like a natural habitat and gives different animals a place to hide and food. Giving nature a chance to do its thing in a small part of your yard makes your wildlife shelter more interesting to a wider range of species by giving it more depth and variety.

      By following these tips, you’ll set the foundation for a vibrant and sustainable wildlife haven that will attract animals season after season.


      The Benefits of Wildlife Shelters in Your Garden


      Creating a wildlife-friendly garden has many benefits beyond just helping local fauna. Here are some added perks:

      1. Pest control: Animals like hedgehogs, frogs, and birds are natural pest controllers, reducing the need for chemical pesticides.
      2. Increased pollination: Attracting bees, butterflies, and other pollinators will help your plants flourish, leading to more blooms and a productive vegetable garden.
      3. Improved mental health: Connecting with nature has been shown to reduce stress and improve overall mental well-being. Watching wildlife in your garden can be a relaxing, almost meditative activity.
      4. Educational opportunities: A wildlife garden is a living classroom. You’ll be able to learn more about animal behavior, plant growth, and ecosystem interactions, making it perfect for kids and adults alike.

      It doesn’t have to be hard to build a wildlife shelter in your yard. Adding a birdhouse here, a pond there, and letting a corner go wild are some of the careful changes that you can make to make the area more interesting for you and the wildlife that lives nearby. After setting everything up, there’s no better feeling than knowing you’ve made a safe place for animals that might have trouble finding a home otherwise.

      Get a shovel and some native plants, and turn your yard into the wildlife haven it was meant to be!

      0
        0
        Your Cart
        Your cart is emptyReturn to Shop