The Ultimate Guide to Natural Fertilizers: Benefits, Types, and DIY Tips for a Healthier Garden

The Ultimate Guide to Natural Fertilizers: Benefits, Types, and DIY Tips for a Healthier Garden

Fertilizer use in agriculture is rapidly evolving as people become more conscious of its impact on the environment and human health. Because of pollution, soil erosion, and climate change, there is a growing movement toward using natural solutions. Natural fertilizers are leading the way. Gardeners, farmers, and even hobbyists are beginning to prefer natural fertilizers over artificial ones because they last longer and are better for the environment. Synthetic fertilizers are made using industrial chemicals, while natural fertilizers come from organic sources and are meant to feed plants, heal the soil, and make the environment better in a gentle way.

We will explore every aspect of natural fertilizers in this post, including their advantages and varieties as well as doable advice on how to apply them efficiently. Knowing natural fertilizers can let you access a more sustainable and fulfilling gardening experience whether your goals are to lower your environmental impact or just desire to use a more natural method of growing your plants. Let us explore why natural fertilizers could be the hidden component your garden has been waiting for.

Why Choose Natural Fertilizers?

Natural fertilizers, like soil, animal manure, and even some minerals, come from things that are already existing. In contrast to manufactured fertilizers, which are often made through chemical processes, natural fertilizers break down slowly and release nutrients slowly. Since this slower release is more like the natural nutrient cycle in the soil, it is less likely to hurt plants or cause nutritional problems.

Natural nutrients are a good idea because of the following:

  • Better for the Environment: Natural fertilizers provide nutrients at a pace soil and plants can absorb, unlike synthetic fertilizers that can contaminate water systems. This lessens the likelihood of water pollution and runoff.
  • Supports Soil Health: Natural fertilizers feed the soil as well as the plants. They raise the organic matter, fix the structure, and help the soil to hold water.
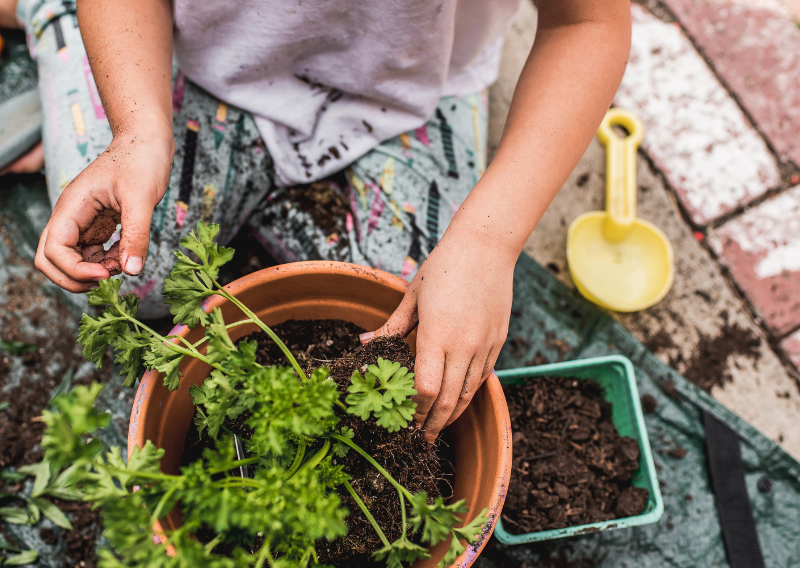
  • Safer for Humans and Animals: Synthetic fertilizers can sometimes contain harmful chemicals. In contrast, natural fertilizers are safe for kids, pets, and local wildlife.
  • Cost-Effective and Sustainable: Many natural fertilizers can be made at home with kitchen scraps or yard waste, making them a budget-friendly option that also reduces waste.

Types of Natural Fertilizers

There are several kinds of natural fertilizers, and every one of them has special value. These are some of the most often used effective types below, together with some quick tips on their application.

  1. Compost
    Rich nutrient value of compost makes it sometimes known as “black gold”. It’s created from broken down organic products including yard waste and culinary leftovers. Beneficial bacteria abound in compost, which aids in the breakdown of organic material in the soil so enhancing the availability of nutrients to plants.
    • How to Use: Mix compost into your garden soil or spread a thin layer on top as a mulch.
    • Benefits: Adds organic matter to the soil, improves soil structure, and increases water retention.
  2. Manure
    Another nutrient-dense fertilizer long utilized for generations is manure, or animal waste. Among the several animals that produce manures are horses, chickens, and cows. Every kind has a distinct nutrient profile, thus you have to pick one that meets the demands of your garden.
    • How to Use: Apply it to your garden soil, but make sure to compost it first. Because it has a lot of nitrogen, fresh manure can burn plants.
    • Benefits: Manure is an excellent source of nitrogen, phosphorus, and potassium. It also adds organic matter, improving soil texture.
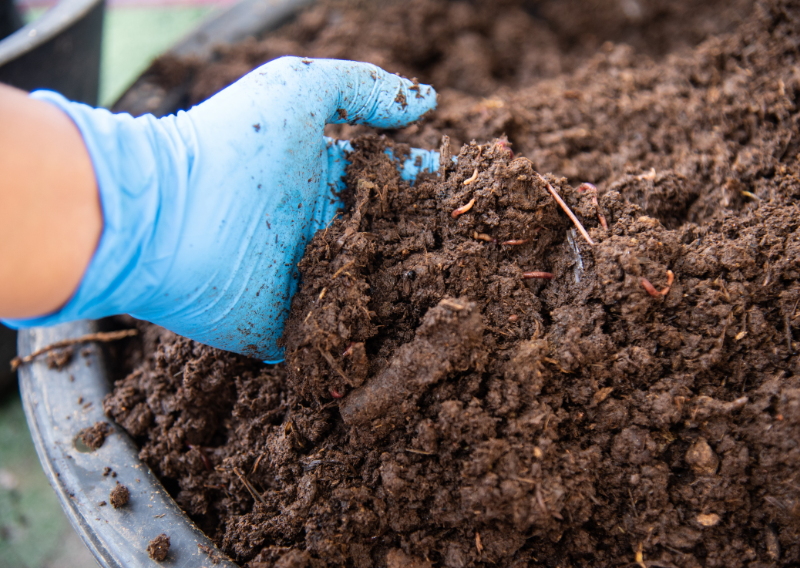
  3. Worm Castings
    Considered to be essentially worm feces, worm castings—also known as worm manure—have lots of nutrients and helpful bacteria. Because it’s mild and won’t burn roots, this fertilizer is especially ideal for potted plants and seedlings.
    • How to Use: Mix into potting soil or sprinkle on top of the soil around plants.
    • Benefits: Provides a balanced nutrient profile and helps improve soil structure.
  4. Wood Ash
    If you have a fireplace, the ash will help your garden. High in potassium and calcium, wood ash can enable pH in acidic soils be raised. Still, it should be used cautiously since too much would turn the ground alkaline.
    • How to Use: Sprinkle lightly over soil and water in. Avoid using around acid-loving plants like blueberries.
    • Benefits: Provides potassium, calcium, and raises pH, making it ideal for gardens with acidic soil.

Benefits of Natural Fertilizers Over Synthetic Ones

It is better to use natural fertilizers instead of manufactured ones in the long run because they have many benefits. Here’s an easy way to compare them:

  • Environmental Impact: Synthetic fertilizers often contain chemicals that leach into water bodies, harming aquatic life. Natural fertilizers, however, are biodegradable and release nutrients slowly, reducing the risk of runoff.
  • Soil Health: Synthetic fertilizers can degrade soil structure over time, while natural fertilizers build up organic matter, fostering a rich, healthy soil ecosystem.
  • Plant Health: Synthetic fertilizers can cause rapid growth, which may lead to weak stems or leaves. Natural fertilizers encourage steady, balanced growth, resulting in stronger, healthier plants.
  • Cost: While synthetic fertilizers might provide an immediate boost, they often need to be applied frequently. Natural fertilizers, on the other hand, improve soil health over time, meaning you may need to apply them less often.

How to Make Your Own Natural Fertilizer

You can often make natural fertilizers at home, which is one of the best things about them. If you want to try some natural fertilizers, here they are.

  1. Compost Tea
    This liquid fertilizer is made by steeping compost in water for a few days. Compost tea is loaded with nutrients and beneficial microorganisms.
    • How to Make: Place a handful of compost in a cloth bag, steep it in a bucket of water for 24–48 hours, and stir occasionally.
    • How to Use: Use as a foliar spray or pour around the base of plants.
  2. Banana Peel Fertilizer
    Banana peels are rich in potassium, which helps plants with flowering and fruiting. You can make banana peel fertilizer by soaking peels in water for a few days.
    • How to Make: Place a few banana peels in a jar of water and let it sit for a few days.
    • How to Use: Pour the water around your plants. You can also bury chopped banana peels directly into the soil.
  3. Epsom Salt Solution
    Epsom salt contains magnesium and sulfur, two essential nutrients that help plants with photosynthesis and overall growth. This works great for roses, tomatoes, and peppers.
    • How to Make: Dissolve a tablespoon of Epsom salt in a gallon of water.
    • How to Use: Use as a foliar spray or pour around the base of plants once a month.

Tips for Using Natural Fertilizers

Natural fertilizers don’t mind if you mess up, but here are some tips to get the most out of them:


  • Don’t Overdo It: Even though they’re natural, too much of any fertilizer can harm plants. Start with a little and add more if you need to.
  • Compost First: Manure and other “hot” fertilizers need to be composted or aged before use to avoid burning plants.
  • Timing Matters: Apply natural fertilizers during the growing season (spring and summer) when plants are actively growing. Avoid applying fertilizers in late fall or winter.
  • Know Your Soil: A soil test can tell you what nutrients are lacking in your garden. This can help you choose the right type of natural fertilizer and avoid nutrient imbalances.

Natural fertilizers will probably become increasingly more common as sustainable gardening methods and organic farming keep developing. Natural fertilizers might shortly provide even greater benefits thanks to continuous study. Scientists are working to improve the nutrient profile of natural fertilizers, hence increasing their availability and efficacy.

Selecting natural fertilizers not only helps your garden flourish but also moves toward a more sustainable environment. Natural fertilizers are a terrific method to help your plants and the surroundings, whether you run a little farm or have tomatoes in your backyard. Try them, then see how beautifully your garden blossoms—never before!

How to Set Up a Rainwater Harvesting System: A Simple Guide

How to Set Up a Rainwater Harvesting System: A Simple Guide

As people become more concerned about the environment and aware of how their actions affect natural resources, collecting rainwater has become a great way to save water and lower your monthly water bill. Setting up a rainwater collection system can be a useful and satisfying way to save water, whether you’re a homeowner who wants to use less water or someone who is just interested in environmentally friendly practices.

In this guide, we’ll talk about the most important parts of a rainwater collection system, explain why they’re useful, and show you how to put one together step by step. We’ll also talk about some mistakes people make and how to take care of your system so it stays in good shape. Let’s start right away!

What is Rainwater Harvesting?

One way to gather and store rainwater that would normally run off your roof and into storm drains is to rainwater harvest. Why let this water go to waste? You can collect it, filter it, and use it for many things, like farming, flushing toilets, and even drinking if you treat it properly. It might seem hard to understand how to collect rainwater, but it’s really not that hard once you get the hang of it.

Why Should You Consider Rainwater Harvesting?

It’s helpful to know why collecting rainwater is a good idea before you start:

  1. Environmental Impact: You can count less on groundwater and city sources when you collect rainwater. These sources are often used up and can lead to droughts.
  2. Saves Money: When you collect rainwater and use it for things other than drinking, like farming or flushing the toilet, you can save a lot of money on your water bill.
  3. Self-Sufficiency: A rainwater system lessens your need for public water sources, which can be especially helpful in places where water limits happen often.
  4. Improves Garden Health: Rainwater is naturally soft and doesn’t contain any chemicals, so it’s great for gardening and plants.

Types of Rainwater Harvesting Systems

You can pick from a few different types of systems based on how you want to use the water and how you like things to be set up:

  • Simple Barrel System: A barrel connected to your gutters will collect water as it flows off the roof and is the easiest way to collect rainwater. It’s simple and doesn’t cost much, but it might only hold a little water.
  • Dry System: A dry system directs water from your roof into a large storage tank and is called “dry” because the pipes empty out after each rain. This option works well for larger storage needs.
  • Wet System: In a wet system, pipes stay full and carry water to a storage tank located further from the house. This setup is ideal for larger properties or when the storage tank isn’t directly next to the downspouts.

What You’ll Need to Get Started

Essential parts for a simple rainwater collecting system are listed here. Feel free to change this depending on the complexity of the system you wish to install.

  1. Catchment Area: Generally your roof is the catchment area for rainwater collecting.
  2. Gutters and Downspouts: These channel straight rainfall from your roof into the storage system.
  3. First-Flush Diverter: Usually the dirtiest since debris on the roof causes, first-flushing diverters direct the first few gallons of rainwater away from the storage tank.
  4. Storage Tank: Your need will determine whether this is a basic barrel, a tank, or a cistern. Verify its water storage capability.
  5. Filter System: While more sophisticated filtering systems can clean the water for drinking, a basic mesh filter can clear out significant trash.
  6. Pump (optional): If you plan to use the water in your home or for irrigation, you may need a pump to help move it from the tank.

    Step-by-Step Guide to Setting Up Your Rainwater Harvesting System

    Let’s look at how to actually set up a simple method for collecting rainwater. These steps can be used for more complex systems as well, but we’ll focus on a simple barrel-based system.

    1. Choose the Right Location for Your Barrel or Tank

    Place your holding tank or barrel near a downspout. Most of the time, picking a spot in the shade is best to keep the water cool and stop bacteria from growing in it. Make sure the ground is level and hard so the big tank can stand up to its weight.

    2. Set Up Your Gutters and Downspouts

    Put gutters along the edge of your roof if you haven’t already. They will collect rainwater and direct it to your drains. Make sure they are free of things like leaves and sticks that could block the flow of water. You might want to add drain guards or leaf screens to make repair work easier.

    3. Install the First-Flush Diverter

    Put a first-flush diverter on the end of your drain. This device helps guide the first flow of rainwater, which is often dirty and polluted, away from your storage tank. A simple diverter is easy to find and install. You can get one at most hardware shops.

    4. Connect Your Downspout to the Storage Tank

    Make sure the drain is securely attached to your barrel or tank so that water doesn’t leak out. For a barrel system, you might need to put in a “downspout diverter kit” that lets water flow into the barrel when it rains and back into the sink when the barrel is full.

    5. Add a Filtration System

    You can put a mesh filter on top of the barrel to keep out leaves, bugs, and other big objects when you’re not drinking it, like when you’re gardening. For drinking water, you’ll need a more modern filtration system with more than one stage, such as one that uses UV light or chemicals to clean the water.

    6. Install a Spigot or Pump

    Put a tap near the bottom of the barrel if you’re using one so you can easily get to the water. If your tank is bigger, you might need a pump to move the water to different parts of your yard or home. Pick a pump size based on what you want to do with the water.


    Maintenance Tips for Your Rainwater Harvesting System

    To keep your rainwater harvesting system running smoothly, regular maintenance is a must. Here’s a simple checklist to ensure everything stays in top shape:

    • Clean Gutters Regularly: Every two months, clean out your gutters of leaves, sticks, and other junk. In the fall, when leaves can quickly clog the system, this is even more important. Make sure your gutters are always clear because clogged gutters can stop the flow of water and damage your system.


    • Inspect the First-Flush Diverter: A lot of dirt gets stuck in the valve, so clean it every couple of months to keep it working. The diverter lowers the amount of dirt in your tank by taking the first, dirtier water from your roof. However, it needs to be maintained for it to work at its best.


    • Check the Filter System: The mesh screens on top of the tank need to be cleaned often to get rid of bigger things like leaves and bugs. For systems that are meant to handle drinking water, more modern filters may need new cartridges or special cleaning. Should you forget to check these filters, germs can grow and make the water unsafe to use.


    • Test for Algae: If your tank gets a lot of sun, algae will likely grow, so look for any signs of yellow buildup in the water. If you see algae, clean the inside of the tank and think about putting it somewhere shadier or covering it. Putting up a small mesh screen can help protect the water from too much sun.


    • Flush the System: Every couple of months, empty the tank all the way to clean out the system and get rid of any sediment or contaminants that may have fallen to the bottom. Many systems have a “tank drain” option that helps with this. Flushing your system regularly will make it last longer, make the water better, and lower the risk of bad smells developing in the tank.

    Typical Mistakes to Avoid

    Although rainwater collection is a quite simple operation, beginners could run across a few typical errors. Avoiding these will save time, money, and aggravation:

    • Underestimating Tank Size: Many start with a tiny barrel only to find it fills rapidly. If at all possible, get a larger tank; carefully estimate your water needs.
    • Ignoring Local Regulations: Before building a system, find out from your local government whether water collecting is restricted in any of the regions.
    • Ignoring Maintenance: It will cause a system to get polluted or choked. The most out of your system depends on regular maintenance.
    • Placing the Tank in Direct Sunlight: Orienting the Tank toward Direct Sunlight Sunlight can cause algal development, rendering the water unfit for use. To stop this, pick a shaded spot or cover the tank.

    Benefits of Rainwater Harvesting in the Long Run

    Although initially requiring some work, installing a rainwater collecting system will pay off in the long run. You can expect the following:

    • Eco-friendly living: For those who care about the environment, collecting rainwater lessens demand on natural resources and makes a great option.
    • Lower Water Bills: Over time, your water savings will mount up and help you save household costs.
    • Better Plant Growth: Perfect for plants as rainwater is naturally soft, pH-balanced, free of salts and chlorine.
    • Emergency Backup: Having collected rainwater on hand will be quite helpful in case of a water scarcity or disaster.

    It might seem hard to set up a rainwater collection system, but once you know the basic parts, all you have to do is gather the materials and follow the steps. A rainwater collection system can be a great job that pays off in the long run, whether you’re a homeowner trying to save money on utilities, an environmentalist, or someone who’s just interested in green living.

    Have a great harvest!

    Gardening with Kids: Simple and Fun Projects You Can Do At Home

    Gardening with Kids: Simple and Fun Projects You Can Do At Home

    Many individuals have always enjoyed gardening because it allows them to connect with nature while also teaching them valuable life skills. Even if you only have a small patch of grass or a few pots on your roof, gardening is a great way to discover new things, grow, and express yourself artistically. More than that, having kids there makes it even more magical. A great way for kids to learn while they play is to garden. Kids are naturally interested and love to do things with their hands. Plus, it’s a fun activity that kids can do outside for hours without a computer and learn skills they can use as adults.

    When you grow plants with children, you teach them about food production, life cycles, and how nature provides for our needs. With some patience and care, children can witness how a small seed can grow into a large flower or a tasty tomato. This is an excellent method to teach children responsibility, encourage creative thinking, and give them a sense of accomplishment. Finally, don’t forget how much joy it was to gather flowers or vegetables from a garden they helped create. They’ll be very proud of it and think they own it.

    Gardening with kids can be both useful and fun for the whole family. We’ll talk about some of the many fun projects and plants that can be used. Whether you’re growing food for dinner or a fairy garden, gardening is a fun way to spend time with friends and family. Here are some of the best gardening ideas, plants that are good for kids, and gardening tips that will make your time in the garden fun!

    Why Gardening with Kids is a Great Idea

    Before we talk about some projects, let’s talk about why gardening with kids is a good idea:

    1. Hands-on Learning: Children learn best when they are involved actively; hence, gardening is a great approach to introducing the natural world to them. They can learn about plant life cycles, photosynthesis, and how ecosystems work while planting seeds and taking care of the garden.
    2. Developing Responsibility: Kids learn responsibility by having to pay attention and work hard to take care of a yard. They’ll quickly learn that plants won’t grow if they don’t water them.
    3. Boosting Creativity: When kids cultivate plants, they can use their imaginations to make choices like what flowers to put on and how to arrange the garden. It makes them feel like their work is their own.
    4. Encouraging Physical Activity: In a world where screen time often takes over, gardening is a way to get kids moving. From digging in the dirt to watering plants, it encourages physical activity and fresh air.
    5. Teaching Patience: Gardening is not an activity that gives you instant gratification. As kids wait for seeds to sprout and plants to grow, they will learn how important it is to be patient.
    6. Bonding Time: It’s a great way for parents and kids to bond. Whether it’s planning the garden together or just enjoying the time outside, gardening can create lasting memories.

    Now that we know why gardening with kids is a good idea, let’s talk about some fun and easy projects you can do.

    Fun Gardening Projects for Kids

    It’s not necessary for every growing project to be a huge job. To keep kids interested, it’s important to start with simple, fun tasks. These are some fun crafts for kids:

    1. Planting a Vegetable Garden

    Kids can really see the fruits of their labor when the vegetables are ready to eat, which makes starting a vegetable garden a great project for them. To begin, follow these steps:

    • Pick Easy-to-Grow Veggies: Some veggies are super easy to grow, which is great for beginners. Radishes, cherry tomatoes, lettuce, and carrots are all excellent choices because they grow quickly and don’t require much maintenance.
    • Start Small: You don’t need a big plot of land. You can even grow veggies in containers or small raised beds. Let your child have their own little section where they can plant their favorites.
    • Harvest Time: One of the most exciting parts is harvesting the veggies! Your child will be thrilled to pull out a carrot they grew from the seed or pick a ripe tomato off the vine.

    2. Creating a Fairy Garden

    This project is a mix of farming and making things up. A fairy garden is a small garden that is meant to be a place for fairies. Making one is easy and takes little room. It’s a fun way to show off your child’s imagination.

    • Pick a Spot: You can build a fairy garden in a small corner of your yard or even in a large pot.
    • Miniature Plants: Choose small, low-growing plants like moss, succulents, or creeping thyme to create a magical miniature world.
    • Fairy Accessories: Add tiny fairy houses, bridges, or small decorations like pebbles and shells. You can find fairy garden kits online, or even better, let your child craft their own fairy furniture from twigs and leaves.

    3. Growing a Sunflower House

    Kids will love this project! A sunflower house is exactly what it sounds like—a building made of very tall sunflowers.

    • Plant Sunflowers in a Circle: To start, create a circular garden bed and plant sunflower seeds around the edge, leaving a small gap for an entrance.
    • Watch Them Grow: Sunflowers grow quickly and can reach impressive heights. As they grow, they’ll create a natural “wall” around the space, making it a fun little hideaway for your child.
    • Add a Roof: Once the sunflowers are tall enough, you can tie the tops of the plants together to form a roof. You could even drape a lightweight fabric or netting over the top to create more of an enclosed space.

    4. Building a Worm Compost Bin

    Worms are very important to the health of a garden, even though some people don’t like them. A worm compost bin is a fun way to teach kids about composting and how to recycle food scraps.

    • Get a Bin: You can use a simple plastic bin or a wooden box. Make sure it has holes for drainage and airflow.
    • Add the Worms: You’ll need special composting worms, like red wigglers. You can buy these from a garden store or online.
    • Feed the Worms: Let your child help feed the worms with fruit and vegetable scraps. Over time, the worms will turn this food into rich compost that you can use in your garden.

    5. Herb Garden in a Window Box

    It’s easy to grow herbs, and they smell great! You can put together a small herb plant on your windowsill or in a small box on the patio. It’s a great project for kids.

    • Choose Your Herbs: Some easy herbs to grow include basil, parsley, mint, and chives. They’re fast-growing and don’t require too much care.
    • Plant the Seeds: Let your child help plant the herb seeds in small containers or a window box.
    • Snip and Enjoy: Once the herbs are grown, you can snip fresh herbs to use in cooking together. It’s a great way to connect the garden to the kitchen.

    Best Plants for Kids to Grow

    Not every plant is easy to grow, and if you want to garden with kids, it’s best to start with plants that won’t die. These plants are fun for kids to grow and are also easy to take care of.

    1. Sunflowers

    Sunflowers are great for kids’ gardens because they grow big and bright. Kids love seeing the big flowers open, and it’s really simple to grow them from seeds. You can also pick the seeds for a tasty snack after they bloom.

    2. Snapdragons

    Kids will enjoy these bright flowers because they can “snap” open and shut like tiny dragon mouths. No matter what the weather is like, Snapdragons will grow well.

    3. Pumpkins

    Pumpkins are a great plant for kids to grow if you have enough room. They grow more slowly at first, but quickly after that! It’s extra fun to grow pumpkins around Halloween when your child can cut a pumpkin that they helped grow.

    4. Strawberries

    Fresh strawberries are great for everyone. They’re tasty, simple to grow, and easy for little hands to pick. You can grow strawberry plants in the ground or in pots, and they will keep giving you fruit all season.

    5. Marigolds

    Marigolds are very easy to grow and have bright, happy flowers. Also, because they keep bugs away, they make great plants to grow with vegetables. Kids will love how bright they are and how quickly they grow.

    Tips for Gardening with Kids

    Gardening with kids can be a fun adventure, but here are a few tips to make sure it stays enjoyable for everyone:

    • Start with Easy Projects: Kids can get discouraged if they don’t see results quickly. Start with simple, fast-growing plants so they can see progress and stay interested.
    • Get Kid-Sized Tools: It can be more fun and meaningful for kids to grow if they have their own set of kid-sized tools. You will only need gloves, a small shovel, and a watering can.
    • Make it Playful: Incorporate fun activities like treasure hunts (bury small toys for them to find while digging) or create a scavenger hunt where they have to find certain types of leaves, bugs, or flowers in the garden.
    • Let Them Get Dirty: Gardening is a messy job, and that’s okay! Let your kids play in the dirt and explore without worrying too much about keeping them clean.
    • Be Patient: Sometimes kids might not do what’s “right” in the yard. They might water plants too much or put seeds too deeply, but that’s how they learn. Allow them to fail and learn from it.

    You can have fun, learn about nature, and grow as a person while gardening with your kids. What you can do is up to you. You can grow a small plant garden on your porch or make a magical fairy garden. You need to do more than just grow plants; you also need to get people excited and creative. Plant some seeds and watch your kids grow as the garden does.

    Happy planting!

    Simple Tips About How You Can Create Bonsai: Beginner-Friendly Guide

    Simple Tips About How You Can Create Bonsai: Beginner-Friendly Guide

    Bonsai is more than a hobby; it is an art form that fosters patience, creativity, and a deep appreciation for nature. People who are new to bonsai may find it overwhelming at first. It may appear to be a private group, given its unique procedures, language, and regulations. In actuality, anyone can begin cultivating bonsai with the right support and attitude. This article will introduce you to the fascinating art of bonsai, provide you with the necessary information to get started, and inspire you to develop your own little tree masterpiece.

    Understanding Bonsai: More than Just Small Trees

    Before we get into the practical aspects of growing bonsai trees, it’s necessary to understand what bonsai is all about. The phrase “bonsai” is derived from the Japanese terms “bon” meaning tray or container, and “sai” meaning planting. Bonsai is the art of cultivating and styling tiny trees in pots. The primary goal of bonsai is to create miniature trees that resemble nature, displaying their beauty on a small scale while focusing on being artistic.

    It’s important to recognize that bonsai is not a specific sort of tree. Instead, it includes a variety of tree types and styles. Almost any tree, from the elegant Juniper to the frail Maple, may be converted into a bonsai with the proper techniques. In addition, bonsai trees can be classified into several styles based on their shape and growth patterns. Here are some fashionable styles:

    • Formal Upright (Chokkan): A straight, vertical trunk that represents strength and stability.
    • Informal Upright (Moyogi): A trunk that has gentle curves, depicting a more natural look.
    • Slanting (Shakan): A tree with a trunk that slants to one side, often mimicking trees affected by wind.
    • Cascade (Kengai): A tree that appears to be cascading down from its pot, resembling trees growing on cliffs.

    The bonsai world provides many opportunities for creativity and self-expression.

    Choosing Your First Bonsai Tree

    Choosing the right sort of tree is critical for those who are just starting out. It will affect not only the growth of your bonsai tree, but also the amount of time and work required to care for it. Here are some easy varieties for beginners to consider:

    1. Ficus: The Ficus tree is well-known for its resilience, making it ideal for those just getting started. It adapts nicely to interior settings and can withstand a wide range of lighting conditions.
    2. Juniper: Junipers, a traditional choice, are sturdy and may be grown both indoors and outdoors. They have gorgeous foliage and are commonly used in informal upright and cascade forms.
    3. Chinese Elm: This tree is forgiving and may survive in a variety of conditions. It also has beautiful, textured bark that makes it visually appealing.
    4. Pine: Pines are legendary bonsai trees that reward growers with outstanding esthetic appeal and longevity, despite being slightly more difficult to grow.

    Think about the weather where you live and whether you want to keep the bonsai tree inside or outside when you choose one. Also, make sure you buy from well-known plant stores or bonsai shops. These places will have healthy trees that are good for growing bonsai.

    The Essential Tools of the Trade

    You will need some easy tools to help you with the bonsai process after you choose your tree. People who are new to bonsai should think about these important tools:

    • Pruning Shears: These are essential for trimming branches and leaves. Look for sharp, durable shears that can make clean cuts.
    • Wire: Aluminum or copper wire is used to shape the branches of your bonsai. Make sure to choose the appropriate gauge based on the thickness of the branches.
    • Bonsai Soil: Specialized bonsai soil helps with drainage and aeration, crucial for the health of your tree. It usually consists of a mix of akadama, pumice, and lava rock.
    • Root Rake: This tool is helpful for untangling roots during repotting.
    • Watering Can: A can with a fine spout allows for controlled watering, preventing over-saturation of the soil.

    Making and taking care of your bonsai will be much easier and more fun if you have the right tools on hand.

    The Basics of Bonsai Care

    Okay, you have your tree and tools. Now it’s time to learn how to take care of your bonsai. For bonsai trees to grow well, they need certain conditions. You will do better if you know these basics.

    Watering

    It’s very important to water bonsai trees the right way. How often you water a plant will depend on the type of tree, the weather, and the size of the pot. Put your finger about an inch deep into the ground to see how wet it is. It’s time to water the plants when the ground is dry. Here’s how to water trees the right way:

    • Use Room Temperature Water: Cold water can shock the roots, while hot water can damage them.
    • Water Thoroughly: Ensure water reaches all the roots by watering until you see it draining from the bottom of the pot.
    • Avoid Overwatering: Root rot can happen if you water too much. Always err on the side of underwatering, especially when you’re just starting.

    Pruning and Shaping

    Pruning is an important part of growing bonsai. It helps keep the shape you want and promotes new growth. Here are some important ways to prune:

    • Maintenance Pruning: This involves removing unnecessary branches and leaves to shape your bonsai. Aim to prune after the growing season to minimize stress on the tree.
    • Structural Pruning: This is done less frequently and focuses on shaping the tree’s overall structure. It typically occurs during the tree’s dormancy period.
    • Wiring: One popular way to shape branches is to use wire. Wrap the wire around the branches gently, being careful not to damage the bark. Bend the branches into your desired shape and remove the wire after a few months.

    Fertilizing

    Fertilizing is important for giving your bonsai the food it needs to grow well. Choose a fertilizer that is safe for bonsai plants and provides nutrients slowly. During the time when the plants are busy growing, use it. Adding fertilizer should happen every four to six weeks, but how often depends on how fast the tree is growing and the time of year.

    Light Requirements

    Different types of bonsai need different amounts of light. Most bonsai like bright light that comes from the side. Here are some rules to follow:

    • Indoor Bonsai: Place them near a window with plenty of natural light. Consider using grow lights during winter months when sunlight is limited.
    • Outdoor Bonsai: Position them in a spot that receives morning sun and afternoon shade to prevent leaf scorch.

    The Art of Repotting

    When you take care of bonsai trees, you have to transplant them. It is done every one to three years, but it depends on the tree and how fast it grows. It is very important to feed the tree the right things and keep the roots healthy. To move your bonsai to a new pot, do the following:

    1. Choose the Right Time: The best time to repot is during the spring, just before the growing season begins.
    2. Prepare Your Materials: Gather fresh bonsai soil, a new pot (if needed), and your tools.
    3. Remove the Tree: Carefully take the tree out of its pot. Gently tease out the roots, removing any dead or unhealthy ones.
    4. Prune the Roots: Trim back any overly long or thick roots. Aim to maintain a balanced root structure.
    5. Place in New Soil: Position the tree in the new pot with fresh soil, making sure it’s centered and stable. Water thoroughly after repotting.

    Common Mistakes to Avoid

    Every beginner makes mistakes, and that’s okay! However, being aware of common pitfalls can help you navigate your bonsai journey more smoothly. Here are a few mistakes to avoid:

    • Overwatering: One of the most common mistakes. Always check the soil moisture before watering.
    • Ignoring the Tree’s Needs: Different species have different care requirements. Research your specific tree to provide the best care.
    • Rushing the Process: Bonsai is about patience. Don’t rush through pruning or shaping; let your tree grow and develop at its own pace.
    • Neglecting Seasonal Changes: Adjust your care routine according to the seasons. Indoor trees may need extra attention during winter.

    Joining the Bonsai Community

    It’s great to be able to grow bonsai trees with other people who are also interested in it. Joining a bonsai group in your area or an online community can help you, give you ideas, and cheer you on. You can better understand and enjoy this art form by sharing your thoughts, asking questions, and learning from people who have done bonsai for a long time.

    If you want to meet other bonsai fans and see some really cool plants, you can go to classes or shows. Having these kinds of relationships can keep you motivated and make you love this old art form even more.

    You need to be patient, know what you’re doing, and really love nature to grow bonsai plants. When you first start out, you may run into problems, but each one will help you become a better bonsai artist. You will find a unique way to do things that shows who you are and what you want by trying and being willing to learn.

    Pick out a tree and get ready to learn about bonsai. In addition to being fun, taking care of a live work of art will help you connect with nature and be more creative. Have fun making these trees!

    How To Design Your Raised Bed Permaculture: A Sustainable Approach to Gardening

    How To Design Your Raised Bed Permaculture: A Sustainable Approach to Gardening

    In the past few years, the idea of permaculture has become more and more common, especially among people who care about the environment and love gardening. Permaculture is a way of life that includes growing food and taking care of the earth too. It is characterized by the combination of sustainable living concepts with innovative gardening techniques. A strategy that is becoming increasingly common is the utilization of raised beds, which is at the core of this activity. The use of raised beds for gardening not only improves the quality of the soil and makes the most of the available area, but it also supports sustainable practices and fosters biodiversity. A better grasp of raised bed permaculture is becoming increasingly important for anybody who is interested in having a positive impact on the environment. This is because an increasing number of people are looking to reconnect with nature and grow their own food.

    In this essay, we will explore the world of raised bed permaculture and discuss its many advantages, as well as design concerns, plant selection, and care procedures. This article contains information that is helpful for anyone who is interested in developing a garden that is both prospering and sustainable, regardless of whether they are a beginner gardener or a seasoned professional.

    What is Permaculture?

    Let’s take a moment to talk about what permaculture is before we get into the details of raised bed permaculture. From the words “permanent” and “agriculture,” “permaculture” is a design idea that uses natural ecosystems to make homes that people can live in for a long time. Its main goal is to make systems that can provide food, water, shelter, and energy while having little effect on the world. Permaculture’s main ideas stress how important it is to pay attention to natural trends, include different kinds of plants and animals, and work with nature instead of against it.

    Why Choose Raised Beds?

    For many reasons, raised beds are becoming more popular. They are a great choice for anyone interested in permaculture. Here are some of the best reasons to garden in raised beds:

    1. Improved Soil Quality: With raised beds, you can mix the soil in a way that meets the needs of your plants. You can change the pH, ventilation, and nutrients in the soil, which makes plants healthier.
    2. Better Drainage: Raised beds help water drain better, which keeps plants from getting flooded and root rot. This is especially helpful in places where it rains a lot.
    3. Easier Access: People who have trouble moving around can grow more easily with raised beds because they are easier to take care of. You can make them taller so that you don’t have to bend down as much.
    4. Extended Growing Season: It is possible to plant earlier because the soil in raised beds warms up faster in the spring. You can also make the growing season last longer by using methods like plant covers.
    5. Weed and Pest Management: It’s easier to get rid of weeds and pests when the area is clear. It is possible to build walls around raised beds to keep animals out.
    6. Aesthetic Appeal: You can make raised beds to fit into any landscape. They give your garden structure and visual interest.
    7. Soil Conservation: By building raised beds, you minimize soil erosion, especially on sloped terrain, promoting long-term soil health.

    Designing Your Raised Bed

    These are some of the most important things to keep in mind when planning raised beds for permaculture:

    Location

    Picking the right spot for your raised beds is important if you want to get the most out of them. Pick a spot that gets at least six hours of sun every day. Most herbs and veggies do best in bright light. To find the best spot, pay attention to how the sun moves across your garden at different times of the day and in different seasons. Also, think about the environment around your plants. Trees or buildings can cast unwanted shade, which will slow their growth. You should also pick a spot that drains well so water doesn’t pool around the roots. Lastly, think about how easy it is to get to your garden. Putting your raised beds near a water source and your house will make upkeep much easier and make you more likely to visit your garden more often.

    Bed Size and Shape

    It’s possible for raised beds to be round, square, or even rectangle. Most raised beds are 4 feet wide and 6 to 8 feet long, which makes them easy to get to from both sides. If you want a more formal look, you could make geometric shapes or paths between the beds so that you can easily move around the yard.

    Material Choices

    Different kinds of products can be used to make raised beds, such as:

    • Wood: A lot of people choose untreated wood, but to make sure it lasts, you should use rot-resistant types like cedar or oak. Treat wood shouldn’t be used because poisons can get into the ground.
    • Stone or Brick: For a more permanent structure, stone or brick can be aesthetically pleasing and durable.
    • Metal: Corrugated metal beds can provide a modern look, but be cautious of potential overheating in hot climates.
    • Recycled Materials: Old pallets, tires, or even concrete blocks can be creatively repurposed for raised beds.

    Soil Preparation

    Soil is the most important part of any garden. Using a mix of topsoil, compost, and organic waste, you can make your own soil mix for raised beds. Here’s an easy way to make raised bed soil that is balanced:

    • 40% Topsoil: Provides structure and essential nutrients.
    • 30% Compost: This adds nutrients and good microbes to the soil.
    • 30% Organic Matter: Such as peat moss, coconut coir, or well-rotted manure, to improve aeration and moisture retention.

      Choosing the Right Plants

      The great thing about permaculture is that it focuses on different kinds of life. Putting different kinds of plants in your raised beds can help the environment stay strong. Here are some things to think about when choosing plants:

      Companion Planting

      Companion planting is a technique where certain plants are grown together for mutual benefits, such as pest control, improved growth, and enhanced flavor. Here are a few famous companion plant pairings:

      • Tomatoes and Basil: Basil can deter pests and improve the flavor of tomatoes.
      • Carrots and Onions: Carrot flies can be scared away by the strong smell of onions.
      • Beans and Corn: Beans fix nitrogen in the soil, benefiting the corn, while the corn provides support for the climbing beans.

      Perennials vs. Annuals

      In permaculture, incorporating perennial plants—those that live for multiple years—can help establish a sustainable garden. Here are some examples:

      • Perennial Herbs: Such as thyme, oregano, and chives.
      • Fruit Trees and Bushes: Consider dwarf varieties for raised beds.
      • Edible Perennials: Like asparagus and rhubarb, which can provide harvests for years.

      Maintenance Practices

      Maintaining a raised bed permaculture garden requires ongoing care and attention. Here are some practices to ensure your garden thrives:

      Mulching

      Applying a layer of organic mulch—such as straw, wood chips, or shredded leaves—helps retain moisture, suppress weeds, and gradually enrich the soil as it breaks down. Mulching also moderates soil temperature, protecting plant roots from extreme fluctuations.

      Watering Wisely

      Watering is an important part of taking care of a garden. In general, raised beds need to be watered more often, especially when it’s warmer outside. For effective watering that goes straight to the roots, think about using drip irrigation or soaking hoses. Check to see how wet the soil is before you water; it’s better to water deeply less often than to water shallowly more often.

      Crop Rotation

      Practicing crop rotation each season can help prevent soil depletion and reduce the risk of pests and diseases. Plan your planting so that different plant families occupy the beds in successive years.

      Pest and Disease Management

      One of the key principles of permaculture is to work with nature rather than against it. Here are some natural pest management strategies to consider:

      • Encourage Beneficial Insects: Plant flowers like marigolds or dill to attract pollinators and predatory insects that feed on pests.
      • Physical Barriers: Use row covers or netting to protect young plants from pests.
      • Natural Remedies: Homemade sprays with garlic, chili pepper, or soap can deter pests without harming beneficial insects.

      The Role of Community in Permaculture

      Permaculture promotes the value of community and working together, even though gardening is often done alone. Joining gardening groups in your area, community gardens, or online forums not only gives you useful information and support, but it also makes you feel like you fit with people who share your interests. Sharing seeds, plants, and gardening experiences makes our ties to the land and to each other stronger. This builds a support system that makes gardening more fun. Getting people in your community involved in permaculture can also lead to bigger projects like food forests or educational workshops that teach people about sustainable practices and give them tools to learn. When groups share resources and information, they can be better prepared to deal with problems like climate change and food insecurity. In the end, working together not only grows a healthy garden but also a strong group of people who care about growth and sustainability.

      Exploring raised bed permaculture is a fun activity that also helps the environment. Gardeners can enjoy abundant harvests while also benefiting the environment by creating self-sustaining ecosystems. Whether you’re a beginner or an experienced gardener, following raised bed permaculture principles can lead to a more rewarding and sustainable gardening experience.

      So, grab your gardening hands, get creative with your designs, and get planting! Your journey into the world of raised bed permaculture is only beginning, and the opportunities are limitless. 

      Happy gardening!

      0
        0
        Your Cart
        Your cart is emptyReturn to Shop