How To Do Eco-Friendly Gardening: The Benefits of Biodegradable Pots

How To Do Eco-Friendly Gardening: The Benefits of Biodegradable Pots

More individuals are beginning to understand in recent years how crucial it is to make sustainable decisions, particularly in relation to landscaping and gardening. The usage of biodegradable pots and planters is one item that is swiftly taking on. Planting your preferred herbs, flowers, or vegetables in a container that doesn’t wind up as garbage is simply organically broken down and returned to the ground! This makes biodegradable pots not only environmentally friendly but also really handy. Let’s explore closely what these pots are, why they’re so fantastic, and some fascinating choices available.

What are Biodegradable Pots?


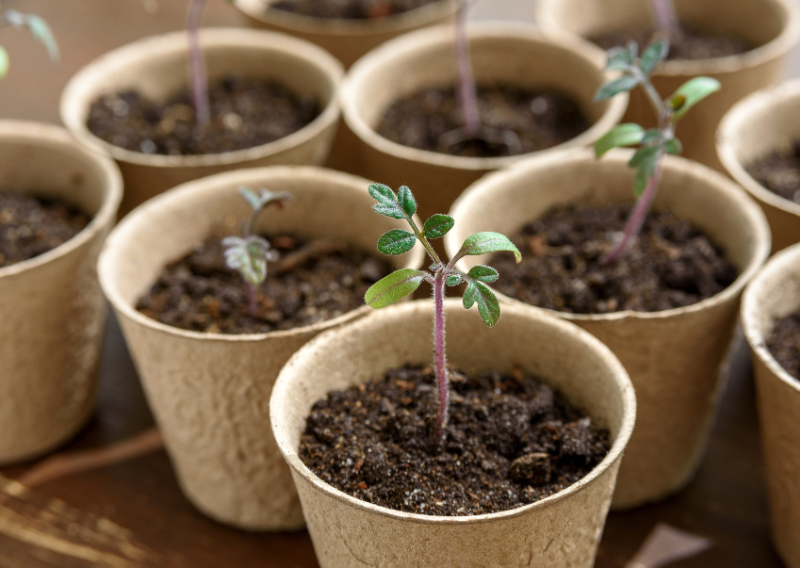
Biodegradable pots are just plant containers made from materials that break down on their own over time, usually when they come into contact with dirt, water, and microorganisms. These pots don’t leave behind a lot of waste like plastic or ceramic pots do. Instead, they break down and become part of the earth. Wood fiber, coconut coir, peat, rice husks, and even recycled paper are all common products.

Biodegradable pots are different because they last longer. Biodegradable pots are meant to do their job and then break down naturally, while plastic pots can last for decades in a dump. They can break down in a few months to two years, depending on the material and the weather. This means there is less plastic in the seas and soil.

Why Choose Biodegradable Pots?

Biodegradable pots aren’t just a trend for people who care about the environment; they’re a real change in how we plant and care for the environment. Even though traditional plastic pots are convenient, they can have a big effect on the world over time. They often end up in landfills, but they don’t break down. Instead, they add to plastic waste and may even release chemicals into the soil. Picking biodegradable pots over regular ones is a small action that has a big effect, helping the earth and being useful at the same time. Here are some strong reasons to switch to plants that break down naturally:

  1. Eco-Friendly and Sustainable

    Biodegradable pots are made from natural materials that can be used again and again, like coconut coir, wood fiber, rice husks, peat, and sometimes even recycled paper. In other words, these pots don’t need resources that come from oil like plastic does. When you throw away biodegradable pots, they break down naturally into the dirt, leaving no harmful waste or residues behind. Also, choosing green materials lowers the need for nonrenewable resources, which helps make the production cycle more environmentally friendly.

  2. Reduced Plastic Waste

    Millions of plastic pots are thrown away every year after only one use. Most of the time, these pots end up in dumps or fires, where they can release harmful chemicals. They can take hundreds or even thousands of years to break down in dumps. The biodegradable pots, on the other hand, break down in a few months to a few years, based on the material, the soil, and the weather. In the end, this means a cleaner, healthier world with a lot less trash in the oceans and landfills.


  3. Healthier Plant Growth

    A lot of recyclable pots are also good for plant health. Because they are made from natural materials, they automatically let more air and water get to the roots of plants. Better air helps roots grow strong and stops problems like root rot from happening. Also, some things, like coconut coir, wood fiber, or cow manure, break down and add nutrients to the soil, making it a better place to grow plants. As these things break down, they can release nutrients that help plants grow well, especially in the beginning.


  4. Minimizes Root Shock During Transplanting

    Plants can get stressed when they are moved from pots to the yard because their roots are often stressed during the process. This problem doesn’t exist at all with many biodegradable pots because they are made to be planted right into the dirt with the plant. In the yard, the pot breaks down over time, letting the roots spread out on their own without having to be taken out. This straight planting lessens transplant shock, which helps your plants get used to their new home more quickly. In the long run, this can make your plants healthier and stronger.


  5. Convenience and Time-Saving

    Biodegradable pots are very helpful for both experienced farmers and people who are just starting out. You can plant the whole biodegradable pot into the ground instead of taking plants out of plastic pots and worried about damaging the roots. This can help you save time, especially when you have a lot of plants to grow. These pots don’t need to be kept or used again, so they can help clear out your garden shed and make it a cleaner place.


Types of Biodegradable Pots

Different types of materials are used to make biodegradable pots, and each has its own benefits and traits. Here is a list of some common types:


  1. Coconut Coir Pots

    • Made from coconut husks, these pots are a byproduct of the coconut industry. They are sturdy, retain moisture well, and can last a bit longer than some other biodegradable options.
    • Benefits: Naturally resists fungal growth, and the coir itself can add structure to the soil as it decomposes.
    • Best for: vegetables and herbs, especially in dry climates where moisture retention is helpful.
  2. Peat Pots


    • Peat is harvested from peat bogs, which store carbon and have been around for thousands of years. Peat pots have been a staple for gardeners for a long time because of their soil-like texture and ability to hold moisture.
    • Benefits: Great for seedlings; easy to transplant without disturbing roots.
    • Best for: Starting seeds of almost any kind.
  3. Wood Fiber Pots


    • These are made from compressed wood fibers, sometimes mixed with natural resins or biodegradable glue. They tend to be a bit more rigid, making them feel similar to traditional pots.
    • Benefits: Sturdy, often last a full season and can add organic material to the soil.
    • Best for: flowers and annuals, especially those that need sturdy support.
  4. Rice Husk Pots


    • Created from rice husks bound together by natural binders, these pots are becoming a trendy option because they are durable yet completely compostable.
    • Benefits: Long-lasting, sustainable, and unique in appearance.
    • Best for: ornamental plants, succulents, and flowers.
  5. Cow Manure Pots


    • It might sound strange, but pots made from sterilized cow manure are great for gardening. They’re sturdy enough to hold up while seedlings grow and eventually break down in the soil, adding nutrients.
    • Benefits: Provides a natural fertilizer boost to the soil and promotes healthy plant growth.
    • Best for: vegetable seedlings, herbs, and flowers.
  6. Recycled Paper Pots


    • Made from compressed recycled paper, these are often the most budget-friendly biodegradable option. They aren’t the longest-lasting, but they work well for short-term use and are easily compostable.
    • Benefits: super lightweight, budget-friendly, great for large-scale projects.
    • Best for: Starting seeds, quick-growing plants.

How to Use Biodegradable Pots

Biodegradable pots are mostly beginner-friendly, but there are a few tricks to get the most out of them.

  1. Don’t Overwater: Biodegradable pots are more likely to absorb water than traditional pots, so it’s easy to overwater. Keep an eye on moisture levels.
  2. Plant the Whole Pot: When your plant is ready to go in the garden, plant the entire pot if it’s one designed for in-ground planting. This helps avoid disturbing the roots and gives them a stable transition.
  3. Break Up Rigid Pots: Some biodegradable pots, like wood fiber pots, can be more rigid. Breaking up the pot slightly before planting it can help roots spread more easily.
  4. Choose the Right Material: Different plants have different needs. Choose a potting material that complements your plant’s growth pattern and moisture preferences.

Pros and Cons of Biodegradable Pots

Like anything, biodegradable pots have their own pros and cons. Here’s a quick look:

Pros
  • Eco-Friendly: They reduce plastic waste and often use renewable resources.
  • Easy Planting: You can transplant directly into the soil without disturbing the plant.
  • Adds Nutrients: Certain materials, like manure and coconut coir, can add nutrients to the soil.
  • Compostable: Many types can be tossed into compost piles after use, adding organic material back into the ecosystem.
Cons
  • Short Lifespan: If you’re used to pots that last years, biodegradable pots may feel like they need replacing often.
  • Water Sensitivity: Since they absorb moisture, biodegradable pots can break down more quickly if left overly wet.
  • Price: Some types, like coconut coir and rice husk pots, can be pricier than plastic, though it’s often balanced out by their environmental benefits.

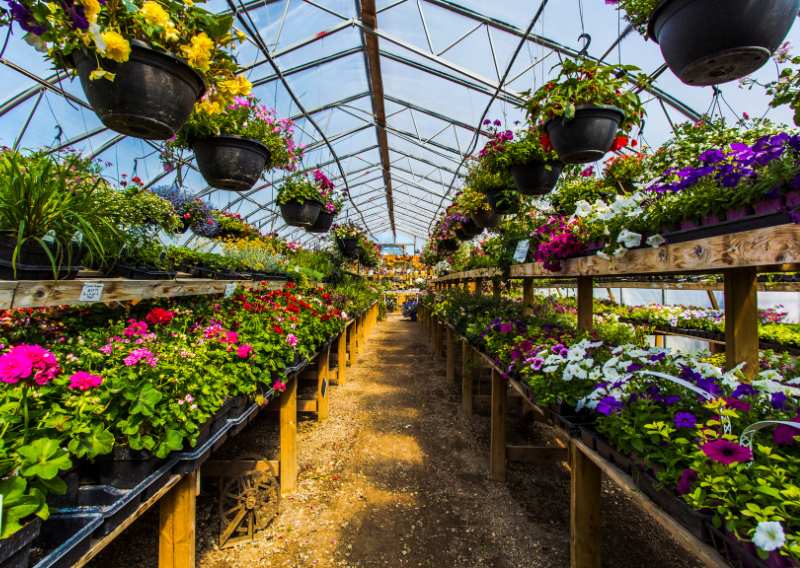
Where to Buy Biodegradable Pots

It’s easier than ever to find biodegradable pots because they are becoming more popular. Online stores like Amazon have a good selection, but gardening stores and websites that sell eco-friendly home supplies may have a wider choice of items that fit your needs. It’s possible to find them at a nearby farm as well, especially if it focuses on eco-friendly gardening. It might cost a little more than plastic pots, but the peace of mind that comes from knowing you’re being good to the earth is worth it.

Caring for Biodegradable Pots

Because they break down faster than plastic pots, biodegradable pots need a little extra care. To make them last as long as possible before you put them, follow these tips:

  • Keep Them in a Shaded Area: Sunlight can make biodegradable materials dry out and deteriorate faster.
  • Monitor Moisture: While plants in plastic pots might be fine if you leave them in a saucer of water for a while, biodegradable pots can get too soggy. Avoid leaving them in standing water.
  • Use a Tray or Liner: If you’re growing seedlings indoors, place biodegradable pots on a tray to catch excess moisture. This protects surfaces and can prevent the pot from breaking down too quickly. 

Fun DIY: Making Your Own Biodegradable Pots

You could make your own recyclable pots at home if you’re feeling crafty. You can use everyday things like toilet paper rolls or even newspapers. Start with this easy-to-follow guide:

  1. Newspaper Pots: Take a few pages of the newspaper, roll them around a jar or can to create a cylinder, and fold them in one end to create a base. It’s cheap, easy, and compostable.
  2. Toilet Paper Rolls: Cut a toilet paper roll in half, then cut small slits around one end and fold them inward to form a base. They’re perfect for starting seeds.

Biodegradable pots and planters are a great way to garden in a world that is becoming more aware of how our actions affect the earth. They are a convenient and eco-friendly option to plastic pots that gardeners can use to help cut down on waste. You’ll be able to find the right biodegradable item for your gardening needs since there are so many kinds and uses for them.

Happy gardening!

How To Grow Living Fences: Beautiful and Natural Barriers

How To Grow Living Fences: Beautiful and Natural Barriers

In the past few years, the idea of living fences has become popular among both property owners and people who like landscaping. Living fences are a unique, eco-friendly option to traditional barriers made of wood or metal. They not only mark the boundaries of your property but also make your landscape look better. As people become more aware of the environment, more of them are looking for ways to make their houses and gardens more eco-friendly. This piece talks about the pros, cons, types, and upkeep of living fences. It also gives you some ideas on how to make your own green wall. Grab a coffee, and let’s learn more about the interesting world of live fences!

What Are Living Fences?

Putting trees, shrubs, or other plants in a row to make a border is what living fences are all about. These natural walls can be used for many things, like privacy, wind protection, and even as homes for animals. The lovely thing about a live fence is that it can grow and change with the seasons, adding something new to your yard. Picture the bright flowers in spring, the lush greens of summer, the beautiful colors of fall, and the quiet beauty of bare trees in winter. This show that changes all the time can be both soothing and beautiful to look at.

Historical Context

Living fences have been used for hundreds of years, which shows how useful and timeless they are. In the past, people put thorny bushes and vines around their homes to keep animals and people from getting in. To protect their homes, the Maasi people in East Africa still use living fence made of acacia trees. Not only do these fences keep people out, but they are also very important to the environment because they give different species food and a place to live. Living fences have been seen as a sign of power and resilience in many cultures. They also show how people and nature can live together peacefully.

Why Choose a Living Fence?

There are several compelling reasons to consider incorporating a living fence into your landscape design:

1. Environmental Benefits

Living fences are a big part of protecting wildlife. They help keep the environment balanced by giving birds, bugs, and other animals a place to live and food to eat. A lot of plants not only provide shelter but also bring pollinators like bees and butterflies, which are very important for plant growth. Living fences can also make the air better by removing carbon dioxide and releasing oxygen, which makes the surroundings healthier. Planting a living fence will not only make your home look better; but it will also help the environment.

2. Aesthetic Appeal

With so many plant choices, you can make a barrier that looks great and goes with your home and yard. Different plants’ colors, shapes, and textures can come together to make a beautiful fabric that changes with the seasons. Your live fence will become the center of attention in your yard when seasonal changes happen, like flowers blooming or leaves turning bright colors. It would be great to walk outside and see your living fence covered in soft snow or bright flowers. It’s a sight that never gets old.

3. Cost-Effective

Setting up a live fence might take more work at first than setting up a regular fence, but it might save you money in the long run. Living fence can give you natural shade, which can save you money on cooling your home in the summer. Also, they don’t need as much upkeep as wooden or metal gates, which may need to be fixed or replaced over time. Over time, the money you save on materials and upkeep can add up to a lot, which makes living fence a smart deal.

4. Privacy and Noise Reduction

Living fences can be good privacy screens that keep people from seeing your outdoor area. With careful planning, a living fence can turn your yard into a peaceful place where you can rest without being bothered by neighbors or people walking by. Also, dense plants can help absorb sound, making the area less noisy from nearby roads or neighbors and making it quieter. This natural sound barrier can turn your yard into a peaceful spot where you can relax and enjoy nature’s beauty.

5. Soil Erosion Control

Plant roots are very important for keeping the dirt stable and stopping it from washing away. This can be especially helpful in places where it rains a lot or where soil runoff is a problem on hills. It is possible for a live fence to naturally stop soil loss and encourage healthy soil growth. You are not only protecting your land by stopping erosion, but you are also helping the health of the environment around you.

Choosing the Right Plants

Choosing the right plants is very important when thinking about a live fence. You might want to think about these popular choices:

1. Hedges and Shrubs

  • Boxwood: A classic choice for formal gardens, boxwoods are dense and can be easily shaped into neat hedges, making them ideal for those who prefer a structured look.
  • Privet: Fast-growing and easy to maintain, privet can create a thick barrier, perfect for privacy without requiring excessive pruning.
  • Yew: This evergreen shrub is known for its resilience and ability to thrive in various soil conditions, making it a versatile choice that can be shaped to fit various garden styles.

2. Trees

  • Hawthorn: With thorny branches, hawthorn not only deters intruders but also produces beautiful blossoms in the spring and berries in the fall, providing food for birds.
  • Arborvitae: A popular choice for privacy, arborvitae grows tall and dense, making it an effective living wall that can block out unwanted views.
  • Willow: Known for its fast growth and flexibility, willow can create a lush, flowing barrier that adds a touch of whimsy to your landscape.

3. Vines

  • Clematis: This flowering vine adds vertical interest and blooms beautifully, making it a lovely addition to a trellis or fence, providing an enchanting look in your garden.
  • Honeysuckle: With fragrant flowers, honeysuckle attracts pollinators while providing a thick cover that can help shield your property from noise and prying eyes.
  • Ivy: Ivy is a classic choice for covering walls or fences and can create a lush, green barrier that thrives in a variety of conditions.

4. Native Plants

Native plants in your living fence not only help local wildlife, but they also need less care because they are used to the environment where they are grown. For the best results, look into plants that are native to your area. These plants will do well without needing extra care or a lot of water. Native plants are often better able to handle local pests and diseases, making them a good choice for your green fence.

Design Ideas for Living Fences

Creating a living fence is not just about practicality; it’s also an opportunity to express your creativity. Here are some design ideas to consider:

1. Layered Planting

Consider planting a mix of tall trees, medium shrubs, and low-ground cover to create a layered effect. This not only enhances visual interest but also provides varying levels of privacy. The interplay between different heights and textures can create a lush, inviting space that draws the eye and adds depth to your garden.

2. Seasonal Color Changes

Plants that grow at different times of the year should be used. Thus, your live fence will be attractive to look at all year long. You could pick dogwoods that bloom in the spring, hydrangeas that bloom in the summer, and maples that have leaves that turn colors in the fall. This variety not only makes the scenery look different all the time, but it also lets you enjoy the beauty of your living fence all year long.

3. Wildlife-Friendly Fences

Select plants that attract pollinators and birds. Incorporating berry-producing shrubs, such as elderberry or serviceberry, can create a vibrant living fence while supporting local wildlife. By providing food and habitat for birds, butterflies, and beneficial insects, you’ll be fostering a thriving ecosystem right in your backyard.

4. Vertical Elements

Use trellises or arbors to support climbing plants. This adds height and dimension to your living fence while also creating a natural archway or entry point. Consider incorporating seating areas or pathways near your living fence to enjoy the beauty and tranquility it offers.

Maintenance Tips

While living fences require less upkeep than traditional fences, they still need care to thrive. Here are some maintenance tips to keep your living fence healthy:

1. Regular Pruning

Prune your plants to keep them in shape and help them grow in a healthy way. Regular trimming can prevent overgrowth and help your living fence stay dense and visually appealing. Aim to prune in early spring or late fall, depending on the species, to encourage new growth and maintain a tidy appearance.

2. Watering

Ensure that your plants receive adequate water, especially during dry spells. Until they get settled, young plants may need to be watered more often. Consider installing a drip irrigation system or using soaker hoses to make watering more efficient and effective.

3. Fertilization

Apply organic fertilizers in the spring to provide essential nutrients. This can help your living fence flourish and promote healthy growth. Look for slow-release fertilizers that won’t overwhelm your plants but will steadily provide nutrients throughout the growing season.

4. Pest Control

Monitor your plants for pests and diseases. Finding problems early on can keep them from getting worse in the future. Opt for organic pest control methods when possible to maintain a healthy ecosystem. This may include introducing beneficial insects or using natural repellents to manage pest populations without harming the environment.

5. Seasonal Cleanup

Remove dead leaves and debris in the fall to prevent mold and pests. This will help your living fence look its best year-round and ensure healthy growth in the spring. Consider mulching around the base of your plants to suppress weeds and retain moisture during dry spells.

Challenges and Considerations

While living fences offer many benefits, there are some challenges to consider:

1. Time to Establish

Living fences take time to grow and establish. Unlike traditional fences, you won’t see immediate results. Patience is key, as it may take a few years for your living fence to reach its full potential. During this establishment period, be sure to provide extra care to young plants to ensure they thrive.

2. Space Requirements

Some plants require more space than others, so be sure to research the mature size of your chosen species. This is especially important for larger trees that may overshadow other plants or encroach on neighboring properties. Planning for adequate spacing can prevent future issues and help maintain a healthy living fence.

3. Maintenance Commitment

While living fences can be lower maintenance than traditional fences, they still require care and attention. Be prepared to invest time in pruning, watering, and general upkeep. Regular attention to your living fence can prevent larger issues down the line and ensure its long-term health.

4. Potential for Invasiveness

Some plants can become invasive if not properly managed. Always research the species you choose to ensure they won’t outcompete native plants or disrupt local ecosystems. Consider consulting with local gardening experts or extension services to identify the best species for your area.

Putting up a living fence is a beautiful and useful way to make natural barriers in your yard. You can make a unique and colorful green place that serves more than one purpose with the many plants and design options available. Putting up a living fence not only makes your home look better but also helps the environment and wildlife.

A living fence might be just what you need to give yourself space, cut down on noise, or just make your yard look better. So why not think about planting your own green wall? If you’re patient and creative, you can grow a living fence that will look great for years to come and help the environment around your house. You can leave a lasting mark on your scenery by appreciating the beauty of nature and working to keep the environment in balance.

Have fun planting!

Choosing the Right Garden Tools: A Complete Guide for Every Gardener

Choosing the Right Garden Tools: A Complete Guide for Every Gardener

For many people, gardening is one of the simple joys in life. It connects us with nature and makes us feel calm and accomplished. It’s amazing to watch a tiny seed or sapling grow into a huge garden, whether you’re just growing a few herbs on your windowsill or a huge garden in your backyard. You should choose the right plants, but having the right tools is just as important if you want to make your gardening dreams come true.

At first, you might think that gardening is all about skill, understanding, and love (what some people call having a “green thumb”). Even though that’s important, the tools you use are really what make gardening work. Imagine digging a hole with a shovel that is dull or cutting back your rosebushes with shears that are rusty. It would not only make the job harder, but it could also hurt someone or damage plants.

Choosing high-quality, well-suited garden tools isn’t just about making things easier; it’s also about giving yourself the power to grow quickly and happily. You should also keep your plants safe and give them the best chance to grow well. This piece will talk about the most important gardening tools that everyone should have, how to pick the best ones, and how to take care of them so they last for years. This guide will show you how to pick the right tools, whether you’re new to growing or want to get better at it.

Why the Right Garden Tools Matter

Gardening might look like a simple hobby that only needs a few basic tools. However, picking the right tools is very important for your experience. If you don’t have the right tools for the job, you could get frustrated, hurt yourself, or even hurt your plants. The other hand, gardening can be more fun, easier on your body, and more productive if you use good tools that are made for the job.

The tools you use in the garden are like extra hands. They make it easy to dig through tough soil, cut back plants that are getting too big, and water your yard without having to bend over backward, sometimes literally! If you want to grow a healthy, successful garden, you need the right tools. Not only will they help your garden better, but they will also keep you from hurting yourself over time.

Essential Garden Tools for Every Gardener

There are so many garden tools out there that it can be tempting to buy every single one that interests you. You don’t need a whole room full of tools, though, to start. Instead, focus on a few basic tools that will meet most of your growing needs. You can always add to your collection of tools after getting these basic ones.

1. Hand Trowel

Your hand trowel is likely the most useful tool in your gardening kit because it can be used for many things. You can plant, dig, mix dirt, and get rid of weeds with this small, hand-held tool. When choosing a trowel, make sure it has a strong, stainless steel blade that won’t bend when you use it and a handle that is comfy and easy to hold. When you’re gardening for a long time, soft-grip handles can help keep your hands from getting tired.

A smaller blade might help you get around rocks if you’re working in rocky ground. Another type of blade is wider, which is better for jobs like moving bigger plants or scooping up soil.

2. Pruning Shears (Secateurs)

A good pair of pruning shears is a must-have for any yard. You can use these to trim bushes, cut back stems and branches that are dead or too big, and keep your plants healthy and in good shape overall. You’ll be wearing these a lot, so it’s worth spending money on good ones.

Cutting shears come in two main styles: bypass and anvil. Because they don’t crush the stem, bypass pruners make clean, close cuts that are great for live plants. On the other hand, anvil pruners are better for cutting through dead wood. No matter what you pick, make sure the handle is easy to hold and the blade is sharp and easy to keep up.

3. Garden Fork

You need a garden fork to break up clumps of dirt and let air flow through your garden beds. It’s also great for pulling weeds and digging up roots. The points, or tines, should be made of a strong metal, like steel, so they don’t bend when they’re pushed. Different garden tools are made for different tasks, so pick the right size for the job. A small hand fork can help you get into tight spots, but a bigger digging fork is better for tough jobs like breaking up hard dirt.

4. Garden Hoe

If you’re planting vegetables or dealing with big flower beds, a garden hoe will come in handy. Hoes are mostly used to break up the earth and get it ready for planting, as well as to cut down weeds before they take over. There are different kinds of hoes for different jobs, so it’s important to pick one that works for you. As an example:

  • Draw hoes are great for heavy-duty digging and shaping soil.
  • Scuffle hoes are perfect for light weeding between rows of plants.

Consider the size and weight of the hoe. You want one that’s comfortable to use for extended periods but still durable enough to get the job done.

5. Watering Can or Hose

For any plant to grow, you need to water it, and the tool you use can make the job go more quickly or slowly. You can use a watering can for small gardens, plants in pots, and gardening inside. For bigger fields or gardens, a hose with an adjustable nozzle lets you better control the flow and pressure of water.

You could also think about getting a soaker hose, which slowly drops water into the ground along its length. This is a great way to save water and is great for plants with deep roots. If you live somewhere that wants to save water, you need to buy a watering system that works well. (Don’t forget that DIY system works very well too!)

6. Spade

A spade is a useful tool that can be used to dig holes, move dirt, edge, and cut through tough roots. If you compare it to a shovel, its blade is generally flatter and sharper, which makes it better for digging precisely. Find one with a steel blade and a strong handle that can handle tough jobs.

7. Rake

Most people think of rakes when they think of falling leaves, but they can be very useful all year long. A garden rake can help you level the ground, spread mulch, and clean up your yard. A heavy-duty metal rake is best for tough jobs like leveling dirt or breaking up clumps of soil, while a light-weight plastic rake is great for picking up grass clippings or leaves.

    Choosing the Right Garden Tools: What to Look For

    How do you pick the right tools when there are so many to choose from? When shopping for outdoor tools, here are some things to think about:

    1. Materials

    Garden tools need to be strong enough to last through a lot of use and being outside in the weather. High-quality materials, like carbon steel or stainless steel, tend to make tools that last longer and don’t rust or corrode. A lot of people choose stainless steel because it is strong and doesn’t rust. Carbon steel is even stronger, but it may need more upkeep. Hardwood handles look good and last a long time, but if you want a softer grip, ergonomically designed plastic or rubber handles are a great option.

    2. Comfort and Ergonomics

    It’s important to pick tools that are easy on the body when gardening because it can be hard work. It’s best to look for patterns that are good for your hands and wrists. Tools that are well-balanced, have soft-grip handles, and are made of light materials can help you work for longer periods of time without getting tired. You should try out a few tools to see how they feel in your hands before you buy them.

    3. Weight and Size

    How easy it is to use your tools can depend on how heavy they are. It may be easier to use tools that are light for long amounts of time, but they may not last as long. On the other hand, heavy tools tend to last longer but are harder to use. It’s important to find the right mix between weight and usefulness. Also, think about how big the tool is compared to your body. If a tool is too big or too small, it might not work as well or feel comfy.

    4. Durability

    Even though better yard tools may cost more at first, they will save you money in the long run because they last longer than cheaper ones. If you don’t want to buy new gardening tools every season, choose good brand and read reviews from other gardeners before you buy.

    How to Care for Your Garden Tools

    If you want your tools to last, it’s not enough just to buy good ones; you also need to take care of them. With the right care, your yard tools will last a lot longer and keep working well for hundreds of years.

    1. Cleaning

    Take a moment to clean your planting tools every time you’re done. Get rid of any sap, dirt, or other things that are stuck on the blades or handles. If your tools are really dirty, give them a quick rinse with water. But make sure to dry them completely to keep them from rusting. You can use a wire brush or a scraper to get rid of sap or dirt that won’t come off.

    2. Sharpening Blades

    The edges of pruning shears, knives, and hoes all work best when they are clean and sharp. If your blades are dull, it can be hard to do things and even grow plants. If you sharpen your tools on a regular basis, they will cut cleanly and quickly. You can use a sharpening stone or file to sharpen most garden tools yourself, or you can take them to a professional if you’re not sure how to do it right.

    3. Oiling and Lubricating

    To keep metal tools from rusting, especially carbon steel ones, they should be oiled often. After you clean the metal parts, give them a light coat of oil. Linseed oil can be used to finish wooden handles so they don’t dry out and crack.

    4. Proper Storage

    Another important thing you can do to keep your tools in great shape is to store them properly. Keep tools away from water and in a dry, well-ventilated place at all times. Tools will be safer if you hang them on a wall rack or put them away in a toolbox. If you can help it, don’t leave your tools outside. The weather can damage them very fast.

    Specialty Garden Tools for Advanced Gardeners

    Once you’ve mastered the basics and feel more comfortable in the garden, you might want to explore some specialty tools. These aren’t necessary for beginners but can be incredibly helpful if you’re tackling more advanced projects or larger spaces.

    1. Loppers

    Loppers are essentially large pruning shears designed to cut thicker branches that pruners can’t handle. These are ideal for trimming shrubs and small trees. The long handles provide extra leverage, allowing you to make clean cuts through branches without putting too much strain on your hands.

    2. Weed Puller

    For those who struggle with weeding (which is probably all of us), a weed puller can make the job much easier. This tool allows you to pull out weeds, roots and all, without having to bend over or strain your back.

    3. Garden Kneeler or Cushion

    Gardening often involves a lot of bending, kneeling, and crouching, which can take a toll on your knees. A garden kneeler or cushion provides much-needed support and comfort, making these tasks easier on your body. Some garden kneelers even double as small benches, so you can take a break without leaving your garden.

    4. Soil Testing Kit

    If you’re serious about optimizing your garden, a soil testing kit is a great investment. It helps you determine the pH level and nutrient content of your soil, allowing you to adjust your gardening practices to suit the needs of your plants. Whether you’re growing flowers, vegetables, or shrubs, knowing your soil’s makeup can greatly improve your gardening success.

    Invest Wisely and Grow Happily

    At first, picking out the right yard tools might seem hard, but it doesn’t have to be. Start by buying the basics. As time goes on, you can add to your collection to meet your unique gardening needs. Remember that quality is very important. Tools of higher quality may cost more at first, but they will save you time, money, and stress in the long run.

    Whether you’ve been gardening for years or are just starting out, having the right tools will not only make your work better but also make gardening more fun. Take the time to buy tools that will help you grow as a gardener and in your yard. A happy gardener has tools that help them do their job better.

    Have fun planting!

    How To Build Greenhouse on a Budget: A Friendly DIY Guide for Beginners

    How To Build Greenhouse on a Budget: A Friendly DIY Guide for Beginners

    A lot of people who want to garden think that having their own greenhouse would be a dream come true. Imagine being able to grow fresh flowers, herbs, and veggies all year long. But the thought of how much it would cost to build a greenhouse often stops people from doing it. The truth is that it doesn’t have to cost a lot of money to make a greenhouse that works well. You can build a greenhouse that works for your growing needs and doesn’t break the bank if you plan ahead and use what you find.

    We will talk about useful ways to build a greenhouse on a budget without sacrificing quality or usefulness in this guide. This step-by-step guide will help you build a greenhouse that works for you without breaking the bank, no matter how much experience you have with gardening or how new you are to it.

    Why You Should Consider Building a Greenhouse

    If you are a farmer, having a greenhouse changes everything. It gives you power over the growing environment, so you can plant later, keep fragile plants safe from bad weather, and even grow plants that wouldn’t do well outside. A greenhouse gives you a lot of options for growing plants, whether they are veggies, herbs, or flowers.

    The best part is that getting a greenhouse doesn’t have to cost a lot of money. Building your own greenhouse can actually save you money and give you the freedom to make the room fit your gardening needs. A greenhouse is very useful because it lets you do many things, like start seeds in the winter and keep tropical plants warm. Plus, you can make one without spending a lot of money.

    Choosing a Greenhouse Design That Fits Your Budget

    Making a design choice that works with your space, wants, and budget is one of the first things you need to do when building a greenhouse. There are many kinds of greenhouses, but for people who like to do things themselves, a few simple, low-cost designs stand out.

    An easy and inexpensive way to build a hoop house is to bend pipes (like PVC) into an arch shape and cover it with plastic sheets. It works well and doesn’t cost much, but it doesn’t last as long as more permanent buildings. The A-frame is a triangle-shaped frame that is usually made of metal or wood. It’s small and strong, so it’s great for gardens with limited room or gardeners who want to reuse old things.

    A lean-to greenhouse might be the best choice if you don’t have a lot of room. Because it connects to the side of your house or garage, you don’t have to pay to build a whole wall. Also, it’s a great way to use up room that would have been wasted otherwise. The geodesic dome is another option for people who want to try something new. It is known for being energy efficient and having a unique look, but it can be harder to build on a budget.

    There are pros and cons to each style, but the best way to build on a budget is to keep things simple and use things you already have or can find for a low price.

    Gathering Affordable Materials for Your Build

    What you use to build your greenhouse can certainly change how much it costs. The good news is that you can get a lot of the things you need for very little money or even for free if you look hard enough.

    PVC lines are a common low-cost choice for the frame. They’re cheap, useful, and simple to work with. You can use recycled metal or wood to make something stronger. You can often find this kind of material at local building sites or recycling centers. Another great place to look for free or cheap materials is online, on sites like Craigslist or Facebook Marketplace.

    It’s just as important to cover your garden. Plastic sheets are one of the least expensive choices. You can get them at most hardware stores. It’s not heavy, simple to set up, and very good at keeping heat in. When you want to save even more money, think about using clear plastic bottles or old windows. They will save you money and are also a great way to reuse things that would have been thrown away otherwise.

    You don’t have to go all out with your floors. A lot of do-it-yourself greenhouses are made with dirt, which is cheap and helps the soil drain. Leaving the floor as bare dirt works fine for most greenhouses if you want to save even more money.

    Picking the Right Size for Your Greenhouse

    When building a greenhouse, size is very important. You should try to find the best balance between what you need and what you can spend. To save money, you might want to build the smallest greenhouse possible, but think about what you want to grow and how much room you’ll need to work.

    A small greenhouse will work great if you only want to grow a few herbs or start seeds. But if you want to grow bigger plants or garden all year, you might want to think about making something a little bigger. Remember that a small greenhouse is cheaper to build, but it might not let you grow as much if it’s too crowded. Think about your plans for the future before choosing a size.

      Insulating and Ventilating on a Budget

      Once you’ve made your greenhouse, it’s important to keep it at the right temperature so that your plants can grow well. If you don’t want to spend a lot of money on tools, there are many cheap ways to keep your greenhouse warm and clean.

      It’s surprising how well and cheaply bubble wrap can be used to protect your greenhouse. It’s easy to put on the inside walls of your greenhouse and helps keep heat in during the cooler months. If you’re covering it with plastic sheets, you might want to fold them in half to make an air gap that will act as an extra layer of insulation.

      It’s important to let air move through the greenhouse so that it doesn’t get too hot, especially in the warmer months. Simple, low-cost fixes that work well include opening windows and doors by hand. Installing automatic air openers, which open and close based on the temperature inside the greenhouse, is a good way to get more automation without spending a lot of money. A well-placed vent or fan, on the other hand, can often do the job for less money.

      Budget-Friendly Watering Systems

      It’s important to keep your plants moist, but you don’t have to buy an expensive irrigation device to do it. Setting up a system to catch rainwater is one of the easiest and greenest ways to water your plants. You can save water from your roof for use in the garden by putting it in a rain barrel. It’s an easy way to keep your plants happy without using more water.

      If you want to have more control over how much water you use, you could make your own drip irrigation system out of old hoses or plastic bottles. You can put a hose or bottle near the base of your plants and poke small holes in it. The water will slowly drip into the dirt. This way saves water and makes sure your plants get the right amount without any extra.

      Lighting and Heating: How to Stay Warm and Bright Without Spending a Fortune

      If you live in an area with harsh winters or limited sunlight, you might need to supplement with artificial lighting or heating.

      • Natural light: Position your greenhouse to make the most of natural sunlight. Ideally, it should face south to maximize sun exposure. This will save you money on lighting in the long run.
      • Heating: If you need to add some heat, there are low-cost solutions like using a compost pile inside your greenhouse. As compost decomposes, it generates heat that can help keep the temperature up. You can also place thermal mass objects like water-filled jugs or rocks in your greenhouse. These will absorb heat during the day and slowly release it at night.

      If you really need to add an electric heater, go for one that’s energy-efficient. Make sure to insulate your greenhouse well so you don’t waste any of the heat you’re generating.

      Recycling and Upcycling for Extra Savings

      One of the best ways to save money when making a greenhouse is to use recycled or upcycled materials. This is good for the environment and gives your garden a personal touch.

      As an example, old windows from a house renovation or building site can be used to make great walls for a greenhouse. They last a long time, keep heat in, and let a lot of light in. In the same way, you can use plastic bottles to insulate or even build a greenhouse by stacking them and binding them with a frame. Wooden boards are also very useful because they can be used to build the frame of your greenhouse or to make shelves inside it.

      You can build a greenhouse on a budget if you plan ahead and use what you already have. You can make a useful and productive greenhouse without spending a lot of money if you pick a plan that isn’t too expensive, use materials that won’t break the bank, and use smart techniques for insulation, ventilation, and watering. Gardening is all about being creative and growing plants, and making your greenhouse is the same way.

      With some time and work, you can have a garden that grows well all year long. You can grow your favorite plants and enjoy the results without spending a lot of money.

      Have fun building!

      Plant Propagation: Easy Step-by-Step Guide to Growing New Plants

      Plant Propagation: Easy Step-by-Step Guide to Growing New Plants

      There are times when you might want to grow more plants but don’t want to spend a lot of money on them. This is where plant propagation comes in. It’s the best way to grow your garden or collection of houseplants by using plants you already have. You can make brand-new plants at home without going to the garden shop if you are patient and know the right techniques. This guide will look at the different ways to grow plants once more, break the process down into easy steps, and give you tips to make sure you succeed.

      Propagation is a skill that you should learn if you want to make your house look like a lush jungle or add more flowers and plants to the garden. It’s also fun! For me, there’s nothing more exciting than seeing a seed sprout or a small cutting grow into a full-grown plant. That being said, let’s learn about how to grow your own green paradise and how to propagate plants.

      What is Plant Propagation?

      Basically, plant propagation is the process of making new plants. There are two major ways to do it: sexual propagation uses seeds, and asexual propagation uses stems, roots, or other parts of the plant. Each way has pros and cons, and the one you choose will often depend on the plant you’re working with and your own gardening goals.

      • Sexual propagation: Involves growing plants from seeds. This method combines genetic material from two parent plants, which means the new plant may differ slightly from its parents. It’s nature’s way of ensuring diversity.


      • Asexual propagation: Uses plant parts such as stems, leaves, or roots to grow new plants. This method produces a clone of the parent plant, so the new plant will have the same traits. Common asexual techniques include cuttings, division, layering, and grafting.


      Why Should You Learn Plant Propagation?

      Learning how to propagate plants can make your gardening experience much better, no matter how experienced you are. Propagation is a useful and gratifying skill for so many reasons:

      • Cost-effective: One of the best reasons to learn how to grow plants from seeds is that it can save you a lot of money. You do not have to buy new plants. You can grow your own from seeds or plants you already have.


      • Growing more plants: Since propagation lets you grow more plants, you can add more plants and flowers to your garden or home without having to buy new ones all the time.


      • Sharing with family and friends: You can give other people your favorite plants by propagating them. Giving someone a new plant as a gift is always fun.


      • Taking care of rare or beloved plants: You can help protect a rare or hard-to-find plant by making more of them. That plant will stay in your collection for years to come because you can make many versions of it.

      Methods of Plant Propagation

      Depending on the type of plant and your preferences, there are different ways to make more of them. We will look at the most common ways and explain how they work and how you can try them at home below.

      1. Seed Propagation

      Seeds are a popular way to grow plants. Because genetic material is being passed from one plant to another, this process is called sexual propagation. When pollen from the male part of the plant fertilizes the female part, a seed is made that has genes from both parents.

      There is something exciting about growing plants from seeds: you never know how the new plant will turn out. People often grow veggies, flowers, trees, and many houseplants from seeds.

      Steps for seed propagation:

      1. Gather seeds: If you want to gather seeds from your plants, do it when they are fully grown. A lot of plants, like tomatoes and beans, make seeds on their own after they flower.


      2. Get the ground ready: Good seed-starting mix should be put in seed boxes or small pots. This mix is airy and light, which helps the seeds grow.


      3. Place the seeds: For most seeds, put them about twice as deep as they are wide. But follow the directions that come with your seeds. For example, lettuce seeds need to be planted very close to the ground.


      4. Water slowly: To wet the soil, use a spray bottle or a slow stream of water. Make sure the ground is never soaked but always moist.


      5. Provide light: Put the pots or trays in a sunny window or under grow lights to get enough light. Most seeds need a lot of light to sprout.


      6. Wait for germination: Wait for the seeds to grow. It could take anywhere from a few days to a few weeks, depending on the plant. Wait your turn and keep the soil wet the whole time.

      While seed propagation is one of the slower methods, it’s incredibly rewarding. It’s especially fun the first time you grow something from a seed because you get to see the plant grow and change over its whole life.

      2. Stem Cuttings

      Asexual propagation is often faster than seed propagation, and stem cuts are one of the simplest ways to do it. To do this, you cut off a piece of the plant’s base and help it grow roots. This is a simple way to grow more of many popular houseplants, like pothos, philodendrons, and succulents.

      How to propagate using stem cuttings:

      1. Select a healthy stem: Choose a section of the plant that is healthy and has at least a few leaves.
      2. Make the cut: Using clean scissors or a knife, cut just below a leaf node (where the leaves attach to the stem). The cutting should be about 4 to 6 inches long.
      3. Remove lower leaves: If there are any leaves near the bottom of the cutting, remove them. You want to leave only the top few leaves intact.
      4. Place in water or soil: Depending on the plant, you can either place the cutting in a jar of water or directly into a pot filled with moist soil.
      5. Wait for roots to form: After a few weeks, you should see new roots developing. For water cuttings, this process is visible, making it especially exciting. For soil cuttings, give the plant a gentle tug to check for resistance, which indicates root growth.
      6. Transplant: Once the roots are well-established, you can transplant the new plant into a larger pot or garden bed.

      Some plants, like cacti, do better when they are grown from leaf cuttings instead of stem cuttings. To avoid rot, just take off a healthy leaf from the plant, let it dry out for a few days, and then put it in soil that drains well. New roots and shoots will show up if you wait a little while.

      3. Division

      If you have a mature plant that’s growing large and producing multiple shoots, division is a simple way to propagate it. Division involves separating a plant into two or more parts, each of which can grow into a new plant. This technique works especially well for plants that grow in clumps, such as ferns, hostas, or daylilies.

      Steps for division:

      1. Dig up the plant: Carefully dig up the entire plant from its pot or garden bed. Be sure to dig wide enough to avoid damaging the roots.
      2. Divide the root ball: Gently pull the plant apart into two or more sections, making sure that each section has both roots and shoots. You can use your hands or a clean knife if the root ball is dense.
      3. Replant: Plant each new division in its own pot or spot in the garden, making sure to water them thoroughly after replanting.
      4. Care for the new plants: Water the new divisions regularly and make sure they get the right amount of sunlight. It may take a few weeks for them to establish themselves fully.

      Division is a great way to rejuvenate an older plant that’s becoming overcrowded. Plus, it gives you more plants without any extra cost!

      4. Layering

      Layering is another way to spread plants without pollination. This method includes getting a branch or stem to grow roots while it is still attached to the parent plant. You can cut off the new plant and put it somewhere else once the roots have grown. People often use this method on plants like philodendrons, raspberries, and blueberries, even ones that are kept inside.

      How to propagate using layering:

      1. Choose a stem: Select a healthy, flexible stem that can be bent toward the ground without breaking.
      2. Bury the stem: Bend the stem down to the soil and bury a portion of it in the ground, leaving the growing tip exposed. You can use a small rock or garden staple to hold the stem in place.
      3. Wait for roots to form: After several weeks, the buried portion of the stem should start developing roots. You can gently check by digging up a small section of the stem.
      4. Cut the new plant away: Once the roots have developed, cut the new plant away from the parent and transplant it to its new location.

      Layering is a great way to grow plants that are hard to get roots from cuttings. It’s also an easy way to spread plants because the baby plant stays linked to the parent and gets all the nutrients it needs.

      5. Grafting

      Grafting is an interesting way for more experienced gardeners to spread plants because it includes joining two plants together so that they grow as one. Fruit trees and roses often use this method to mix the best parts of different plants. To do this, a piece of one plant, called the scion, is joined to the stem of another plant.

      Steps for grafting:

      1. Select your plants: Choose a healthy scion (the plant you want to propagate) and a rootstock (a plant with a strong root system).
      2. Make the cuts: Use a sharp knife to cut both the scion and rootstock at matching angles so they can fit together.
      3. Join the two plants: Place the scion onto the rootstock so that the cuts line up, ensuring the vascular tissues are aligned.
      4. Secure the graft: Use grafting tape or rubber bands to hold the scion and rootstock together while they heal and fuse.
      5. Care for the new plant: Keep the grafted plant in a sheltered environment, and water it regularly until the graft takes.

      Grafting lets gardeners make hybrid plants that are better at fighting off diseases, being stronger, or producing more than either parent. It works great for fruit trees because you can grow different kinds on the same tree!

      Best Plants for Propagation

      While many plants can be propagated, some are particularly easy to work with. If you’re just starting out, here are a few beginner-friendly plants to try:

      • Pothos: This popular houseplant is incredibly easy to propagate from stem cuttings. Just place a vine in water and watch as roots develop in a matter of days.
      • Spider plant: Spider plants produce “pups” or small baby plants that can be easily rooted in soil or water. Simply cut them off and replant.
      • Succulents: Many succulents can be propagated from individual leaves or stem cuttings. Let the cuttings dry out for a few days, then place them in well-draining soil.
      • Herbs: Plants like mint, basil, and rosemary are perfect for propagation through stem cuttings. You can place the cuttings in water until roots form, or plant them directly in soil.
      • Ferns: Ferns grow in clumps, making them ideal for division. Simply split the plant into sections and replant.

      Common Mistakes to Avoid in Propagation

      Even though plant propagation is relatively simple, there are a few common mistakes that can lead to failure:

      • Overwatering: Too much water can cause cuttings to rot, especially for succulents. Keep the soil moist but not soggy.
      • Not providing enough light: Many propagated plants need bright, indirect light to grow successfully. If they don’t get enough light, they might become leggy or fail to root.
      • Cutting hygiene: Always use clean, sharp tools when taking cuttings. This reduces the chance of introducing disease to the plant.

      Tips for Success

      First, rooting hormones can greatly improve your chances, especially for plants that take a long time to root. Rooting hormones help roots grow faster and stronger, which is helpful when you want to make more plants from cuttings. It’s more likely to work if you put a little of this hormone on the cut end of the cutting before planting it.

      Having the right amount of air is also very important. A humid climate is good for many cuttings because it keeps the leaves from drying out before the roots have a chance to grow. Covering your cuttings with a plastic bag (make sure it doesn’t touch the plant) is an easy way to make a small greenhouse. This will keep the water in and make it perfect for new roots to grow.

      Last but not least, be patient. It’s not always easy to grow new plants quickly, and the results can be different for each type of plant and each method. Some plants don’t show signs of growth for weeks or even months. This is especially true for plants that were grown from seeds or slow-growing cuttings. Don’t give up if you don’t see effects right away; if you keep up the care, it will pay off in the end.

      Growing new plants from cuttings is a fun and cheap way to grow a garden or indoor plant collection. You can make new plants from the ones you already love by learning how to do it in different ways, such as through seeds, cuttings, division, stacking, or grafting. It’s not only a good way to save money, but it’s also very exciting to see a small piece of a plant grow into a full, healthy plant. You can soon be surrounded by plants that you helped grow if you are patient and take good care of them.

      Happy gardening!

      0
        0
        Your Cart
        Your cart is emptyReturn to Shop