Monthly Gardening Guide: A Complete Year-Round Plan for Your Garden

Monthly Gardening Guide: A Complete Year-Round Plan for Your Garden

Gardening isn’t just a hobby; it’s a way of life. It doesn’t matter if you’re growing herbs, veggies, or flowers—the most important thing is to remember what needs to be done each month. Seasonal changes give gardeners new tasks and chances to succeed. A monthly plan can help you stay on top of your gardening game and stay organized. We can help you with everything from planting new crops to getting rid of pests every month of the year. Let’s go over your yearly gardening list. You’ll be a pro at gardening by the end of the year!

January: Plan and Prepare

Things may move more slowly in the winter, but January is a great time to start making plans for the growing season that’s coming up. This is the month to learn more about your garden, get it in order, and set goals for it.

  • Review last year’s garden: Did some plants do better than others? In what part of the room did you need more sunlight? Did bugs cause trouble? Write down what went well and what didn’t so you can make changes.
  • Start seed shopping: Look through seed brochures and buy seeds for your garden this spring. When picking out plants to grow, make sure to think about the growth season and weather in your area.
  • Prepare gardening tools: Check that all of your tools are in good shape. Get your tools clean, sharp, and oiled so they’re ready to use when it gets warmer outside.
  • Plan crop rotation: You might want to change up the plants you grow in your veggie garden from last year. This can help keep the dirt from drying out and lower the risk of pests.

February: Start Indoors and Check for Pests

Even though there may still be snow outside, you don’t have to wait until spring to start growing. You can start planting seeds for your spring garden indoors in February.

  • Start indoor seedlings: Start planting seeds indoors if you want to grow veggies like peppers, tomatoes, or herbs. To get your plants off to a good start, use boxes, pots, or other small containers.
  • Inspect your garden tools and equipment: Keep an eye out for rats, mold, and other pests in your greenhouse, garden shed, or any other outdoor storage space. Keeping your storage area clean will help you avoid problems in the future.
  • Prune trees and shrubs: During the month of February, when most trees and bushes lose their leaves, it is a good time to prune them. This helps plants grow well in the spring.
  • Tidy up the garden: It’s a good idea to clean up old plant parts, leaves, and any vegetables that haven’t been eaten yet while the garden is quiet so that you don’t have fungal problems when it gets warmer.

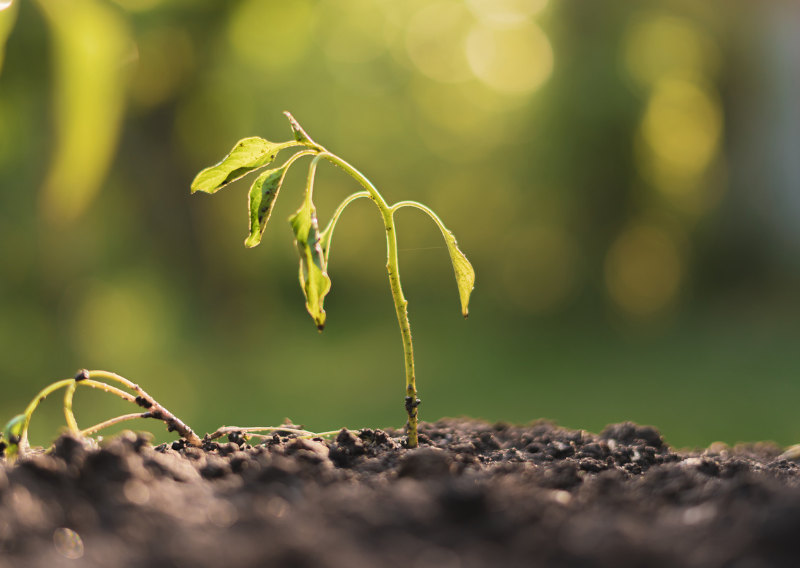
March: Prepare for Planting

As the days get longer and the weather gets warmer, you should start planting and getting ready for the next growing season.

  • Prepare garden beds: To make the soil better, break it up and add compost or other organic waste. You should also check-raised beds and fill them up if they need it.
  • Start hardening off seedlings: If you start plants indoors, move them outside to a protected area every day for a few hours to get them used to the weather. Over the course of a week or two, slowly extend the contact time.
  • Fertilize perennials and shrubs: Give your trees, plants, and perennials a boost for the growing season by giving them a slow-release fertilizer now.
  • Plant early-season crops: Plant cool-season plants like peas, lettuce, spinach, and broccoli if the earth can be worked. These plants can handle the cool spring weather.

April: Plant and Protect

April is the month to start putting bigger plants outside and taking steps to keep them safe from the spring weather that can change quickly.

  • Plant frost-sensitive plants: It is okay to plant soft vegetables like tomatoes, peppers, and cucumbers outside after the frost risk has passed. Plant flowers for the season now too!
  • Mulch garden beds: Put down a layer of mulch to keep the soil moist and safe. Mulch keeps bugs away and cools your plants’ roots when it’s hot outside.
  • Start dealing with pests: Watch for the first signs of pests like aphids, slugs, and snails. To stop an invasion, use natural pesticides like neem oil or set up traps.
  • Feed plants regularly: As your plants grow quickly, make sure they are getting all the nutrients they need. If you want to keep them healthy and strong, use a balanced fertilizer.

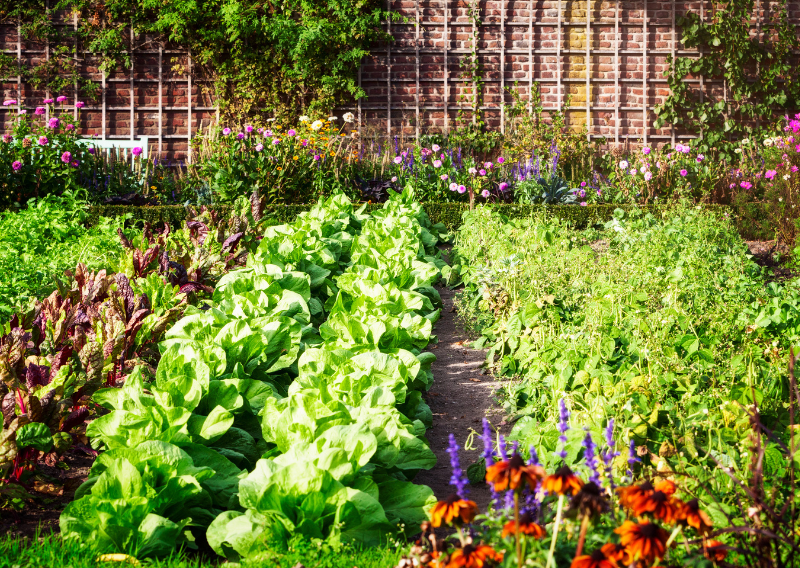
May: Grow and Maintain

By May, your plants are strong and most of your hard work has paid off. But don’t relax too much—this month is all about keeping things in good shape.

  • Water consistently: With warmer weather, your garden will need more water. Make sure you water deeply and consistently, especially for newly planted crops.
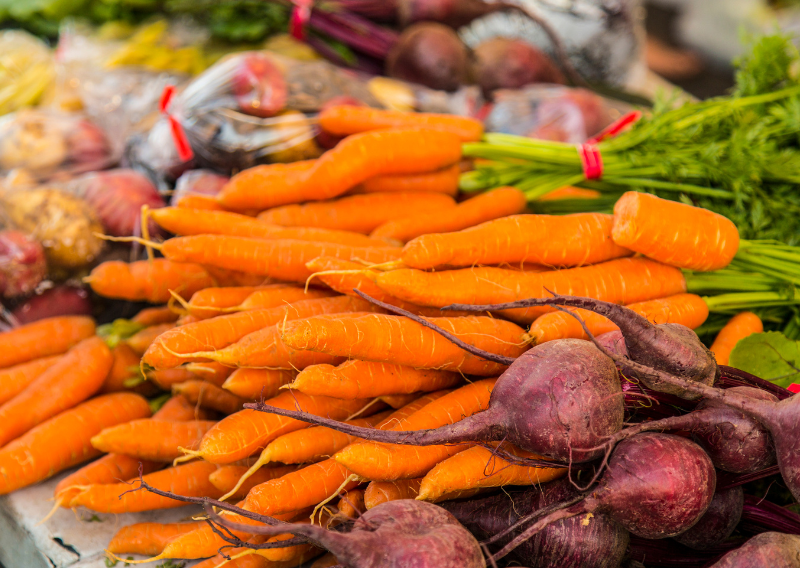
  • Thin seedlings: If you’ve planted crops like carrots, beets, or radishes, thin them out so they have plenty of space to grow. This encourages strong root systems and prevents overcrowding.
  • Keep an eye on pests: Monitor your garden regularly for pests, and act quickly if you spot any troublemakers. Early intervention is key to preventing a full-scale infestation.
  • Deadhead flowers: To encourage more blooms, deadhead flowers regularly by removing spent blooms. This also helps keep your garden looking neat and tidy.

June: Fertilize and Prune

Summer is here in full force in June, so now is the time to make sure your garden is ready for the hottest months of the year.

  • Feed summer vegetables: Give your heat-loving plants like tomatoes, peppers, and cucumbers a boost by feeding them with a high-phosphorus fertilizer to encourage flowering and fruiting.
  • Prune summer-flowering shrubs: This is a great time to prune shrubs like lilacs, roses, and lavender, which are beginning to bloom or have finished blooming. Cutting back these plants will encourage stronger growth for the next season.
  • Control weeds: Summer is prime time for weeds to grow, so be vigilant about weeding regularly. Use mulch and hand-pull weeds to keep them under control.
  • Check soil moisture: Make sure your plants are getting enough water during the hotter months. If the weather is particularly dry, consider setting up a drip irrigation system to ensure consistent moisture.

    July: Harvest and Stay Vigilant

    By July, your garden should be in full swing, and all your hard work should be paying off. While gathering is important, it’s not the only thing that needs to be done.

    • Harvest regularly: Keep an eye on your fruits and vegetables and harvest them as they ripen. Regular harvesting encourages plants to keep producing and helps avoid overripe produce.
    • Monitor for pests: Some pests can become more active during the summer months, so continue to check for any new infestations. Be sure to act quickly if you notice signs of damage.
    • Maintain soil moisture: If you’re experiencing hot, dry weather, make sure to keep your garden well-watered. Consider watering in the early morning or late afternoon to reduce evaporation.
    • Feed crops that need it: Certain crops, like tomatoes and corn, benefit from an additional dose of fertilizer during mid-summer. Keep them well-fed for the best yields.

    August: Tidy Up and Prepare for Fall

    As summer ends, it’s possible that your garden is beginning to look old. It’s time to get ready for fall in August, but you can still enjoy their summer crops.

    • Clean up dead plants: Remove spent annuals and any plants that are past their prime to prevent disease and pests from taking hold.
    • Start fall crops: Begin planting cool-season crops like kale, spinach, and carrots, which thrive in the cooler temperatures of fall.
    • Prune spent flowers: Trim back spent flowers and deadhead any remaining blooms to encourage the plants to focus on their remaining growth.
    • Maintain watering: Continue to water your garden, especially as the weather shifts. Keep an eye on moisture levels to prevent plants from drying out during late summer heat.

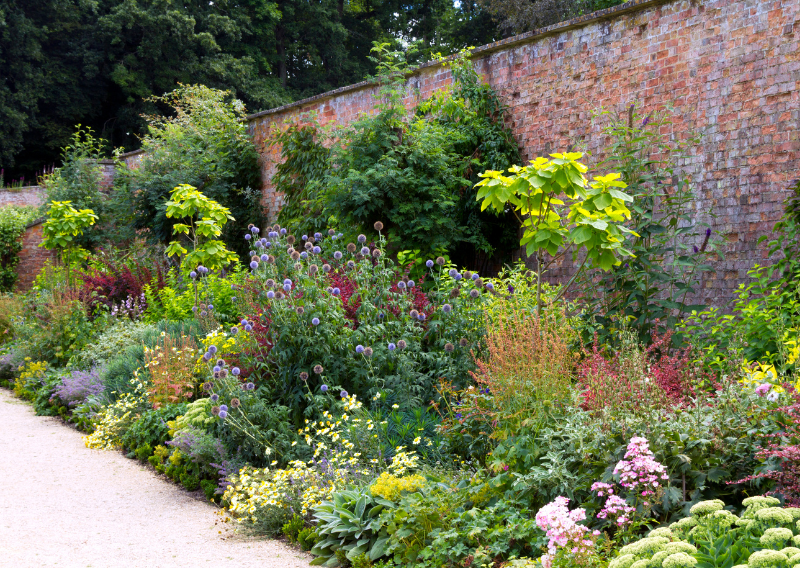
    September: Prep for Fall

    For real, summer ends in September, but it’s also a great time to start planning your fall yard. The change from one season to the next starts at this point.

    • Plant fall bulbs: If you’re into flowers, September is the time to plant bulbs like tulips and daffodils for next year’s spring blooms.
    • Harvest late crops: Keep harvesting those fall vegetables, especially if they were planted earlier in the season. Squash, pumpkins, and root crops will be ready by now.
    • Prepare soil for next season: Once your summer crops are finished, add compost to your garden beds to improve the soil for next year’s plants.
    • Clean tools and equipment: As the season winds down, clean your gardening tools and equipment. This will help them last longer and keep them ready for the next season.

    October: Tidy Up and Get Ready for Winter

    A lot of farmers start to slow down in October, but there’s still a lot to do to get ready for the winter.

    • Remove dead plants: Clear out any dead plants and spent crops to prevent pests and diseases from overwintering in your garden.
    • Plant winter crops: If you live in a mild climate, you can still plant hardy vegetables like garlic and onions in October for a winter harvest.
    • Prepare for frost: If frost is a concern in your area, take steps to protect sensitive plants. Use row covers or frost blankets to shield plants from the cold.
    • Clean and store tools: Thoroughly clean and store your garden tools for the winter to prevent rust and damage.

    November: Rest and Reflect

    Since it’s getting colder and planting is taking longer, November is a good month to take it easy and think.

    December: Plan for the Future

    It’s easy to think that your garden is over for the year, but December is a great month to start making plans for next year.

    • Order seeds for next year: Take advantage of seed catalogs and plan your garden for next year. Think about what worked well in your garden and what new varieties you want to try.
    • Maintain tools: Keep your tools sharp, clean, and ready for the next season.
    • Reflect and relax: Enjoy the quiet season and the break from gardening. By the time spring rolls around, you’ll be eager to get back to it.

    Gardening is a fun and satisfying hobby, and you can have a successful garden all year long with some planning and work. As long as you use this monthly guide, your plants will always get the care and attention they need to do well.

    Happy gardening!

    How to Save a Dying Plant: Signs & Step-by-Step Revival Techniques

    How to Save a Dying Plant: Signs & Step-by-Step Revival Techniques

    Having plants around is like having little green friends. They make the room look better, clean the air, and bring some life to even the dreariest spots. Realistically, taking care of plants isn’t always as easy as “water it and watch it grow.” You are not the only one who has ever looked at a pothos plant that used to be doing so well and thought what went wrong.

    Plants don’t die overnight. Instead, they show small (and sometimes big) signs that something is wrong. It could be leaves that are turning yellow, stems that are drooping, or brown, crispy tips that look like they’ve seen better days. The good news? A little TLC and detective work can fix most of these issues.

    It’s not enough to just save a dying plant’s life; you need to learn what it needs, get to know its quirks, and become a better plant parent. If you find that you’ve overwatered a plant, let pests take over, or the plant just looks sad, this guide will show you how to save it step by step. Let’s make your dying plants into a success story that people will want to share on social media!

    Signs Your Plant Is Crying for Help

    Plants can’t talk to you directly (sorry, no SOS calls from your pothos), but they can show that they are upset in other ways. Here are some signs that your plant is having a hard time:

    • Yellowing leaves: Could be overwatering, underwatering, or a nutrient deficiency.
    • Browning leaf tips: Often caused by inconsistent watering or low humidity.
    • Droopy leaves: Your plant might be thirsty, or it could be overwatered and drowning.
    • Leggy growth: When stems grow long and spindly, it’s usually a sign of insufficient light.
    • Wilting: This can indicate a lack of water, poor soil quality, or root issues.
    • No new growth: Plants that aren’t growing might need more nutrients or better care.

    Understanding the signs is step one. Step two? Figuring out what’s actually wrong.

    Diagnosing the Problem

    Before you jump into rescue mode, take a moment to play detective. Your plant’s issues can usually be traced back to one of these main factors:

    1. Watering Woes

    Too much or too little water is the most common plant problem. Check the soil:

    • If it’s bone-dry, your plant is thirsty.
    • If it’s soggy, you might be overwatering.
      To fix this, water only when the top inch of soil feels dry (stick your finger in to check!).

    2. Light Struggles

    Plants have specific light needs, and placing them in the wrong spot can cause problems. A fiddle-leaf fig loves bright, indirect sunlight, but a snake plant thrives in low light. If your plant looks sad, assess its lighting situation. Adjust by moving it closer to or farther from a window or investing in grow lights.

    3. Nutrient Deficiencies

    Plants need food, too! If your plant isn’t growing or its leaves look pale, it might need fertilizer. Choose a balanced fertilizer and follow the label instructions (too much can do more harm than good).

    4. Pests

    Tiny pests like spider mites, mealybugs, and aphids are sneaky and destructive. Inspect your plant closely—especially under the leaves—and look for webbing, sticky residue, or bugs. A quick fix? Spray your plant with neem oil or wipe the leaves with soapy water.

    5. Temperature and Humidity

    Most houseplants prefer a consistent temperature between 65-75°F and moderate humidity. Sudden drafts, extreme heat, or dry air can stress plants out.

      The Revival Process: Step-by-Step

      So your plant looks like it’s auditioning for a role in a zombie movie—don’t panic. Bringing a plant back to life requires a mix of patience, observation, and a few strategic actions. Here’s how you can transform a struggling plant into a healthy, thriving beauty again:

      Step 1: Check the Roots—The Foundation of Plant Health

      The roots are your plant’s lifeline. When things go wrong, they’re often the first place to show signs of trouble. Gently remove the plant from its pot and inspect the roots.

      • What to look for:
        Healthy roots are firm, white, and spread evenly. If you see mushy, slimy, or brown roots, your plant might be suffering from root rot caused by overwatering.
      • What to do:
        • If the roots are rotting, trim away the affected parts using clean, sterilized scissors.
        • Repot your plant in fresh, well-draining soil and a pot with drainage holes. This step might feel drastic, but cutting away unhealthy roots gives your plant a better chance to recover.

      Step 2: Rehydrate or Dry Out—Getting the Water Balance Right

      Watering issues are one of the biggest reasons plants struggle. Your goal is to strike the right balance between overwatering and underwatering.

      • Underwatered plant: If the soil feels dry as a desert, give your plant a good soak. Place it in the sink or a bucket and water thoroughly until it runs out of the drainage holes. Let it drain completely to avoid waterlogging.
      • Overwatered plant: If the soil is soggy or smells musty, stop watering for a while. Let the soil dry out before you water again. If the issue persists, consider repotting it into fresh soil.

      Going forward, check the top inch of soil regularly. Only water when it feels dry to the touch.

      Step 3: Adjust Lighting—Find the Perfect Spot

      Light is food for your plants, and not getting the right amount can leave them weak and stressed. Evaluate your plant’s current location and consider its light requirements.

      • For low-light plants: Move them to a shaded area or away from direct sunlight that might scorch their leaves.
      • For light-loving plants: If they’re looking leggy or pale, relocate them closer to a window with bright, indirect sunlight.
      • Can’t find the right spot? Consider investing in grow lights. They mimic natural sunlight and work wonders for plants that can’t get enough light indoors.

      Step 4: Feed Your Plant—Boost It with Nutrients

      A struggling plant often lacks essential nutrients. Using fertilizer can give it the energy it needs to recover.

      • Type of fertilizer: Use a balanced, water-soluble fertilizer for general plant care. If you know what’s missing (like nitrogen or potassium), use a specialized formula.
      • How to apply: Dilute the fertilizer to half-strength to avoid overwhelming your plant. Feed it once a month during its active growing season (spring and summer).

      Pro tip: If your plant is already in shock from root pruning or repotting, wait a few weeks before fertilizing. This gives it time to settle in before introducing more changes.

      Step 5: Handle Pests—Evict the Unwanted Guests

      Pests are like uninvited houseguests that just won’t leave. If you notice tiny bugs, sticky residue, or webbing on your plant, it’s time to take action.

      • Common culprits: Spider mites, mealybugs, and aphids.
      • Treatment plan:
        • Start by isolating the affected plant to prevent pests from spreading to others.
        • Spray the plant with neem oil or insecticidal soap. For a DIY option, mix a few drops of dish soap with water and apply it using a spray bottle.
        • Wipe the leaves clean with a damp cloth to remove pests and eggs. Repeat this process weekly until the pests are completely gone.

      Step 6: Create the Perfect Environment—Temperature and Humidity Matter

      Plants are sensitive to their environment, so ensure they’re comfortable. Most houseplants thrive at room temperature (65-75°F) and appreciate some humidity.

      • Boosting humidity:
        • Group your plants together to create a mini greenhouse effect.
        • Use a humidifier, especially in the winter when indoor air gets dry.
        • Place a tray filled with water and pebbles near your plant. Avoid placing plants near heaters, air conditioners, or drafty windows, as sudden temperature changes can stress them out.

      Step 7: Wait, Watch, and Be Patient

      Reviving a dying plant isn’t an overnight process. Even after you’ve addressed the root cause, it might take weeks or even months for your plant to fully recover. Look for small signs of progress, like new growth or healthier leaves.

      During this period, stick to a consistent care routine. Check your plant regularly, and don’t overreact to every tiny change. Sometimes, the best thing you can do is give your plant time to heal.

      Special Rescue Tips for Common Plants

      Different plants have unique needs. Here’s how to handle some popular ones:

      1. Succulents

      These desert babies hate overwatering. If your succulent is mushy, it’s likely overwatered. Let it dry out completely, and avoid watering until the leaves look slightly wrinkled.

      2. Ferns

      Ferns love humidity! If your fern looks crispy, mist it daily, or place a tray of water nearby to increase humidity.

      3. Peace Lilies

      These are drama queens when it comes to watering—they droop dramatically when thirsty but bounce back quickly. Keep the soil moist but not soggy.

      4. Monstera

      Yellowing leaves? Check your watering schedule and lighting conditions. Monsteras love bright, indirect light and soil that’s evenly moist.

      Preventing Future Plant Problems

      Once you’ve brought your plant back to life, you’ll want to keep it healthy. Here are some tips for long-term care:

      • Stick to a schedule: Check your plants regularly for water, pests, and overall health.
      • Rotate your plants: Turning them occasionally helps ensure even growth.
      • Group plants together: This creates a microclimate of higher humidity, which many plants love.
      • Learn your plant’s personality: Every plant is different. The more you understand its needs, the better you’ll care for it.

      When to Let Go

      No matter how hard you try, a plant might not always make it. That’s fine too! Not every plant can be saved, especially if it’s been damaged too much. Don’t feel bad about what happened; instead, use it to learn something. Now that you know better, get a new plant and start over.

      It can feel like an uphill fight to bring a dying plant back to life, but it’s also very rewarding. You’ll know it was all worth it when you see that first new leaf grow after weeks of careful care. Don’t give up on your green friends! It takes time, knowledge, and a little love to turn a plant graveyard into a jungle full of life.

      Go check on your plants now! Today, they might need you to take care of plants. 

      Happy gardening!

      The Easiest Vegetables for First-Time Gardeners: Simple Tips for Beginners

      The Easiest Vegetables for First-Time Gardeners: Simple Tips for Beginners

      One of the most satisfying things to do for fun is to start a vegetable garden. Imagine going outside to your balcony or backyard, picking some fresh vegetables, and then making dinner with them. Doesn’t that sound like a dream? But for people who have never gardened before, starting can be a little scary. What should you plant? How much room do you need? How do you make sure your plants stay alive? Don’t worry; planting doesn’t need to be hard. Just make sure you plant the right vegetables and put in some work. Soon, your garden will be growing.

      This article is for anyone who wants to grow their own food, whether they are a college student on a budget who wants to eat fresh food, a busy worker who wants to get back to nature, or someone who is just interested in the subject. Here are some of the easiest veggies to grow, along with some tips and mistakes you should try to avoid.

      Why You Should Grow Your Own Vegetables

      Let’s talk about why growing your own food is so cool before we get to the “how to.” First, it feels really good. There’s something amazing about seeing a tiny seed grow into something you can eat. It’s also a smart way to save money. Most homes always have vegetables like lettuce, spinach, and tomatoes, and growing them yourself can save you a lot of money on your food bill.

      Food loss is also cut down by gardening. You don’t have to buy a whole bag of spinach from the store and then forget about it in the fridge. You can just pick what you need from your garden. Plus it’s better for the environment. Vegetables from the store are often packed in plastic and shipped over long distances, which adds to carbon emissions. Last but not least, gardening is good for your mind. Working with dirt and taking care of plants outside can be a nice way to relax after a stressful day. 

      Getting Started: What Every New Gardener Needs to Know

      You don’t need a huge garden or years of experience to start a vegetable garden. All you need is some simple tools and some time to plan. The most important thing for a garden is sunlight. Most plants do best when they get at least 6 to 8 hours of direct sunshine every day. Take some time to look at your area before you plant. In what places does the sun shine the most during the day? If you garden inside or in the shade, your plants may need a grow light to get the extra light they need. Sunlight is like food for your plants, so this step is non-negotiable for a thriving garden.

      Next, let’s talk about soil, which is basically the foundation of your garden. Don’t skimp on this part; healthy dirt makes plants healthy. Soil that is nutrient-rich, drains well, and is open enough for roots to grow in is ideal. If you are working with soil from your garden, you might want to add compost or other organic matter to make it better. A good organic potting mix is great for plants that are grown in pots. It’s okay if your soil isn’t great at first. Gardening is a process of learning, and you can always improve the soil over time.

      Another important part of gardening is watering, but this is where many new gardeners make mistakes. If you want to, you could water your plants every day, but that could cause root rot and other problems. Check the ground first before you water. It shouldn’t feel soaked, but a little damp. It’s time to water if it’s dry an inch below the top. Most veggies like it when the water stays the same, so try to water them at the same time every day. A watering can, a hose with a spray tip that is gentle, or even a drip irrigation system can help you do this job better.

      You don’t need a big garden either to start planting. A lot of veggies do really well in pots, which makes them great for apartments, balconies, and patios. To keep the soil from getting too wet, look for pots with drainage holes and pick a size that’s right for your plant. For instance, lettuce and herbs do well in small pots, but tomatoes and cucumbers need bigger ones. Raised garden beds are a great choice if you have some outdoor room. You can control the quality of the dirt and they are easier to take care of than regular garden plots.

      The last thing is to remember the tools and ingredients. You don’t need a lot of fancy tools to grow, but a trowel, gloves, and pruning shears will make your life a lot easier. Getting these basic things can save you a lot of time and trouble as you start out. With a little work and planning ahead, your garden will soon be full of life, ready for a season of fresh veggies grown at home.

        The Best Vegetables for Beginners

        If you have never gardened before, start with veggies that are simple to grow and take care of. Here are some choices that can’t go wrong:

        1. Radishes

        Radishes grow quickly, which is great for farmers who don’t like to wait. Radish plants will be ready to pick in three to four weeks. They can grow in small fields or pots because they don’t need a lot of room.

        • How to Grow: Plant radish seeds directly in the soil. They prefer cooler weather, so spring or fall is the best time to plant them. Keep the soil moist, and they’ll practically grow themselves.
        • Why You’ll Love Them: Radishes add a satisfying crunch to salads and sandwiches. Plus, they’re great for experimenting with pickling.

        2. Lettuce

        It’s easy to start with lettuce. The plant grows quickly, doesn’t need much care, and does best in cooler weather. Having fresh lettuce on hand is always helpful, whether you’re making salads or wraps.

        • How to Grow: Sow lettuce seeds in loose, fertile soil. Leaf lettuce varieties are easier to grow than head lettuces like iceberg.
        • Harvest Tip: Pick the outer leaves as needed, and your lettuce plant will keep producing new ones.

        3. Green Beans

        If you’re new to gardening, green beans are a good choice. They can handle rough conditions, produce food, and don’t need much care. Bush beans stay close to the ground, but pole beans need a trellis or stick to hold them up.

        • How to Grow: Plant seeds directly in the soil after the last frost. They love sunshine, so choose a sunny spot.
        • Why They’re Awesome: Beans are incredibly versatile in the kitchen, and the more you harvest, the more they’ll grow.

        4. Carrots

        One of the easiest root veggies to grow is the carrot. As long as you use a deep pot, they’re also great for growing in pots.

        • How to Grow: Sow carrot seeds in loose, sandy soil to ensure the roots grow straight. Carrots take 2-3 months to mature, so patience is key.
        • Fun Fact: Carrots come in various colors, including purple, yellow, and white, which can make your garden (and meals) more vibrant.

        5. Zucchini

        One food that keeps giving is zucchini. During the growing season, a single plant can make a lot of zucchini.

        • How to Grow: Zucchini needs space to spread, so it’s best suited for outdoor gardens. Plant seeds after the last frost and keep the soil moist.
        • Pro Tip: Harvest zucchinis when they’re small for the best flavor. If left too long, they can grow to comical sizes.

        6. Tomatoes

        Tomatillos are a classic garden vegetable. Even though they need a little more attention than some of the other vegetables on this list, especially baby tomatoes, they’re still easy for beginners to grow.

        • How to Grow: Start with a small tomato plant instead of seeds for faster results. Use a stake or cage to support the plant as it grows.
        • Why They Rock: Homegrown tomatoes are infinitely tastier than store-bought ones. Use them in salads, and sauces, or just eat them fresh off the vine.

        7. Spinach

        Spinach grows quickly and is full of nutrients. It does best when it’s cooler outside. It works really well in small fields or even pots.

        • How to Grow: Spinach grows best in fertile, well-drained soil. Plant seeds in early spring or late summer.
        • Harvest Tip: Pick leaves from the outside of the plant, and it will continue producing new ones.

        8. Cucumbers

        Cucumbers grow quickly and are very good for you. Cucumbers are great fresh, pickled, or in salads, so you should have some in your garden.

        • How to Grow: Plant cucumber seeds after the last frost in a sunny spot. If you’re short on space, use a trellis to grow them vertically.
        • Keep in Mind: Regular watering is essential to avoid bitter-tasting cucumbers.

        9. Peas

        Peas are sweet and simple to grow. They do best in cooler weather and can grow in small areas with some help.

        • How to Grow: Plant pea seeds in early spring or fall. They grow quickly and don’t require much maintenance.
        • Fun Fact: Pea plants enrich the soil with nitrogen, which benefits other plants in your garden.

        10. Herbs (Bonus Pick!)

        It’s not really a food, but herbs like parsley, basil, and cilantro are some of the easiest plants to grow. They’re great for small rooms and make almost any dish taste better.

        • How to Grow: Herbs grow well in small containers, making them ideal for indoor gardening. Keep them near a sunny window or under a grow light.
        • Why You’ll Love Them: Fresh herbs take your cooking to the next level, and you can harvest them as needed.

        Tips for Avoiding Common Gardening Mistakes

        Even the easiest vegetables can struggle if you make some rookie mistakes. Here are a few to watch out for:

        1. Too much water: A lot of people who are just starting out think their plants need to be watered all the time, but too much water can cause root rot. Check the earth. Don’t water it yet if it’s still wet.
        2. Planting Too Close Together: Too many plants close together can make it hard for air to flow and cause diseases. Find out how far apart to plant the seeds on the box.
        3. Not Getting Enough Sunshine: Most plants need a lot of sunshine. If your yard gets too much shade, choose plants that can handle it, like lettuce or spinach.
        4. Not using fertilizer: Over time, soil can lose its minerals. For healthy plants, use an organic manure that is well-balanced.

        It’s not just about growing food in a garden; it’s also about the journey. It’s very rewarding to see your seeds sprout, care for your plants, and harvest your first crop. It brings you closer to nature and teaches you to be patient, strong, and creative.

        Take a moment to remember that everyone who gardens started out as a beginner, whether they grow radishes in a window box or tomatoes in their backyard. Don’t worry about being perfect; just enjoy the process. Who knows? You could find that gardening is one of your favorite things to do.

        Are you ready to begin? Get some seeds, find a warm spot, and begin to grow. 

        Happy gardening!

        Garden Borders Ideas: Fun, Creative, and Easy DIY Tips for Every Garden Style

        Garden Borders Ideas: Fun, Creative, and Easy DIY Tips for Every Garden Style

        When people do landscaping, they often forget to put up garden borders. Take a look at this: the bright flowers, green grass, and cozy patios are the main draws, but the borders really make the scene. They frame your garden, give it shape, and connect all of its parts to make a beautiful whole. Having the right border can make all the difference, whether you have a huge garden or a small garden on your rooftop. Are you ready to make your outdoor area better? Here are some creative ideas, useful tips, and motivation to help you frame your garden like a pro!

        Why Garden Borders Are a Big Deal

        The borders around the garden might not seem important at first, but they make a big difference. Borders are the first step in making a garden look neat, stylish, and like it serves a purpose. This is why you should pay attention to them:

        • Organization: A well-placed border keeps everything in its place, whether it’s flower beds, vegetable patches, or pathways. It’s the difference between a chaotic mess and a garden that looks straight out of a magazine.
        • Enhanced Visual Appeal: Borders give your garden more definition and make the lines more clear, which is more pleasing to the eye. They also make it look like there are layers, which makes even a small yard feel more alive. 
        • Protection: Borders help keep the soil from washing away, the mulch from running off onto the walks, and weeds and grass that are too big for your beds.
        • Low Maintenance: Long term, the right border can save you time and work by stopping the spread of weeds and keeping things neat.

        Borders are like the cherry on top of a cake—they make your garden shine.

        Choosing the Right Material for Your Garden Borders

        What you need to do first to make a great garden border is pick out the right stuff. If you want your garden to look good, think about how the material you choose fits with your style and your needs. Let’s look at some well-known options:

        1. Natural Stone

        They will always look good, and you can use them with almost any style of garden. Stones like marble, granite, sandstone, and slate can be used to make both casual and formal gardens.

        • Pros: It’s long-lasting, won’t break in bad weather, and looks good.
        • Cons: It can be heavy, and it costs more than other materials.

        2. Wooden Borders

        I like how the garden feels warmer and more natural with wooden borders. Wood can bend in many ways. If you want a more modern look, use smooth planks instead of old, worn-out wood.

        • Cons: It’s bad for the environment, hard to use, and can’t be changed.
        • Cons: It needs regular upkeep to keep it from rotting and getting damaged by the weather.

        3. Metal Edging

        Metal edging is a great way to give something a sleek, modern look. But steel and aluminum are also very strong and bendy, which makes them perfect for designs with curves or straight lines.

        • Pros: Minimalist and long-lasting.
        • Cons: Can be pricey and may require rust-proof treatments over time.

        4. Bricks and Concrete

        Brick and concrete walls are strong, cheap, and simple to use in many ways. They have been around for a long time. You can make your own shapes out of concrete or figure out cool ways to lay bricks.

        • Pros: It’s strong and simple to keep up.
        • Cons: Setting up can take a long time.

        5. Recycled and Upcycled Materials

        Why not use old things in a new way? Used things like old plates, wine bottles, and even tires can be used to give your garden a unique look.

        • Pros: affordable and good for the environment.
        • Cons: Installing it might take more thought and work.

        Creative Garden Border Ideas

        Now that you know what materials to use, let’s look at some creative garden border ideas that will help you plan your next project.

        1. Living Borders

        Should the edges be made of stone or wood? Add plants to the edges to make them look lush and living. You can choose lavender, thyme, or boxwood because they don’t get very tall. They make your garden look nice, and some of them even smell nice.

        2. Glow-in-the-Dark Edging

        Want your garden to look beautiful at night? Paint stones with glow-in-the-dark paint or put solar-powered LED strips along the edges of your garden. It’s an easy way to make a magical atmosphere for parties in the evening or quiet nights under the stars.

        3. Mosaic Borders

        Making a mosaic out of broken glass, tiles, or rocks can make you an artist. This project is easy and fun to do yourself, and it will make your yard look better. Use it for walks and the edges of your garden.

        4. Edible Borders

        Edible borders are both useful and pretty for people who like to garden in their kitchens. Herbs and fruits, like parsley, chives, and thyme, or strawberries, make edges that are both useful and tasty.

        5. Upcycled Borders

        Get creative with materials you already have. Wine bottles, old plates, or even bricks from a demolished wall can be repurposed into charming and unique garden borders.

        6. Terracotta Pot Edges

        Set up small terracotta pots around the edges of your flower beds. You can leave them empty to make them look nicer, or you can put small flowers or succulents inside to make them more interesting.

        7. Wildflower Borders

        Plant wildflowers around the edges of your garden to make it feel like a whimsical meadow. This method is easy to keep up and works great for drawing pollinators like butterflies and bees.

          How to Plan Your Garden Borders

          It’s not enough to just pick the most attractive border for your garden; you should also think about how it will work and last for a long time. To get you going, here are some ideas:

          1. Match Your Garden Style: The theme of your garden area should go well with your borders. For instance, modern gardens look best with sleek metal edging, while cottage-style gardens look best with rough wood edging.
          2. Factor in Maintenance: Some materials, like wood, require regular upkeep. Be honest about how much time and effort you’re willing to invest.
          3. Measure and Mark: Before installing any borders, measure your garden beds and pathways carefully. Use stakes and string to outline the edges for precision.
          4. Play with Layers: Layering plants of different heights, colors, and textures along your borders can add depth and visual interest.
          5. Stick to Your Budget: While it’s tempting to go all out, there are plenty of budget-friendly options that look just as great as premium materials.

          DIY Garden Border Ideas for Every Budget

          1. Rustic Log Edging

          If you like the look of natural wood, a log fence might be the best choice for your garden. Cut tree branches or logs into the same length and stand them up to make a border that looks earthy and rough. This type of landscaping works well outside and makes flower beds and walks look great.

          How to Create It:

          • Cut logs into lengths of 6 to 12 inches, ensuring the base is flat for stability.
          • Dig a shallow trench around your garden bed and place the logs upright in the trench.
          • Pack soil or gravel around the base to keep them steady.
          • For added durability, treat the logs with a weatherproof sealant to prevent rotting.

          Why Choose Log Edging?

          • It’s eco-friendly, especially if you’re using fallen branches or salvaged wood.
          • Logs add a warm, organic feel to your garden.
          • It’s a highly customizable option—you can paint or sand the logs for a polished look or leave them natural for rustic charm.

          2. Bottle Borders with a Pop of Color

          Putting up garden borders out of glass bottles is both eco-friendly and artistic. You can use soda bottles, wine bottles, or even beer bottles for this project. It will give the edges of the garden color and texture.

          Step-by-Step Guide:

          • Collect bottles in various colors for a vibrant effect or stick to one shade for a uniform design.
          • Clean the bottles and remove any labels.
          • Dig a shallow trench around your garden bed.
          • Bury the bottles upside down, leaving the bottoms exposed. Ensure they are positioned at the same height for a neat appearance.
          • For a sturdier setup, fill the bottles with sand or gravel before planting them.

          Creative Variations:

          • Paint clear bottles in metallic or pastel shades for a customized look.
          • Use plastic bottles if you want a lightweight alternative.

          Why It Works: Bottle borders are inexpensive, easy to install, and add a unique aesthetic to your garden. Plus, it’s a great way to recycle materials that would otherwise go to waste.

          3. Versatile Pallet Wood Edging

          You can do a lot of different things with old wooden boards, and they are cheap and easy to find. With little work, they can be turned into attractive and useful yard borders. You can make any kind of fence out of pallet wood, from natural ones to sleek, modern ones.

          How to Do It:

          • Take apart an old pallet and sand the wood planks to remove splinters.
          • Cut the planks into uniform lengths based on your desired border height.
          • Arrange the planks vertically, burying the bottom portion in the soil for stability, or attach them horizontally to stakes for a fence-like look.
          • Paint, stain, or leave the wood natural, depending on your garden’s style.

          Benefits of Pallet Wood Edging:

          • It’s incredibly budget-friendly—many hardware stores or warehouses give away old pallets for free.
          • It complements a wide range of garden styles, from rustic to minimalist.
          • Pallet wood is easy to work with, making it an ideal material for beginners.

          Pro Tip: Use weather-resistant wood treatment or sealant to ensure your pallet border lasts through the seasons.

          4. Decorative Stone Stacking

          Stone edges are always a good choice because they last a long time and look great naturally. A border made of stacked stones can give your yard a sophisticated, layered look while also being very strong. For plants with an organic or traditional theme, this method works great.

          Steps to Get Started:

          • Choose flat stones or river rocks for easy stacking. Look for rocks on your property, purchase them from landscaping stores, or collect them during outdoor adventures.
          • Dig a shallow trench along your garden bed to create a stable foundation.
          • Start with larger stones at the base and stack smaller stones on top, ensuring they fit snugly together.
          • For added security, use landscape adhesive or mortar to hold the stones in place, especially if the border will face heavy rain or foot traffic.

          Variations:

          • Use decorative pebbles in contrasting colors to fill gaps between the stones for a more artistic finish.
          • Incorporate moss or small plants into the crevices to add greenery and soften the look.

          Why It’s Great: Stone stacking is timeless, easy to customize, and requires minimal maintenance once installed.

          5. Mosaic or Tile Borders

          Use old tiles, plates, or broken pottery to make a colorful and artistic border around your yard. Adding mosaic edges to your garden beds not only makes them look nicer, but they also add color and creativity that makes the area stand out.

          How to Create a Mosaic Border:

          1. Gather things like tiles, plates, or bright pieces of glass. You can usually find these at thrift stores for a low price or fix up things you already have that are broken.
          2. Break up bigger pieces into smaller ones with a hammer. (Don’t forget to put on gloves and glasses!)
          3. Put the pieces on a base made of concrete blocks, bricks, or wood planks and arrange them in shapes or at random.
          4. Use outdoor-grade glue to stick the pieces together, making sure that none of the sharp ends are showing.
          5. To keep the mosaic safe from the weather, cover it with a weatherproof covering.

          Why Mosaic Borders Are Worth the Effort:

          • They’re perfect for adding personality and color to your garden.
          • Mosaics are a great way to recycle materials, making this both eco-friendly and budget-conscious.
          • Each border is a unique piece of art, ensuring no two gardens look alike.

          Maintaining Your Garden Borders

          It is important to keep your borders in good shape after you have put them up. How to make them last:

          • Regular Cleaning: Sweep away dirt, leaves, and debris that accumulate around your borders.
          • Weed Control: Check for weeds and remove them promptly to keep your borders looking neat.
          • Inspection and Repairs: Look for signs of damage, such as rotting wood, chipped stones, or rusting metal, and make repairs as needed.
          • Re-treat Materials: If you’re using wood or metal, reapply sealants or rust-proof coatings every couple of years to maintain durability.
          • Plant Care: For living borders, trim and shape the plants regularly to keep them healthy and tidy.

          Even though it might not seem important, garden borders are a big part of making an outdoor space look good. Borders can separate your flower beds and give your paths a creative touch, making your yard look nice, be well-kept, and be useful. Folks have used stone and wood for a long time, but you can try something new with recycled materials and do-it-yourself projects.

          It’s easy to show off your creativity, style, and love in your garden.  

          How to Find the Perfect Sunlight Balance for Your Garden

          How to Find the Perfect Sunlight Balance for Your Garden

          Every gardener knows that giving your plants the right amount of sunlight is one of the most important things you can do to make your yard grow well. But how do you know if the sun is too much or too little in your garden? Plants need sunlight to make food and grow. This process is called photosynthesis. When plants don’t get enough sun, they may become weak and spindly, or even worse, they may never grow again. When plants get too much sun, their leaves can get burned or dry out. This slows their growth and hurts plants that are already weak. 

          It can be hard to find the right mix because each plant needs a different amount of sunlight. Some plants do better in full sun, while others do better with some shade. If you’re not sure how much light your garden is getting or if your plants don’t seem as healthy as they should, you may want to check it out more closely. This guide will show you the signs that your garden might need more or less sunshine and give you tips on how to change your setup so that your plants stay healthy. Managing the sun in your garden is important whether you’re a beginner or an experienced gardener. It can make all the difference in making your outdoor space bright and alive.

          Why Sunlight Matters

          Before we talk about the signs, let’s talk about why plants need sun so much. Plants need sunshine to do photosynthesis, which is how they turn light into energy. This is what plants need to grow, bloom, and make food. For plants, not getting enough sunshine can make them weak and leggy. But too much sun can hurt the leaves by drying them out or burning them. You need to give each plant the light it needs for your garden to grow well.

          Here are some ways to tell if your garden has too much or too little sunlight. 

          Signs Your Garden Needs More Sunlight

          1. Stunted Growth or Leggy Plants

          When plants in your garden don’t get enough sun, their growth slows down or stops. You have “legginess” if your plants are getting tall but look weak and spindly. It’s most likely because they want to reach the sun. A plant will stretch out to find light if it doesn’t get enough of it. The roots and leaves get long and thin this way. Tomatoes, cucumbers, and other vegetables that need full sun are often the ones that do this.

          How to fix it: You could move your plants to a spot with more sun or cut back the tall stems to make them grow bushier. You can also use screens or reflectors to help the plants get more sunlight.

          2. Yellowing Leaves

          Your plants’ leaves might be turning yellow and falling off because they aren’t getting enough light. In order to take in light, plants need chlorophyll. If they don’t get enough sunlight, they can’t make enough of it. The leaves turn yellow, and the plant looks sick all around.

          How to fix it: Every day, make sure your plants get at least six to eight hours of full sunlight. Move them or look for plants that do better in places with less light if you can’t do this where they are now.

          3. Poor Flowering or Fruiting

          Insufficient sunlight could be the reason why your flower or veggie plants aren’t flowering or fruiting when they should. Without sun, flowers and fruit can’t grow, so if your plants are only making leaves and stems and not flowers, they might not be getting enough sun.

          How to fix it: During the hottest parts of the day, make sure your plants are in full sun. Plants like peppers and tomatoes do best where they get direct sunshine for at least six hours a day.

          4. Moss or Lichens Growing

          Moss and algae are often signs that it is too dark somewhere. These organisms do best in damp, dim places, and they can quickly take over a garden if it doesn’t get enough sunshine. If moss starts to grow on the ground or on your plants’ roots, you need to move everything to a spot with more sunlight.

          How to fix it: To get more sunlight on your plants, move them to a spot with more light or cut back any trees or bushes that are blocked by them. If you can’t move your plants, you might want to switch to types that do better in shade.

            Signs Your Garden Needs Less Sunlight

            A lot of plants do well in full sun, but not all of them do. Some plants, especially those from cooler areas or with thin leaves, can burn or dry out if they get too much sun. If you see any of these things, your yard may be getting too much sun.

            1. Wilting or Scorched Leaves

            If leaves are wilting or getting burned, it’s clear that there is too much sunshine. This happens when a plant gets too much sun. The leaves may curl up, turn brown, or get dry, crispy ends. This usually happens because the plant is trying to keep its water in because it is hot.

            How to fix it: During the hottest part of the day, usually between noon and 3 p.m., move the plant to a spot with more shade. You might also want to use shade cloth or yard structures like arbors to protect yourself from the sun.

            2. Leaf Burn or Sunburn

            Leaf burn is when a plant’s leaves get hurt from too much sun. A lot of plants that aren’t used to the strong noon sun do this. It’s possible for leaves to get dark brown or black spots from too much sun. In the worst cases, it can kill the plant.

            How to fix it: Give your plants shade during the hottest parts of the day to keep them from getting too much sun. It can also help to plant plants that like sun in the morning or late afternoon, instead of in the harsh daytime sun.

            3. Dry Soil or Cracked Soil Surface

            It’s possible that your garden is getting too much sun if the soil dries out too fast. Soil that is in direct sunlight will lose water more quickly, which will cause the surfaces to crack and your plants to not get enough water.

            How to fix it: Putting down mulch in your flower beds will help the soil stay moist and at the right temperature. To keep the soil moist, you can also put plants that like it moist in these places.

            4. Slowed Growth or Stress

            When plants are in too much sun, they may not grow as much or show signs of stress, especially those that are used to cool, shady places. They might not grow at all or lose all of their leaves.

            How to fix it: You should move these plants to a spot that gets shade or some indirect sunshine. You should pick types that will do better in your area and with the amount of sun your garden gets.

            How to Adjust Light in Your Garden

            Let’s talk about how to change the amount of light your plants are getting now that you know what to look for. Here are some tips for making sure your garden gets the right amount of sun:

            • Move Plants Around: If you have potted plants, moving them to different areas of your garden or patio can help you find the perfect amount of sunlight. Just make sure to avoid sudden changes in light, as plants can get stressed if they’re moved too quickly.
            • Use Shade Cloth or Screens: Shade cloth or outdoor screens can be used to block the sun from plants that need more extra care. It works great if you want to keep your fragile plants safe while still letting them get some sun. 
            • Prune Overhanging Branches: If trees or big shrubs are blocking the sun, cut back any branches that hang over. In turn, this will help let more light into your plant bed.
            • Choose the Right Plants: Some plants need more energy than others. When you plan your yard, make sure you choose plants that can grow in the light you have. Plants that do well in shade, like ferns or hostas, do well in spots with less sun. Plants that do well in full sun, like sunflowers or lavender, will thrive in full sun.

            It’s very important to know how much sunlight your garden needs for plants to grow well and stay healthy. It is important to pay attention to the signs and make changes based on them, whether your plant needs more sun to grow or less sun to keep it from getting too hot. You can make a beautiful, well-balanced garden that grows well all year by paying close attention to your plants and making the changes they need.

            So, go outside and give your plants the care they need. Whether they need more sun or a little shade, they’ll thank you with bright flowers and lush green leaves!

            0
              0
              Your Cart
              Your cart is emptyReturn to Shop