The Ultimate Guide to Transplanting: Tips, Tricks, and Creating Your Own DIY Transplant Soil Mix

The Ultimate Guide to Transplanting: Tips, Tricks, and Creating Your Own DIY Transplant Soil Mix

All gardeners, whether they’re new to the hobby or have been doing it for years, need to learn how to transplant plants. If you have ever tried growing plants, you most likely already see the need for transplanting and how it could affect the state of your garden. Though it seems like a straightforward chore, moving plants from one location to another is really far more difficult than it seems. Your transplanting method will help decide whether your plants will struggle to adapt or flourish in their new surroundings. Knowing how to transplant effectively can make all the difference between a thriving garden and one that hardly holds on.

The point is, though, that it goes beyond simply excavating a hole and setting the plant in the ground. Particularly about the kind of soil you are utilizing, there is much more involved. Plants are picky about their soil, hence, the shock of being uprooted can cause stress. Using the correct type of soil mix will help to lower this stress and promote good development. This is why today I want to walk you through the subtleties of transplanting your plants will definitely appreciate. So let’s start right now and set your plants up for success without more delay!

What is Transplanting, and Why Do It?

Basically, transplanting is just the act of moving a plant from one place to another; nevertheless, there is much more to it than just excavating a plant and replacing it somewhere. Transplanting is essential for your plants to reach their best, whether you are moving a little seedling from a tray into your garden bed or a plant from a tiny pot to a larger one. Your plants need fresh nutrients, more room to flourish, and an overall healthier environment for their roots to thrive, hence, this process is absolutely vital. Plants can become stationary without transplanting; lack of room and nutrient depletion stunts their development.

Preventing plants from becoming root-bound is one of the primary reasons transplanting is so helpful. This occurs when the roots outgrow their container and begin to tangle or circle around themselves, therefore restricting their effective absorption of nutrients and water. Although on the surface a root-bound plant may seem robust, beneath it is struggling. Transplanting gives your plant the room it needs to spread out and keep developing, thereby avoiding the problems with packed roots. Moreover, transplanting guarantees that plants have enough access to nutrients, water, and appropriate air circulation—important elements in preserving a robust, normal development rate.

Transplanting, then, is about preparing the plant for success in its new surroundings rather than only about physically relocating it. Here is when a good soil mix’s value is most apparent. To promote good development following the relocation, the soil surrounding the roots must have the proper mix of nutrients, moisture, and aeration. A well-prepared transplant soil mix can make all the difference between a plant that recovers from shock of relocation and one that adjusts easily. Consider it as providing your plants with the ideal welcome space so they may start their new life in the best conditions.

DIY Transplant Soil Mix: Why It Matters

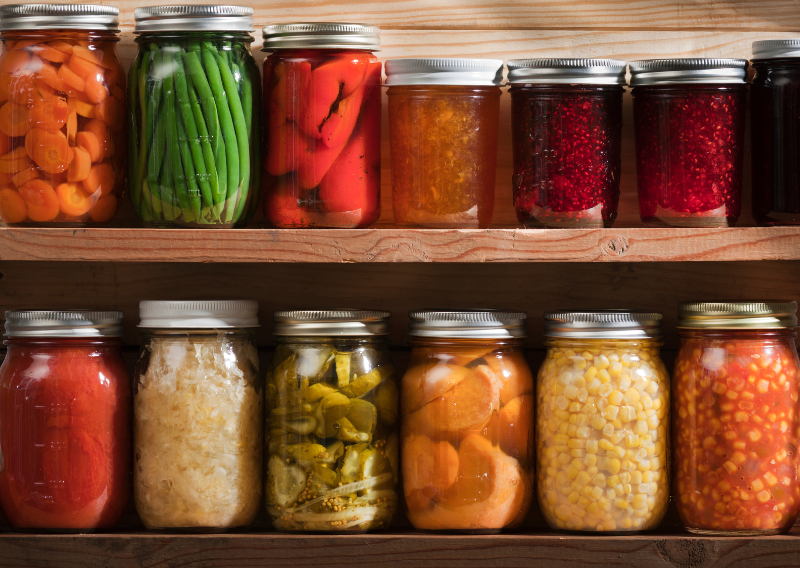
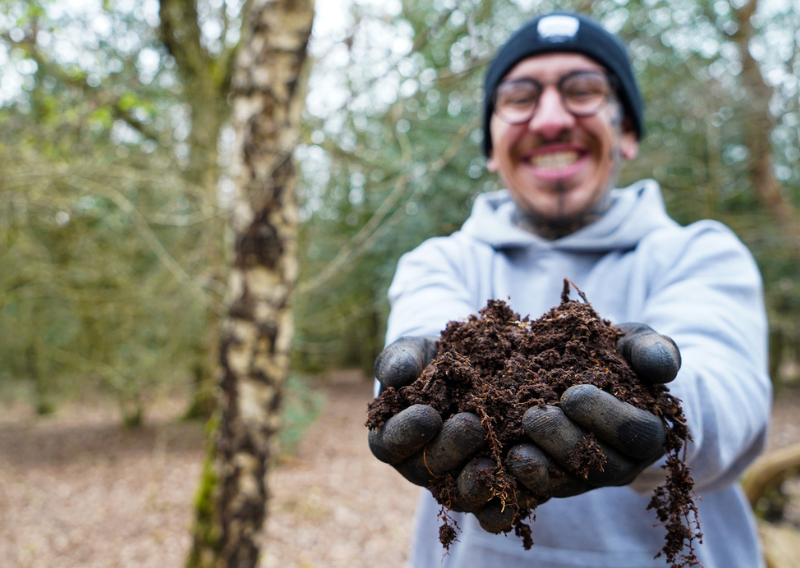
One of the most overlooked parts of transplanting is the soil. Sure, you can buy bags of potting soil from the store, but making your own transplant soil mix gives you more control over what your plants are growing in. Plus, it’s usually cheaper and better for the environment since you’re not relying on packaged products.

Your transplant soil needs to be rich in nutrients, have good drainage, and be light enough for roots to spread easily. Let’s break down a basic recipe for a DIY transplant soil mix.

DIY Transplant Soil Mix Recipe:

You’ll need:

  • Compost (provides nutrients)
  • Coconut coir or peat moss (helps with moisture retention)
  • Perlite or sand (improves drainage)
  • Garden soil (adds body to the mix)
  • Worm castings or organic fertilizer (gives your plants an extra nutrient boost)

You’ll want to mix these ingredients in roughly equal parts, but feel free to adjust based on your plants’ needs. If you’re growing something that likes extra drainage, like succulents, add more perlite or sand. If moisture retention is key (like with tropical plants), bump up the coconut coir or peat moss.

By making your own mix, you can also skip the harsh chemicals and synthetic fertilizers that can come with store-bought soil. It’s all about giving your plants the best chance to grow naturally and healthily.

    When is the Right Time to Transplant?

    When it comes to transplanting, timing is really important; getting it exactly right will make all the difference in how well your plants adapt and flourish. Starting plants from seed, the best time to transfer them is when they have established at least two pairs of “true leaves.” These actual leaves are those that show up following the first set of tiny, spherical leaves—also called cotyledons—that first develop upon seed germination. The actual leaves indicate that the plant has matured sufficiently to start generating energy by photosynthesis, even while those first leaves help start the development of the plant. Usually strong enough to resist the strain of being relocated, the plant will have a higher chance of flourishing in its new environment at this point.

    Regarding outdoor transplanting, the condition of the weather is also really crucial. Your plants cannot be thrown outside whenever you feel like it since, especially if they have been growing indoors or in a greenhouse, rapid exposure to outdoor elements can be rather shocking to them. Timing outdoor transplants properly involves waiting until the risk of frost has totally passed. Tender plants can be damaged and possibly killed even from a light cold. Pay also attention to overnight temperatures; indoor plants are not used to the cool evenings. It is advisable to wait until the evenings are regularly warm before bringing them outside.

    Step-by-Step Guide to Transplanting

    Okay, now that you know the when and why, let’s talk about the how.

    1. Prepare the new home: Before you even think about moving your plant, get the new pot or garden bed ready. Fill it with your DIY soil mix and make sure there’s proper drainage (you don’t want your plant sitting in water). Water the soil lightly to give it a nice, moist environment.
    2. Loosen up the plant: Gently tap the sides of the current container to loosen the roots. If the plant is stubborn, you might need to use your fingers to gently tease the roots free. Try to avoid pulling on the stem, as that can damage the plant.
    3. Plant at the right depth: When placing your plant into its new home, make sure it’s sitting at the same depth it was before. If you plant it too deep or too shallow, the plant could struggle to grow. For certain plants, like tomatoes, you can plant them deeper to encourage more root growth along the stem.
    4. Water thoroughly: After transplanting, give your plant a good soak to help it settle into its new home. This helps reduce transplant shock, which is basically the stress a plant goes through when moved. Adding a little organic fertilizer or root stimulator to the water can give your plant an extra boost.

    Handling Transplant Shock

    Some plants will still suffer from transplant shock even if you follow every stage exactly. Being moved naturally causes a reaction that can result in drooping, yellowing leaves, or perhaps slower development. Still, avoid panic; your plants can recover with some care.

    Try to transplant late afternoon or on a cloudy day to reduce shock. This allows your plant time to adjust free from the pressure of strong sunshine. Try not to fertilize for one week or two after transplanting; keep the soil moist but not watery. Your plant must settle before you begin applying additional nutrients.

    If your plants seem to be suffering with the change, you could consider covering them with a shade cloth or makeshift cover for a few days. This will enable them to gradually fit their new surroundings without becoming overwhelmed by direct sunlight.

    Why Drainage is Key

    I cannot stress enough how important appropriate drainage is during a transplanting operation. One of those things that may either help or ruin your plants’ chances of survival. Roots basically suffocate without oxygen; they require it to flourish. Should the soil be overly compacted or hold too much water, the roots get soggy and may rot or develop various fungal infections. Though more water is preferable, plants need a balance; too much water drowns them, and too little causes them to dry up. This is where appropriate drainage enters in, and why you should focus especially on the soil mix you are employing.

    Including ingredients like perlite, sand, or coarse compost will help your homemade soil mix have better drainage. One volcanic glass that has been heated till it expands is perlite, which also helps produce air spaces in the soil by its lightweight construction. Healthy root development depends on oxygen getting to the roots, which these air spaces help to accomplish. Likewise, adding sand to your soil mix helps break up the texture, thereby keeping it from getting overly compacted; coarse compost offers organic matter that enhances both drainage and nutrient content. These little additions to your soil mix will greatly enhance the conditions for your plants, thereby guaranteeing that they have the water they require as well as the ventilation required for robust and healthy growth.

    Make sure your container has enough drainage, especially if you are transplanting into a pot. Though it seems like a little feature, always look for drainage holes at the bottom of the pot. Water has nowhere to go without drainage holes; hence, it will gather at the bottom of the pot and cause the terrible root rot. For most plants, root rot is almost a death sentence; it’s aggravating since, with appropriate drainage, it is usually preventable. Relax if you have containers without built-in drainage. A few little holes on the bottom will let extra water escape really quickly. Before stuffing the container with soil, another method is to spread a layer of rocks or pebbles at the bottom. This forms a barrier whereby extra water can gather away from the roots, therefore lowering the chance of waterlogging.

    Common Transplanting Mistakes (And How to Avoid Them)

    Transplanting seems simple, but it’s easy to make mistakes if you’re not careful. Here are a few common pitfalls to watch out for:

    • Not hardening off plants: If you’re moving plants from indoors to outdoors, you need to harden them off. This means gradually exposing them to the outdoor environment by placing them outside for a few hours a day, increasing the time each day for about a week.
    • Overwatering after transplanting: Yes, your plants need water, but drowning them won’t help. Keep the soil moist but not soggy, and make sure your soil mix has good drainage.
    • Transplanting too early or too late: Timing is everything. Move your plants too early, and they might not be ready to handle the change. Move them too late, and they could become root-bound or start to suffer from nutrient deficiencies.

    Transplanting need not be frightening. Your plants will grow larger, stronger, and healthier with some forethought and care. And by creating your own do-it-yourself transplant soil mix, you are providing your plants with the best possible beginning in their new environment free from reliance on chemically loaded commercial items.

    Whether you’re moving established plants into your garden or transplanting seedlings into larger pots, just keep an eye on them, make sure they have the correct soil mix, and treat them gently following the relocation. Not too far off, you will find vibrant, contented plants ready to flourish to their utmost.

    Happy gardening!

    A Beginner’s Guide to Food Preservation: Simple Ways to Keep Your Food Fresh

    A Beginner’s Guide to Food Preservation: Simple Ways to Keep Your Food Fresh

    Like me, you most likely enjoy having fresh, delicious food available without having to make frequent grocery shop visits or frequent cooking from scratch. Food preservation can be a game-changer when your garden produces an incredible crop. In addition to saving time and money, it helps lower food waste. Food preservation is becoming popular, even though it may sound a bit old-fashioned now that people are more interested in green living and do-it-yourself tasks. On a cold winter day, opening a jar of homemade jam or pulling out well-preserved berries can also be very satisfying.
    That being said, there are so many ways to keep food fresh that it can be hard to know where to begin. The good news is you don’t have to be professional to make it work. Simple, efficient methods abound that can prolong the life of your food without resorting to overly sophisticated methods.

    Why Preserve Food in the First Place?

    It’s important to know the “why” before we get into the “how.” Why should you try to keep your food fresh? It saves money, for starters. You don’t have to throw away that last bunch of bananas or those tomatoes that are just a little too soft. There is a way to store them that will make them last months longer. This easy habit will help you waste less food and get more for your money at the store. Think about how good it will feel to use those bananas in banana bread months later or those soft tomatoes to make a tasty pasta sauce.

    One more reason is that preserving food lets you eat different foods all through the year. When it snows outside, there’s something magical about biting into a pickle made from summer tomatoes. Or letting a bag of frozen berries from the summer thaw so that you can make a drink in the middle of winter. You can bring the best tastes of the season to your table whenever you want with techniques for preserving food.

    Now that we’ve talked about why preserving food is a good idea, let’s look at some easy ways to make your food last longer.

    Canning: Sealing in the Flavor

    Since the early 1800s, canning has been one of the oldest and most effective ways to keep food fresh. It is still a popular choice among do-it-yourselfers and people who live on their own. Canning is a safe way to store food that will last for a year or more, whether you want to keep a bumper harvest or just fill up your pantry with home-baked goods. During the process, food is put in clean jars and then sealed to stop dangerous bacteria from growing.

    There are two primary methods of canning: water bath canning and pressure canning. Each method is suited for different types of foods depending on their acidity levels.

    1. Water Bath Canning

    Water bath canning is ideal for high-acid foods such as jams, pickles, fruit preserves, and tomato-based sauces. Here’s a step-by-step guide to get started:

    Step 1: Prepare your food (e.g., making jam, pickles, or sauce).
    Step 2: Sterilize canning jars by boiling them in water for 10 minutes.
    Step 3: Fill the jars with the prepared food, leaving about ½ inch of space at the top (called “headspace”).
    Step 4: Wipe the rims of the jars clean, then place sterilized lids on top and screw on the rings until finger-tight.
    Step 5: Submerge the jars in a large pot of boiling water, ensuring the water covers the tops by at least 1 inch.
    Step 6: Boil for the recommended time (usually 10–30 minutes, depending on the recipe).
    Step 7: Carefully remove jars using tongs, place them on a towel, and allow them to cool. As the jars cool, you’ll hear a “pop,” signaling the vacuum seal has formed.

    2. Pressure Canning

    Pressure canning is essential for low-acid foods like meats, beans, and most vegetables, which require higher temperatures to destroy bacteria like botulism.

    Step 1: Prepare your food (e.g., cooking meats, beans, or vegetables).
    Step 2: Sterilize jars and fill them with the food, leaving proper headspace.
    Step 3: Add water to the pressure canner according to the manufacturer’s instructions and place the jars inside.
    Step 4: Lock the canner lid in place and allow it to vent steam for 10 minutes.
    Step 5: Close the vent and bring the canner to the required pressure (usually 10–15 pounds).
    Step 6: Process for the specified time (20–90 minutes, depending on the food).
    Step 7: Allow the canner to cool and depressurize before carefully removing the jars.
    With both methods, the result is shelf-stable food that can last for up to a year. Canning provides not only convenience but also a way to enjoy your garden’s bounty of homemade creations all year long.

    Freezing: A Simple and Quick Method

    One of the best ways to keep food fresh until you’re ready to can it is to freeze it. It’s likely that most of us have frozen leftovers at some point. But did you know that you can freeze almost any kind of food? Busy people who want to save time and food often freeze everything from fruits and veggies and even whole meals.

    When you freeze food, remember that not all of it freezes the same way. For example, strawberries and blueberries both hold up pretty well when they thaw, while strawberries get soft. To keep their color and texture, vegetables usually need to be washed before they are frozen. Blanching means to boil them for a few minutes and then put them in ice water right away to cool them down.

    Also, make sure your frozen food has labels on it. It’s awful to look through the freezer and find a bag of “mystery stew” that isn’t labeled. You can keep track of what needs to be eaten first by writing the date and what’s inside each container.

    Freezing is convenient, but the downside is that frozen food can only last for several months before it starts to lose its quality. That said, it’s still one of the simplest and most convenient preservation methods.

    Drying: Let the Air Do the Work

    Another really old-fashioned way that still works well today is drying. Plants, herbs, and fruits can be dried. Taking away the water from food stops mold, bacteria, and yeast from growing, so it can be stored for a long time without getting spoiled.

    To dry food quickly and easily, an electric dehydrator is a great choice. With low heat and a fan moving air around, these handy tools dry food without cooking it. A low-temperature oven can also be used if you don’t have a dehydrator. It may take longer, though.

    Sun-drying is an older way, but it needs the right weather, which is usually a lot of dry, sunny days. Sunlight makes it very easy to dry herbs. For a few days, you can hang them upside down in a dry place with small bundles tied around them.

    It’s easy to carry dried foods with you on hikes, as they are small and light. You can also store them in your pantry for months at a time.

    Fermentation: Good Bacteria to the Rescue

    Fermenting food might sound like something fancy cooks or health nuts do, but it’s actually an old way to keep food fresh that you can do yourself. In addition, it makes tastes that are tasty and sour and is good for your gut health.

    Sauerkraut and kimchi are possibly the most well-known fermented foods, but you can ferment any kind of vegetable (including honey and garlic). To do this, you put your vegetables in a saltwater brine and let natural bugs do their thing. Good bacteria called lactobacillus break down the sugars in food over time. This makes lactic acid, which keeps the food fresh and gives it its unique sour taste.

    There is no special gear needed for fermentation, but some people like to use fermentation weights to keep the vegetables immersed. The best part? Adding herbs, spices, or even fruits to your fermented vegetables can help you try out different tastes.

    The only bad thing about fermentation is that it usually takes weeks to finish. Fermented foods can stay good in the fridge for months after they’re made, though.

    Pickling: Not Just for Cucumbers

    Another old way to store food that has been making a big comeback lately is pickling. Pickling isn’t just for veggies, either. Carrots, green beans, onions, and even fruit rinds like watermelon can all be pickled.

    Soaking food in a liquid is a part of both pickling and fermentation. In pickling, the liquid is usually vinegar-based brine instead of salt water. Because vinegar is acidic, it stops bad germs from growing, which keeps the food fresh for months.

    A fun and simple way to start is with quick pickling. It’s easy: just heat up some vinegar and spices, pour them over the vegetables, and put them in the fridge. You can eat these quick pickles in a few hours, but they generally last for a few weeks.

    After pickling your vegetables, you should use the water bath method to store them for longer. They can be kept on the shelf for a long time and can be enjoyed all year.

    Remember to clean the rims of the jars using vinegar. Vinegar doesn’t allow mold to build up on top of the jar, so make sure to clean the rims using a cloth dipped in a little bit of vinegar.

    Root Cellaring: Nature’s Fridge

    If you’re fortunate enough to have extra space or a basement, root cellaring is one of the most natural and straightforward ways to preserve food. Unlike canning or freezing, it doesn’t require any cooking or processing. The idea is simple: store your harvested produce in a cool, dark, and humid environment to extend its shelf life by months.

    Root cellars work by taking advantage of nature’s natural refrigeration. These spaces maintain a stable temperature, typically between 32°F and 40°F (0°C to 4°C), and high humidity, which prevents produce from drying out. This makes them perfect for storing root vegetables like carrots, potatoes, and beets, as well as apples, cabbage, and onions. Here’s a brief guide to setting up your own root cellar:

    Step-by-Step Guide to Root Cellaring:

    Choose Your Location:
    If you already have a basement or a garage, you’re halfway there. The key is to find a cool, dark spot with natural insulation. Avoid areas that get direct sunlight. If you’re in a warmer climate or don’t have a basement, you can bury a container, such as a metal or plastic barrel, in the ground. Make sure the location stays above freezing but cool enough to prevent rotting.

    Ventilation:
    Proper airflow is essential to prevent mold and rot. If you’re using a basement, crack open a small window or install a simple ventilation pipe. For buried containers, drill a few small holes to let air circulate. This ensures your produce doesn’t get too stuffy.

    Monitor Temperature and Humidity:
    Aim for a temperature between 32°F and 40°F (0°C to 4°C) with 85-95% humidity. You can use a thermometer and a hygrometer to keep track. If the air is too dry, place pans of water or wet sand in the space to increase humidity. If it’s too cold, insulate the walls or cover your produce with straw.

    Prepare and Store Produce:
    Harvest your root vegetables and fruits at the peak of their ripeness. Don’t wash them before storage—simply brush off any excess dirt. Place them in baskets, crates, or even wooden shelves, ensuring good air circulation between items. Some produce, like apples, release ethylene gas that can cause other vegetables to spoil, so it’s best to store them separately.

    Check Regularly:
    Every few weeks, inspect your stored items. Remove any rotting produce to prevent it from affecting the rest of your stock.

    By following these steps, you can set up a simple, efficient root cellar to preserve your harvest with minimal effort. This age-old technique requires little maintenance and helps keep your produce fresh for months without the need for electricity or chemicals.

    Vacuum Sealing: Keep Air Out, Freshness In

    More and more people are vacuum-sealing their food these days, especially those who want to keep their leftover food fresh for longer. Vacuum sealing stops oxidation, freezer burn, and the spread of bacteria by taking out all the air from a package.

    To begin, you will need a vacuum sealer machine and bags that are made to be vacuum sealed. When food is packed, it can last a lot longer than if it were just put in a paper bag. You can use this method on cheeses, and even dried foods like pasta or grains.

    Food that has been vacuum-sealed can be kept in the fridge, freezer, or pantry, based on what it is. Remember that vacuum packing your food makes it last longer, but not forever, so keep an eye on the dates that say it’s no longer good.

    Conclusion: Start Small, Have Fun

    It might seem like a lot of work to preserve food, but you don’t have to do it all at once. It’s important to start small and pick one way that you enjoy or that works for you. You could freeze some fresh berries this summer while they’re at their best, or you could try making quick pickles for lunch. These easy steps can help you get started in the satisfying world of preserving food without being too much.

    Putting food away can become a fun and rewarding part of your cooking routine with some time and practice. By using all of the fruit and vegetables you buy, you will not only waste less food, but you will also be able to make meals that are healthy and taste better. You’ll also save money in the long run because the food will last longer. Putting food away not only makes you a better cook, but it also connects you more deeply to nature’s cycles and the joys of living in a way that doesn’t harm the environment. Now it’s time to get dirty, pick a way, and start the adventure of preserving food!

    How to Make Crunchy, Zero-Waste Veggie Crisps at Home

    How to Make Crunchy, Zero-Waste Veggie Crisps at Home

    As gardeners and sustainability enthusiasts, we’re always on the lookout for ways to cut down on waste in the kitchen. One of the simplest methods is to use every part of the vegetables we grow or buy. Instead of throwing away those nutrient-rich peels, why not transform them into something crunchy and delicious? With this Zero Waste Veggie Crisps recipe, you can make the most of potato and carrot skins while enjoying a tasty snack.

    I’ll share the step-by-step procedure in this blog and I hope you’ll love it as much as we do.

    The Recipe: Super Crunchy, Super Easy

    Here’s a simple recipe to get started with your zero-waste crisps.

    Ingredients:

    • Potato peels
    • Carrot peels
    • Olive oil
    • Your choice of seasoning (we love using zero-waste garlic and onion powder)

    Step-by-Step Instructions:

    1. Wash and Peel Your Veggies – Start by thoroughly cleaning your vegetables. Since the peels are going to take center stage in this dish, you want to ensure they’re fresh and free from dirt.
    2. Drizzle with Olive Oil – Toss the peels in a bit of olive oil. This not only helps them crisp up nicely but also gives them that lovely golden color when cooked.
    3. Season with Flavor – Next, add your favorite seasonings. If you’re aiming for zero waste, consider using homemade garlic or onion powder, which you can easily make from leftover garlic or onion skins! Feel free to experiment with flavors like rosemary, smoked paprika, or nutritional yeast. 
    4. Cook in the Oven – Spread the seasoned peels on a baking tray and bake them in the oven at 160°C (320°F) for about 20 minutes, or until they’re crispy and golden. Remember to check on them halfway through and give them a little shake to ensure even cooking.

    Waste-Free Kitchen Tip

    To maximize efficiency, consider making veggie crisps while you’re already roasting other vegetables or baking something else. By utilizing your oven to its full capacity, you save energy and prep extra meals for the coming days. We often toss these crisps in alongside a tray of roasted veggies, ensuring every inch of oven space is used effectively. Plus, they store well in an airtight container and can last for a few days—if you don’t eat them all at once! Enjoy this simple, sustainable snack that makes the most of your kitchen efforts!

    Why Go Zero Waste?

    If you’re growing your own vegetables, you’ve already taken a significant step toward living more sustainably. Making Zero Waste Veggie Crisps is an easy way to enhance that lifestyle even further. By using the whole vegetable, you minimize waste, cut down on food costs, and treat yourself to a nutrient-rich snack that’s free from unnecessary packaging and preservatives.

    So, whether you’re harvesting from your garden or using store-bought organic produce, remember: those peels are too valuable to waste. Give this recipe a try and enjoy the benefits of a waste-free kitchen. It’s a delicious way to reward yourself for all the hard work you put into your garden!

    Happy cooking!

    Zero Waste Old Bread: How To Turn Leftovers Into Dessert

    Zero Waste Old Bread: How To Turn Leftovers Into Dessert

    Bread is one of the most wasted foods globally, and it’s surprising how much of it ends up in the trash when it can still be reused. The truth is, bread that’s gone a bit stale doesn’t need to go straight into the compost bin or the trash (we’ve proved it a lot of times in our home!). There are many ways to repurpose old bread and create delicious, zero-waste meals. Today, I’ll share a simple yet amazing dessert recipe that uses stale bread without cooking required!

    Why Old Bread?

    With a bit of imagination, stale bread can become crunchy croutons, tasty breadcrumbs for your favorite dishes, or transformed into a super easy and delicious dessert like the one I’ll show you here!

    Whether you’re growing your own veggies or making conscious efforts to reduce your footprint, adopting a zero-waste mindset in the kitchen complements sustainable gardening beautifully.

    The Simple Dessert: No-Bake Bread & Tofu Cream Treat

    This recipe turns your leftover bread into something delightful without even turning on the stove. It’s plant-based, low on ingredients, and will satisfy your sweet tooth – plus, it’s a great way to use up stale slices.

    Ingredients for the Bread Base:

    • 5 slices of bread (stale or fresh but we prefer the stale ones)
    • 1 ½ cups of brewed coffee
    • 1 tablespoon sugar (or substitute with agave)

    Ingredients for the Cream:

    • 300g silken tofu
    • 150g coconut milk (solid part only)
    • 3 tablespoons sugar (or agave)
    • Sifted cocoa powder for topping

    Step-by-Step Instructions:

    1. Prepare the Bread Base: Start by cutting your bread slices into pieces, then soak them in a mixture of coffee and sugar. Once the bread is soaked, use your hands to mash it into a soft, mushy texture. Spread the bread mixture evenly in a flat container, pressing it down with a spoon to create a smooth, level layer.

    2. Prepare the Cream: In a bowl, combine the silken tofu, the solid part of the coconut milk, and sugar. Whisk the ingredients together until you get a smooth, creamy consistency.

    3. Assemble the Dessert: Evenly spread the cream mixture over the bread base. Finish by sifting some cocoa powder on top. Place the dessert in the refrigerator for a few hours to allow it to set and firm up.

    Additional Tips:

    • If you want to make the cream even thicker, blend in some cashews with the tofu mixture.
    • You can substitute sugar for agave to keep it lighter or for personal preference.

    This dessert is a perfect example of how versatile bread can be, showing that there’s no need to toss it when it goes stale. Plus, with ingredients like coffee, coconut milk, and silken tofu, it’s a wholesome and satisfying treat you can feel good about making.

    Why It Matters for Sustainability

    Reusing old bread is just one of many ways to embrace a zero-waste lifestyle. As a gardener, you already know the value of growing your own food, cutting down on your environmental impact, and making sustainable choices. But kitchen waste, like stale bread, can pile up too. Repurposing it—whether by whipping up creative recipes like this dessert or turning it into breadcrumbs for your homegrown veggies—is a smart way to get the most out of your food.
    Before you toss that stale bread, why not give this recipe a try? Zero-waste living isn’t just about the garden; it extends right into the kitchen, where you can find creative ways to reuse what might otherwise end up in the trash. From the garden to the table, living sustainably is about making mindful choices that benefit both you and the environment.

    Try it out, and you’ll never see old bread the same way again!

    How To Make 2 Creative DIY Garden Projects Using Oak Barrels

    How To Make 2 Creative DIY Garden Projects Using Oak Barrels

    Gardening is such a great way to get in touch with nature, and you really don’t need a huge yard to make a garden work. If you happen to come across an oak barrel—maybe you found one for free or at a bargain—you’ve got an awesome piece to get your creative juices flowing. In this blog, I’ll show you two DIY projects that will help you get the most out of your garden while being eco-friendly. My fiance, Iasmina, and I enjoyed doing these and I hope you will, too.

    Project #1: DIY Small Pond

    Creating a small pond with an oak barrel can add tranquility and beauty to your garden. Plus, it provides a habitat for beneficial wildlife and plants. Here’s how to get started:

    Materials Needed:

    • Oak barrel
    • Pond solar fountain (optional)
    • Water plants (like water lilies or duckweed)
    • Rocks

    Instructions:

    1. Prepare the Barrel: Start by cleaning the oak barrel thoroughly. If it has any old residue, rinse it out with water.
    2. Position the Barrel: Choose a sunny spot in your garden, as most water plants thrive with sunlight. Make sure the ground is level.
    3. Add Water: Fill the barrel with water. If you’re using a solar fountain or water pump, install it now to keep the water moving. This not only creates a soothing sound but also helps prevent mosquito infestations.
    4. Incorporate Plants: Place your water plants in the barrel, ensuring they’re submerged correctly according to their needs. You can also add some decorative rocks around the edge for a natural look.
    5. Maintenance: Regularly check the water level, especially in hot weather. If you notice mosquito larvae, consider adding Bacillus thuringiensis subspecies israelensis, a natural solution that targets pests without harming beneficial insects.

    Creating a small pond is not just visually appealing; it’s also a fantastic way to foster biodiversity in your garden.

    Project #2: Recycled Bike Wheel Trellis

    Transform an old bike wheel into a charming trellis for climbing plants. This project is perfect for small spaces, allowing you to grow peas, beans, or even flowering vines in a unique way.

    Materials Needed:

    • Old bike wheel rim
    • Jute rope
    • Oak barrel or plastic pot
    • Organic compost
    • Peas or beans seedlings

    Instructions:

    1. Prepare the Base: Fill the oak barrel halfway with organic compost.
    2. Attach the Trellis: Take the bike wheel rim and secure it upright into the compost in the center of your barrel. You might need to use additional supports to keep it stable.
    3. Create the Climbing Structure: Wrap jute rope around the bike wheel, creating a grid pattern. This gives the plants something to grab onto as they grow.
    4. Plant Your Seeds: Sow your peas or beans at the base of the trellis, following the instructions on the seed packets for depth and spacing.
    5. Water and Care: Keep the soil moist and provide adequate sunlight. As your plants grow, they will naturally climb the trellis, adding a beautiful vertical element to your garden.

    Both of these projects are super practical, and they really help you make the most of whatever space you have while encouraging sustainable practices. With just a bit of creativity, you can turn even a small area into a beautiful garden oasis. Keep in mind that space isn’t a barrier; it’s a chance to get creative and enhance your gardening experience!

    Happy gardening!

    0
      0
      Your Cart
      Your cart is emptyReturn to Shop