How To Make Homemade Healthy Magnums: A Garden-Fresh Summer Treat

How To Make Homemade Healthy Magnums: A Garden-Fresh Summer Treat

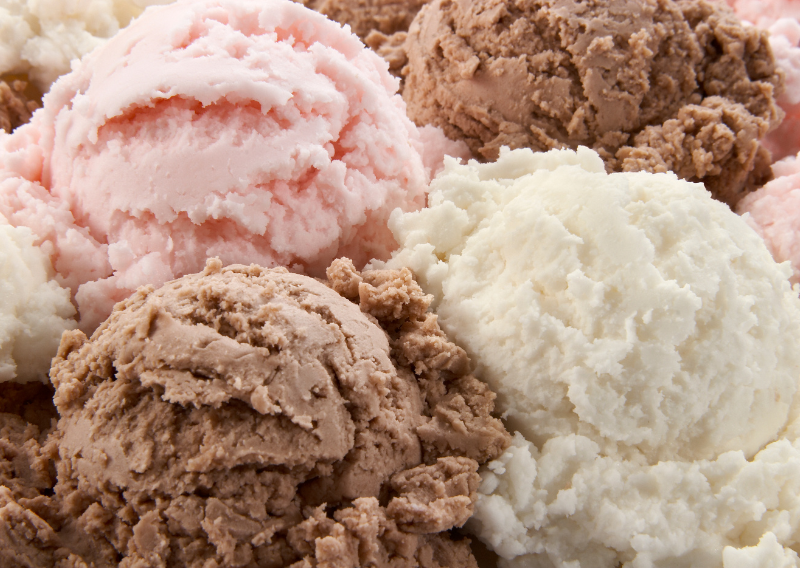
There’s something special about making your own summer treats using ingredients fresh from your garden. When you combine sustainability, creativity, and delicious flavors, the results can be pretty extraordinary. One of my favorite ways to indulge during the warmer months is with homemade Healthy Magnums. They’re 100% plant-based and free from artificial ingredients.

If you’re curious about it and want to give it a try, I’ll show you how to make these healthy magnums at home.

Why These Magnums Stand Out

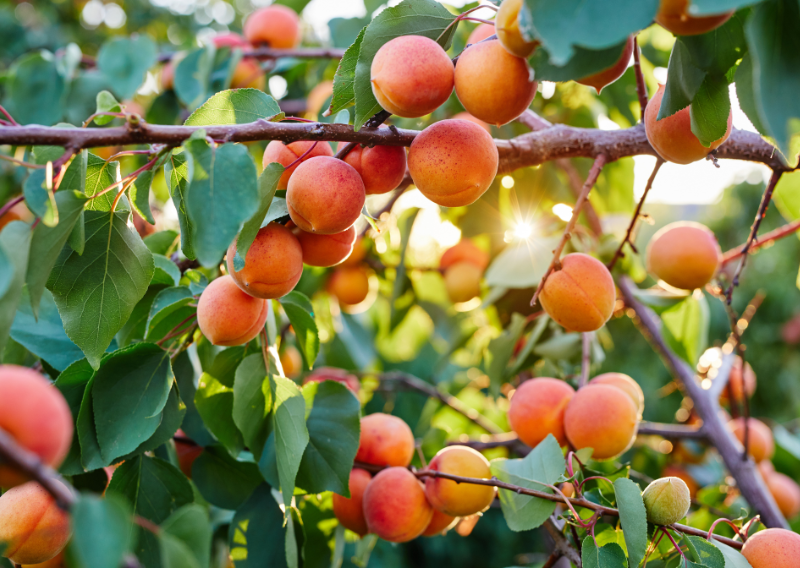
The charm of these Healthy Magnums lies in their simplicity and the use of natural, garden-fresh ingredients. Unlike store-bought versions laden with refined sugars and preservatives, these homemade treats offer a wholesome alternative that doesn’t skimp on flavor. Fresh apricots bring a bright, natural sweetness that pairs perfectly with the creamy texture of coconut cream.

For those who are dairy-free or looking to cut down on processed snacks, this recipe is a great choice. Coconut cream provides a smooth, velvety base that complements the apricots beautifully. It’s not just a dairy substitute—it adds a subtle tropical flavor that takes these Magnums to the next level.

Recipe Ingredients:

  • 1 cup coconut cream
  • 3 cups sliced apricots
  • ½ cup maple syrup or honey (depending on your preference for sweeteners)
  • 1 cup vegan semi-sweet chocolate chips or chopped chocolate
  • ½ cup chopped almonds

Instructions:

  1. Begin by blending the coconut cream, sliced apricots, and maple syrup (or honey) until smooth. Aim for a silky, fruit-filled mixture that will become the creamy core of your Magnums. The fresh apricots add a bright, tangy-sweet flavor that beautifully balances the richness of the coconut cream.
  2. Once blended, pour the mixture into Magnum molds (or any ice cream molds you have on hand). Insert a popsicle stick into each and freeze for at least 4 hours, or until solid.
  3. Melt the vegan semi-sweet chocolate chips or chopped chocolate over a double boiler. Once melted, dip each frozen Magnum into the chocolate, coating them evenly.
  4. As soon as you’ve coated the Magnums in chocolate, sprinkle the chopped almonds over the top while the chocolate is still soft. The combination of smooth chocolate and crunchy almonds creates an indulgent texture that makes these Magnums extra special.
  5. Return the Magnums to the freezer for another 30 minutes to let the chocolate fully harden. Once they’re set, they’re ready to be enjoyed!

A Bonus Garden Tip

As an added bonus, you can make use of the apricot pits by cracking them open and infusing them in vinegar. This creates a unique, nutty-flavored dressing that’s perfect for salads. Just remember, since apricot pits contain cyanide, it’s best to use the infusion sparingly and enjoy it in moderation.

Note: If you don’t have an apricot, you can use any fruit!

Enjoy these Healthy Magnums as a summer snack or a post-dinner dessert, and share them with friends and family to show that plant-based, homemade treats can be just as delicious as their store-bought counterparts.

Happy eating!

Healthy Reese’s: How To Make The Plant-based Option of Chocolate

Healthy Reese’s: How To Make The Plant-based Option of Chocolate

If you’re craving a healthier, plant-based version of Reese’s cups, swapping out chocolate for carob could be the perfect solution. Carob is naturally sweet and brings a range of health benefits that make indulging in this treat even more satisfying. Best of all, this simple recipe uses just four ingredients and is incredibly easy to whip up. I feel extra lucky that a carob tree is growing just 15 steps away from my place!

Let’s dive into how to make these delicious, guilt-free treats and explore why carob makes such a fantastic alternative to traditional chocolate.

Why Choose Carob?

Carob comes from the pods of the carob tree, which thrives in warm climates and produces a naturally sweet powder once the pods are dried and ground. Unlike chocolate, carob is caffeine-free which makes it a great option for those sensitive to caffeine or trying to lower their caffeine intake. Carob is also packed with calcium, iron, and fiber, and it contains fewer calories than chocolate. For those who want to satisfy their sweet tooth without the sugar rush, carob is definitely a healthier alternative.

Carob Reese’s Recipe: Simple & Delicious

Ingredients (Makes 9-12 Reese’s Cups):

  • 1 cup coconut butter
  • 1 cup carob powder
  • 3 tbsp coconut or almond flour
  • Pinch of sea salt
  • 9-12 tsp peanut butter

Instructions:

  1. In a small pot, gently melt the coconut butter over low heat. Be sure to stir occasionally to prevent burning.
  2. Once melted, add the carob powder, coconut or almond flour, and a pinch of sea salt. Stir well to ensure the mixture is smooth and free of lumps.
  3. Pour one tablespoon of the carob mixture into the bottom of each silicone cupcake mold. Place the molds in the freezer for a few minutes until the base is hard.
  4. Once the base is set, add one teaspoon of peanut butter on top of each mold.
  5. Pour the remaining carob mixture over the peanut butter layer and freeze again until fully set.
  6. Keep your carob Reese’s cups in an airtight container in a cool place or the fridge to maintain freshness.

Health Benefits of Carob

  • Caffeine-Free: Unlike chocolate, carob doesn’t contain caffeine, making it an excellent choice for those who want to avoid jitters.
  • Low in Fat and Calories: Carob contains less fat and fewer calories than chocolate, making it a smart option for those watching their calorie intake.
  • Rich in Nutrients: Carob is packed with calcium and fiber, both of which are essential for bone health and digestion.
  • Naturally Sweet: Since carob is naturally sweet, you don’t need to add any additional sweeteners, making it ideal for people looking to cut down on sugar.

Whether you’re a gardener committed to sustainable living or someone who loves a healthy twist on classic treats, these carob Reese’s cups are a must-try. They’re quick to whip up, need just a handful of ingredients, and offer a nutritious, plant-based alternative to traditional Reese’s cups. With carob’s health benefits, you can indulge your sweet tooth while keeping your wellness goals in check. Give them a go—you might find yourself opting for these over the store-bought variety!

Enjoy making these tasty treats, and feel great knowing you’re making a choice that’s both delicious and sustainable!

Happy eating!

Eggplant Schnitzel: Easy Plant-Based Recipe to Try At Home

Eggplant Schnitzel: Easy Plant-Based Recipe to Try At Home

With aubergine (eggplant) season in full swing, it’s the perfect time to get inventive in the kitchen. One of my favorite ways to prepare this versatile vegetable is by making a plant-based schnitzel. This recipe not only brings out the rich, earthy flavor of eggplant but also offers a delicious twist on a classic dish with a fully plant-based approach. It’s a fantastic way to celebrate the harvest and enjoy the season’s bounty.

Eggplant Schnitzel Recipe

Ingredients:

  • 1 large eggplant
  • Salt
  • Your favorite spices and herbs (e.g., paprika, garlic powder, onion powder, dried oregano)
  • Flour
  • Chickpea water (aquafaba)
  • Bread crumbs
  • Vegetable or seed oil for frying
  • Fresh lemon (for serving)
  • Potato and pickle salad (for serving)

Instructions:

  1. Prepare the Eggplant: Begin by cutting the eggplant into thin slices, leaving the end attached to the stem for easier handling.
  2. Remove Excess Moisture: Sprinkle salt over the eggplant slices and let them sit in a pasta strainer for a couple of hours. After a few hours, gently pat the slices dry with a paper towel.
  3. Bread the Eggplant: Set up a breading station with three bowls:
    • Bowl 1: Mix your favorite spices and herbs with flour. This will create a flavorful coating for the eggplant.
    • Bowl 2: Pour chickpea water into the bowl. This acts as a binding agent and helps the breading adhere to the eggplant slices.
    • Bowl 3: Place bread crumbs in the bowl for the final coating.
  4. Dredge each eggplant slice in the seasoned flour, then dip it into the chickpea water, and finally coat it with bread crumbs.
  5. Fry the Schnitzel: Heat vegetable or seed oil in a deep pan over medium heat. Place the breaded eggplant slices in the hot oil, frying until they are golden brown and tender on the inside (please be careful on this part). This should take about 3-4 minutes per side.
  6. Serve: Once fried, place the schnitzel on a plate lined with paper towels to drain any excess oil. For a burst of freshness, squeeze some lemon juice over the schnitzel before serving.

Pairing Suggestions

For a more enjoyable and well-rounded meal, pair your eggplant schnitzel with a fresh potato and pickle salad. The tangy pickles and creamy potatoes make a perfect match for the crispy, savory schnitzel. You could also serve it with a side of sautéed greens or a simple green salad to add extra freshness.

Eggplant schnitzel is an excellent plant-based alternative that doesn’t sacrifice flavor or texture. Using chickpea water as a binding agent is not only plant-based but also enhances the crispiness of the breading. Frying the schnitzel gives it that satisfying crunch, reminiscent of the traditional meat version.

Whether you’re a budding gardener or a seasoned plant enthusiast, this eggplant schnitzel is a fantastic way to highlight your harvest and enjoy a comforting, plant-based meal. Give it a try and savor the delicious flavors of this seasonal treat!

Happy cooking!

DIY Fruit Ice Cream: How to Make Your Own Delicious Treats

DIY Fruit Ice Cream: How to Make Your Own Delicious Treats

If you’re a gardener who enjoys getting creative with your harvest, you’ll be thrilled to know you can transform your garden’s produce into a delicious and unique treat which is the homemade fruit ice cream. No ice cream machine is needed, and you can even use fruit skins for a zero-waste recipe.

This simple, sustainable recipe will not only help you cool off in the summer heat (you can also make this even in the winter, it’s still delicious, to be honest) but also let you enjoy the freshest flavors straight from your own garden. We had so much fun making the ice creams but the best part was when we were done – it tasted amazing! You can try the recipe at home, too!

Why This Ice Cream is Unique

What sets this fruit ice cream apart from traditional versions is its incredible versatility and simplicity. You can use whatever fruit you have on hand—whether it’s ripe strawberries, juicy peaches, or even tart apples. It even makes use of fruit skins, like those from kiwis or bananas, adding extra fiber and flavor while minimizing waste.

The base is made from rich, creamy coconut milk, making it a perfect dairy-free option. It’s naturally sweetened with maple syrup, though you can easily swap it out for your preferred sweetener, such as honey or agave syrup. The recipe is fully customizable—your ice cream, your way!

    Easy-to-Make Fruit Ice Cream Recipe

    Here’s a simple, easy-to-follow recipe that you can try to suit your tastes and the produce from your garden.

    Ingredients:

    • 400 ml full-fat coconut milk
    • 100 ml maple syrup (or any sweetener you prefer, such as honey or agave)
    • 1 whole kiwi (80-100g)

    Optional toppings:

    • Chocolate chips
    • Fresh mint

    Instructions:

    1. Blend all the ingredients until smooth.
    2. Pour the mixture into ice molds and freeze.
    3. Once completely frozen, blend the cubes again until smooth.
    4. Eat straight away or store in an airtight container in the freezer for later enjoyment.

    Fun fact: I know many people don’t press the kiwi with their hair because we’ve been taught to peel it off but trust me it is fully edible you just have to blend it well. 😊

    A Few Fun Variations:

    Not feeling like using Kiwi? No problem—swap it for any fresh fruit you prefer! Whether it’s sun-ripened berries from your garden or a tropical twist with mangoes, the possibilities are endless. You can even infuse your coconut milk with pea flowers to create a stunning blue base before adding blueberries or go for a rich, decadent combo with coffee, chocolate, and banana.

    Here are a few flavor combos you can try:

    • Kiwi & Chocolate Chips
    • Pea Flower & Blueberries
    • Coffee Chocolate & Banana

    Making your own fruit ice cream is a simple and rewarding way to enjoy the literal fruits of your labor. With this customizable, dairy-free recipe, you can get creative with the fresh produce from your garden, all while knowing exactly what’s going into your dessert. Plus, you’ll save money and cut down on waste, treating yourself to a delicious garden-to-freezer snack.

    So, the next time your garden is bursting with ripe fruit, why not transform some of it into this unique homemade ice cream? After this, store-bought ice cream just won’t compare!

    Happy eating!

    How to Make Candied Orange Peels: A Delicious Zero-Waste Treat

    How to Make Candied Orange Peels: A Delicious Zero-Waste Treat

    If you want to make the most of every part of your fruits, this delicious and easy recipe using orange peels is just what you need. As gardeners, we often focus on reducing waste in our gardens, but this approach can extend to our kitchens as well! Embracing zero-waste living is a great way to cut down on our environmental impact while getting creative with food scraps. One such kitchen treasure is the humble orange peel, which we often turn into candies—a favorite treat for me and my fiance, Iasmina, after meals.

    Why Zero-Waste?

    Practicing zero-waste involves rethinking what we usually toss out and finding ways to reuse, recycle, or compost it. This not only helps cut down on the waste heading to landfills but also maximizes the value of what we already have. For gardeners, this mindset extends to handling plant, fruit, and vegetable leftovers. Repurposing food scraps like orange peels not only reduces waste but can also lead to tasty and surprising creations, such as orange peel candies.

    Benefits of Orange Peels

    Orange peels are often overlooked, but they’re packed with health benefits! They’re rich in vitamin C, fiber, and antioxidants, making them a nutritious addition to your recipes. Plus, their natural fragrance adds a burst of citrus flavor to everything from teas to baked goods.

    But orange peels offer more than just nutritional benefits. For gardeners, they can serve as natural pest repellents when scattered around plants. Their strong citrus scent helps deter slugs and other pests, while they break down gradually to enrich the soil. Whether you use them in the garden or in the kitchen, orange peels are a great way to cut down on waste.

      Candied Orange Peels Recipe

      This recipe is quick, delicious, and makes for a perfect zero-waste snack. You can even swap oranges for lemons if you’re in the mood to experiment with different flavors.

      Candied Orange Peels: A Zero-Waste Delight

      Ingredients:

      • Peels of 3–4 oranges
      • 1½ cups brown sugar
      • 2 cups water
      • 160g dark chocolate
      • ½ cup chopped almonds
      • Sea salt (optional)

      Step-by-Step Instructions:

      1. Prepare the Peels: Slice the orange peels into your preferred size. For this recipe, I like to slice them thinly, with each orange making around eight pieces.
      2. Blanch the Peels: To remove the bitterness from the white part of the peel, blanch them twice. This will help take away any unwanted bitter flavors.
      3. Dry the Peels: After blanching, place the peels on a grid and let them cool and dry.
      4. Melt the Chocolate: While the peels are cooling, melt the dark chocolate in a double boiler. Add the chopped almonds to the melted chocolate for extra texture.
      5. Coat the Peels: Dip each orange peel into the melted chocolate, ensuring they’re fully coated.
      6. Cool and Store: Place the chocolate-coated peels on a sheet of baking paper to cool completely. Once cooled, store them in an airtight container where they’ll last for around two months!

      By adopting a zero-waste lifestyle, gardeners can discover creative ways to utilize every part of the fruits and vegetables they grow. Whether you’re composting orange peels to boost your soil or turning them into a sweet treat like candied orange peels, the possibilities are endless.

      So, the next time you peel an orange, remember that even the scraps have an important role to play in both your garden and kitchen.

      0
        0
        Your Cart
        Your cart is emptyReturn to Shop