Level Up Your Cooking: How to Find & Use Wild Garlic

Level Up Your Cooking: How to Find & Use Wild Garlic

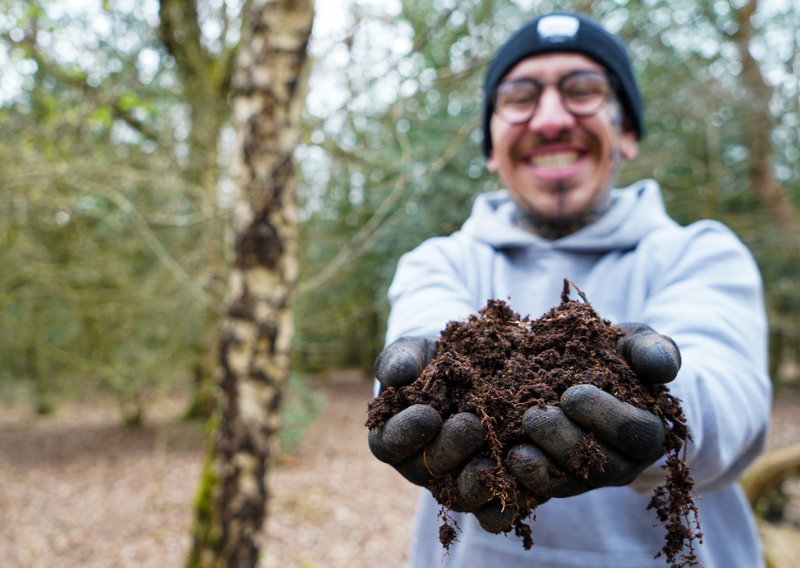
Who says adventures are only about scaling mountains or exploring hidden caves? How about embarking on a unique culinary exploration that’s as delicious as it’s close to nature? I have just the thing for you: foraging wild garlic, also affectionately known as ramps or leeks.

I found this hidden gem of a place here in London, UK, and I immediately fell in love! A heartfelt shoutout to my dear friend, @jacks_patch for introducing me to this magical place!

Benefits of Wild Garlic

Wild garlic, a medium-sized bulbous perennial, transforms woodlands into an aromatic paradise every spring with its distinctive garlicky aroma. But if hiking through woodlands isn’t for you, it’s okay! You could also buy organic wild garlic bulbs online to plant in shaded areas of your garden. Ideally, under a tree but I have mine in a few raised beds.

Wild garlic can be consumed both raw or cooked, and all parts of the plant including the flowers, leaves, and stems are edible.

The headline health benefit of garlic is its effectiveness in reducing blood pressure and, hence, heart disease and the risk of stroke. Although all garlic has this property, wild garlic has the greatest effect on lowering blood pressure.

How to Forage Wild Garlic, The Responsible Way:

Step 1: Identification is Key

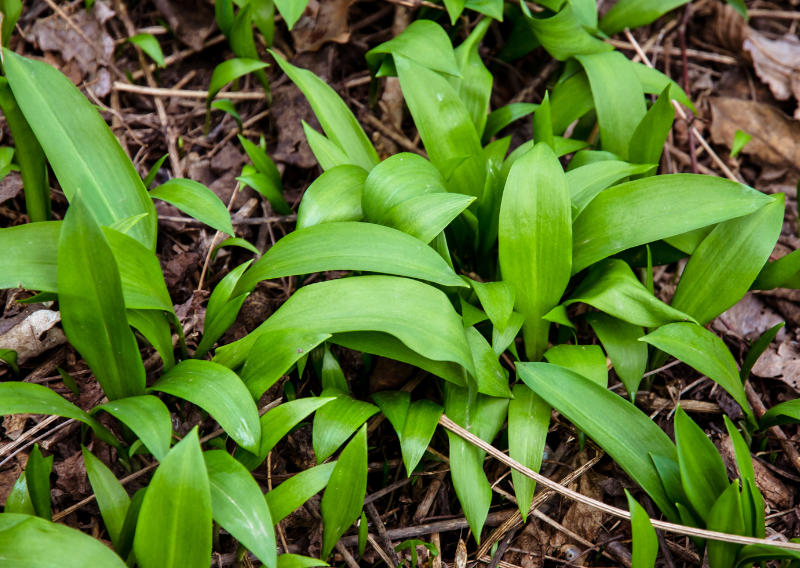
Wild garlic is easy to spot, thanks to its long, smooth leaves that closely resemble those of lily of the valley. The aromatic clusters of wild garlic are your clue to identifying this plant.

Step 2: Choose the Perfect Spot

You’re likely to find wild garlic growing joyfully in damp, shaded environments like the edges of woodlands, riverbanks, or meadows. Stay clear of areas potentially contaminated by pesticides or pollutants.

Step 3: Be a Sustainable Harvester

Remember, sustainable foraging is the only way to go. Leave ample leaves on each plant to ensure its growth isn’t hindered. Using scissors or a knife to cut the leaves ensures the plant remains unharmed.

Step 4: Savor the Fruits of Your Effort

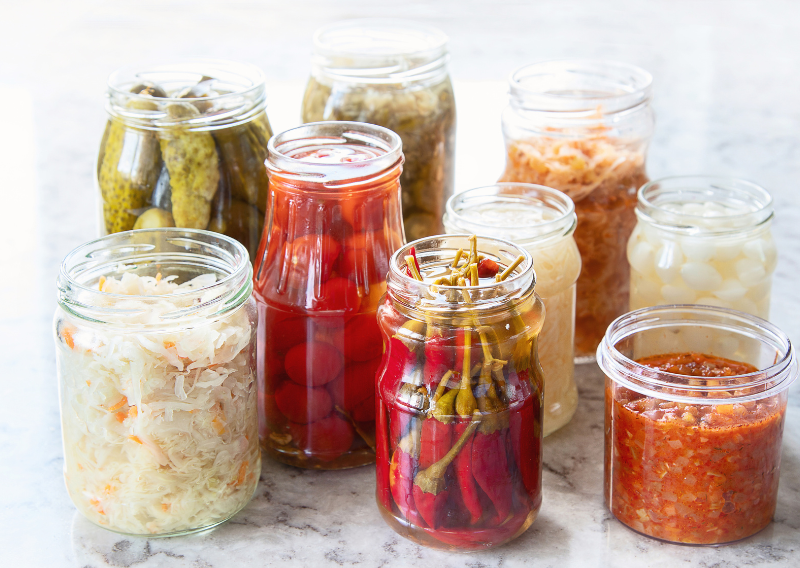
Once you’ve had a successful day of wild garlic foraging, it’s time to spice up your dishes with it! Use the leaves fresh in salads, soups, or pesto, or dry them for later. Their mild garlic flavor lends a unique depth to your dishes, making wild garlic a favorite among chefs and home cooks alike.

Bonus Recipe – Wild Garlic Gnocchi

Ingredients:

  • 4 x medium potatoes (400g)
  • 1 x handful wild garlic (50g)
  • 1 x cup plain flour (125g + extra for dusting)
  • 1/2 tsp salt

Step-by-Step Procedure:

1. Peel and dice the potatoes- boil until soft
2. Chop wild garlic
3. In a blender, add the boiled potatoes and the chopped wild garlic
4. Place in a bowl and add white flour (depending on the potato you use, you will need more or less flour)
5. Mix well and add salt
6. Get some flour and spread it on a clean table
7. Knead your dough and roll it into tubes
8. Cut 1 inch per piece and cook in boiling water
9. Prepare some sauce and enjoy!

Please remember: If you find a patch of Wild Garlic, don’t be greedy, and don’t let the excitement get to you! Take what you need and collect just a few leaves from each plant. Be respectful of this great gift provided by Nature! So, are you ready to embark on this deliciously wild adventure?

Happy growing!

How To Easily DIY Transplant Soil Mix For Containers At Home

How To Easily DIY Transplant Soil Mix For Containers At Home

Let’s get one thing straight, fellow and aspiring gardeners: soil mixing is not a one-size-fits-all business. It’s a bit like preparing your favorite cocktail. You have your preferred ingredients, and the secret shake you swear by, and everyone has their own twist. In my case, it’s all about creating the perfect environment for transplanting plants. I’d say that my transplanting method is pretty good because we can produce around 200kg of food yearly in our backyard here in London which is just 8×5 meters. One of the secrets? My personal transplanting method. So, feel free to experiment and/or follow what I’m about to teach you if you feel that it’ll suit your gardening style.

The Importance of Soil Health

Imagine your potting mix as the cozy home where your plants put down their roots and kick back with a cold glass of water (or nutrients, in this case). The quality of your potting mix can make or break your plant’s well-being, affecting everything from drainage to nutrient availability to root health. Now, I understand that this is quite tricky and I have a fair share of experience being stressed about my soil when I started gardening, but you can skip that and just watch out for these things:

Drainage Drama

Too soggy or too dry – An ideal potting mix should provide adequate drainage to prevent your plants from turning into waterlogged sacks. Excess water can suffocate roots and lead to a host of issues like root rot. It will be best if you opt for a mix that strikes a balance between moisture retention and drainage, ensuring that your plants can breathe easily.

Nutrient Nirvana

Like us, plants need their daily dose of vitamins and minerals to thrive. Ensure your mix contains organic matter, perlite, and volcanic rock dust to create a nutrient powerhouse that keeps your plants happy and healthy.

Root Rendezvous

Healthy roots, happy shoots – it all starts below the surface. A well-aerated and light potting mix encourages strong root development, allowing plants to anchor themselves securely and easily access nutrients. Think of it as laying down the red carpet for your plant’s underground VIP guests – the roots!

The Ingredients for Success 

To create my soil mix, I use a variety of high-quality products, some of which may be different from what you typically use. But that’s the beauty of it! You can swap out any of these components with what you prefer or try something new altogether.

Here are the elements I bring together to whip up my soil mix:

-A good compost mix (ask your local garden center or find online a reliable source in your area. Green waste, mature horse manure, mature mushroom compost, or homemade compost also works great) 50L
-A few handfuls of worm casting (optional)
-A few handfuls of Perlite
-And a few handful of Volcanic Rock Dust

Creating the Perfect Blend

Now, once you’ve gathered your ingredients, roll up your sleeves and get ready to dive in. Literally. Mix all these ingredients thoroughly with your hands, making sure to reach those sulky corners if your container is a bit grumpy like mine.

Next, introduce your plant into the new pot, gradually adding soil around the roots until the pot is full. Give the pot a gentle tap on the floor and apply a slight pressure with your hands to compact the soil around the roots. Plants like firm soil so they can expand their root mass and access all the nutrients they need to meet their needs.

A Word of Caution

Some might advise you to break the roots before transplanting. Well, if you’re feeling brave, go for it. But if you’re a first-timer, I’d say tread carefully. You wouldn’t want to end your transplanting journey before it’s even begun! I would break the root mass only when you buy plants from the store and the root mass is not white and healthy but brown/yellow and all tangled up. 

And there you have it. My personal soil mix recipe. Try it, tweak it, and make it your own. After all, it’s all part of the wonderful world of home gardening. Happy gardening, and don’t be scared of experimenting as failure could teach a far more valuable lesson than success! 

How To Keep Your Veggies Fresh – Fermentation, Freezing, and Dehydrating Method

How To Keep Your Veggies Fresh – Fermentation, Freezing, and Dehydrating Method

We are now in the winter, which means the cold season, so only a few vegetables are available to grow in your garden. It may seem disheartening, but no need to lose hope. We can always store and preserve veggies for later use. The question is, how to keep your veggies fresh?

Every year, before going towards the winter, I always make sure that I preserve my veggies so I can use them in the later season. With the right preservation techniques, you can give your immune system a boost and improve your overall health – preserving most of the nutritional value.

I have 3 preservation techniques (my favorite is the first one) that I will share with you today:

1. Fermenting Vegetables: A tasty journey that’s good for gut health.
2. Freezing your Vegetables: A quick method to lock in the freshness.
3. Dehydrating Vegetables: A fun and easy way to make your veggies last.

The Magic of Fermentation

You might wonder, “What’s the secret recipe?” Well, the key ingredient is none other than salt. We need about 3-5% of this salt based on the total weight of our vegetables. You can use any unprocessed salt, but the pink Himalayan variety gives an extra kick.

Follow this easy guide:

1. Dissolve your salt at the bottom of a jar by mixing it with filtered or unchlorinated water.
2. Now we get to the fun part! Peel your fresh veggies and cut them into small pieces.
3. Pack the vegetable pieces into your jar.
4. Fill the jar with more water until your veggies are completely submerged.
5. To ensure everything stays under the water, use a larger vegetable (like a cabbage leaf) or any kind of weight to keep the vegetables submerged.
6. The final touch – you have to ‘burp’ (open) your jar daily to avoid the build-up of CO2.

How Long Should I Ferment My Vegetables?

This is one of the most asked questions. The answer? It’s really up to your taste buds! You can ferment them for a few weeks or even up to several months depending on the flavor intensity you’re after.

Chill Out: Your Friendly Guide to Freezing Vegetables

Whether you’ve just had a huge harvest from your garden or just getting ready for the next season, freezing is a fantastic way to make sure no veggies go to waste.

Here’s the step-by-step guide:

1. Prep those veggies. Give them a good rinse in cold water to get rid of any dirt or little creepy crawlies. You can also chop them according to your liking.
2. Boil the veggies for a short period then immediately dunk them in ice water. This stops the cooking process and helps the vegetables keep their delightful color, flavors, and texture after freezing. (a.k.a blanching)
3. Tap Dry your veggies. This step is crucial – the dryer your veggies, the better they’ll freeze.
4. Pack your vegetables in freezer-safe containers or heavy-duty freezer bags. 5. Leave a small space (about 1/2 inch) at the top for expansion during freezing.
6. Place your baggies or containers on a flat surface in the coldest part of your freezer.

Bonus Tips about Freezing Your Veggies

Not every vegetable needs blanching. Leafy greens, for instance, can skip this step. While some vegetables, like corn and peas, can be frozen just as they are. Just give them a good wash, remove their outer layers, and into the freezer they go! Remember that your frozen vegetables will last about 6-12 months in the freezer. But try to use them within the first few months for the best quality.

How to Dehydrate Vegetables At Home

This simple process not only extends the life of your favorite greens but also packs them with a flavor punch. Whether you’re making homemade seasoning, lightweight hiking snacks, or just cutting down on food waste, dehydrating veggies is a super way to go!

Here’s the process:

1. Select the freshest and most vibrant vegetables. Peppers, tomatoes, carrots, mushrooms, and those lush leafy greens are excellent choices.
2. Wash them thoroughly and dry. To ensure a smooth drying process, cut them into uniform, thin pieces.
3. If you have a dehydrator handy, that’s better! Just follow the manufacturer’s instructions for temperature and drying times. If not, no worries! Your trusty oven can get the job done just as well. Keep the door slightly open using a wooden spoon and set it to the lowest possible temperature (around 52°C)
4. Arrange your prepped veggies on dehydrator trays or oven-safe baking sheets. Do not overlap them.
5. Fire up the dehydrator or oven. The drying process can vary vastly, anywhere from 4 to 12+ hours, depending on the type and size of the vegetable and the drying method used. To ensure even drying, rotate the trays from time to time.
6. Your vegetables are ready when completely dry and brittle. If they snap easily when broken, voila, you’ve done well! But be careful not to over-dry them, or they can turn tough and chewy.
7. Once they’re cool, store your dehydrated treats in airtight containers in a cool, dark, and dry place. If stored well, they can last several months to a year.

What You Need To Know When Dehydrating Your Veggies

Consider using mesh screens for smaller vegetables or leafy greens. This helps improve air circulation. Also, don’t forget to label your containers with the vegetable type and date for easy identification. And here’s the fun part – you can easily rehydrate your dehydrated vegetables by s

So there you have it, gardeners! Three effective, fun, and healthy ways to store your vegetables during the cold (and even other) season. Enjoy the process and relish the satisfaction that comes with preserving your own food. Talk about a delicious way to be self-sufficient and healthy!

Benefits of Lion’s Mane Mushrooms: A Gardener’s Guide to a Better Brain Health

Benefits of Lion’s Mane Mushrooms: A Gardener’s Guide to a Better Brain Health

As a gardening enthusiast, I’ve always taken joy in nurturing the environment and receiving the benefits of my efforts. However, my interest in gardening was sparked when I found the incredible benefits of Lion’s Mane mushrooms.

Lion’s Mane mushrooms have quickly become my all-time favorite for a variety of reasons, the most exciting of which is that they contain unique compounds that have been scientifically confirmed to boost nerve growth factor (NGF) production. As a result, they have the potential to improve our mental abilities.

Research has shown that Lion’s Mane mushrooms offer a myriad of benefits, such as:

-Improve memory
-Boost mental focus
-Relieve mild symptoms of depression and anxiety
-Assist with diabetes symptoms, making them a truly versatile health ally.What’s even more remarkable is the variety of ways in which these mushrooms might be incorporated into our daily lives. Personally, I prefer to dry the entire harvest and store the powder in clear vegan film capsules. Each capsule contains 1g of powder, providing a convenient and effective way to consume Lion’s Mane mushrooms.

How To Make Lion Mane Capsule:

1. Dry and cut the mushrooms into little pieces
2. Dehydrate at 55C / 24-26H (you can also dehydrate them in an oven but keep it at around 70-80C)
3. Crush with a mortar until you have a fine powder
4. Use vegan film capsules to make your daily input

I find that taking these capsules before bedtime is particularly beneficial, as they appear to be more effective during the REM phase (rapid eye movement) of sleep. This allows for optimal absorption and utilization of the mushroom’s potent compounds, maximizing their therapeutic effects. I can vouch that it really helped me improve my memory.

How To Grow Lion’s Mane Mushrooms

To start growing Lion’s Mane mushrooms at home, all you need is a substrate such as sawdust or straw, a suitable container, and a spore syringe or spawn. Unlike typical plants, these mushrooms take up very little space and can even be cultivated indoors under the correct conditions. With careful care and attention, you’ll soon be rewarded with an abundance of these wonderful fungi.

Growing your own Lion’s Mane mushrooms not only provides a sustainable source of this superfood but also allows you to enjoy the satisfaction of seeing something grow from seed to maturity. Also, the satisfaction of knowing that you are benefiting from your own farmed vegetables is absolutely amazing.

Whether you’re a pro or a beginner, including Lion’s Mane mushrooms in your gardening routine not only enhances your gardening and culinary adventures but also gives a natural way to improve your brain health. You can eat them dried, fresh, or in capsules! These mushrooms show the beauty of nature and the ability of gardening to nourish the mind and the body.

Why not plant Lion’s Mane mushrooms in your garden today and go on a journey to discover their incredible potential? With a little love and care, you’ll soon be reaping the benefits of this wonderful fungus while also experiencing a sharper, more focused mind.

Happy growing!

Get Rid of Fungus Gnats: Simple & Effective Control Methods

Get Rid of Fungus Gnats: Simple & Effective Control Methods

Are those pesky fungus gnats pestering your houseplants or seedlings? These tiny insects might seem harmless, but they can quickly become a major nuisance. As someone who has been deeply rooted in gardening since childhood, I understand the frustration these pests can cause if left unchecked. Your harvest will be in big trouble if you don’t act fast.

What are the Fungus Gnats, and how can you kick out these unwanted guests for good?

Meet the Fungus Gnat

Fungus gnats, also known as sciarid flies, are a common pest of plants grown in pots and trays. They are small, dark, mosquito-like insects that thrive in moist environments rich in organic matter. These tiny insects have a short lifespan, with adults living for about 7–10 days. Despite their short lives, a female gnat can lay up to 100–300 eggs in batches of 2–30, making them a formidable foe for your plants.

Adult fungus gnats crawl over the compost surface and, if disturbed, fly around the lower leaves of your plants. While the adults might seem like a nuisance, the larval stage causes the most damage. The larvae live in the compost and feed on the roots of your plants, which can be particularly harmful to young seedlings.

Taking Control

To control fungus gnats, it’s important to target both the larvae and the adults and take proactive measures. One effective method is using beneficial nematodes, tiny roundworms that are harmless to plants but deadly to fungus gnat larvae. These nematodes enter the larvae through natural body openings (I’ll leave some space for your imagination) and release symbiotic bacteria that quickly kill the host.

Preventative Measures

In addition to nematodes, there are other steps you can take to prevent and control fungus gnats. You can use a sciarid nematode packet. It’s very easy, and I always do this in my backyard garden whenever I spot these tiny insects.

Here are the easy steps:

-Get 1 liter of rainwater or unchlorinated water
-Mix the sciarid nematodes well with the 1L of water. You can use the whole packet for a more concentrated mix and you can’t overapply them so no worries
-Pour the mix into 10 liters of water
-Water all your plants until they run off.

Also, keeping the surface of your pots as dry as possible can help, as the larvae thrive in moist conditions – Start by reducing excess moisture in your plants’ soil, as fungus gnats are attracted to damp environments. Allow the top layer of soil to dry out between waterings, and avoid overwatering your plants. You can also hang yellow sticky traps around your growing area to catch adult fungus gnats. The bright color attracts them, and once they land on the trap, they’ll stick to the paper.

Fungus gnats might be small, but they can cause big problems for your plants if left unchecked. By taking proactive measures like using nematodes and sticky traps, you can protect your plants from these pesky pests and ensure they stay healthy and thriving.

Happy growing!

0
    0
    Your Cart
    Your cart is emptyReturn to Shop