How To Recycle Used Mushroom Blocks At Home

How To Recycle Used Mushroom Blocks At Home

Let’s dive into the world of sustainable gardening and see how reusing mushroom blocks can transform your gardening habits. As we work to lessen our dependency on chemical inputs while also promoting soil and biodiversity health, implementing this cool “hack” fits well with our goals.

So, what are mushroom blocks, and how could they help your garden? Mushroom blocks are the nutrient-dense substrate in which mushrooms develop. Even after the mushrooms have been picked, these blocks still contain a richness of organic matter and helpful microbes that can help your plants thrive.

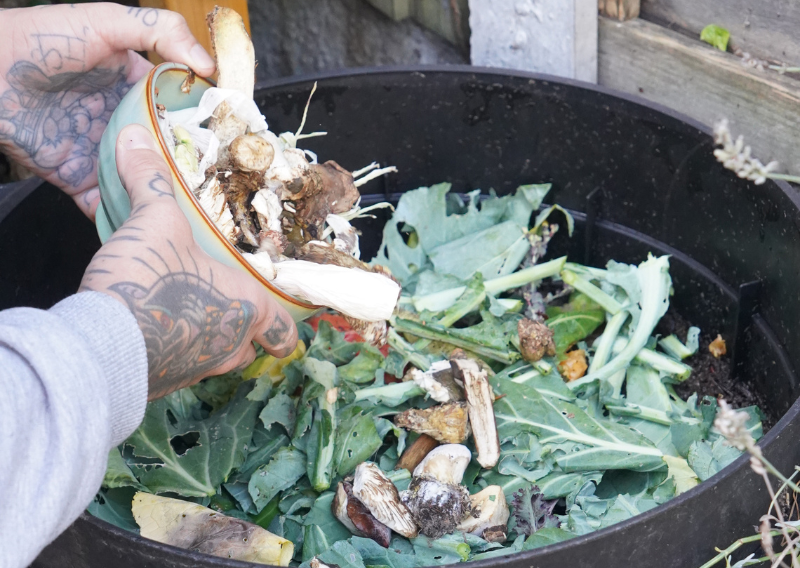
Reusing mushroom blocks in your garden is an efficient way to recycle this unique resource and save it from going to waste. This is in line with what we believe in – reducing waste and maximizing the use of our natural resources.

And I’m sure the majority of you can relate to that sinking feeling… Realizing that your mushroom blocks have stopped producing those delicious and bountiful flushes. It’s a sad end to a successful garden adventure, right? (Yup, I can relate because I experienced this in the past. It was really an awful feeling).

But, relax, I got you now. It doesn’t have to be the end.

Mushrooms are nature’s masterpieces. Since we embraced a plant-based diet, these adaptable mushrooms have become one of our kitchen’s favorites. From hearty stews to mouthwatering risottos, these fungi elevate every dish, adding depth and nourishment to each bite. They not only give depth of flavor to any cuisine, but they also provide a good amount of nutrients including vitamin D, which is crucial for bone health, immune function, and mood regulation.

Now, considering all these good benefits of mushrooms (and the amazing taste, of course) Can you still have the heart to throw your used mushroom blocks? Let us not do it, please! Instead, I have amazing advice for you: include zero waste in your gardening routine and see how we can rebirth our mushroom blocks.

Rebirth of Your Mushroom Blocks

Recycling your spent mushroom blocks is not only an eco-friendly move for your garden, but it also gives a second life to your mushroom cultivation journey.

But you must be wondering, “How?”

It’s simple.

Here are some easy steps to resurrect your mushroom blocks:

1. Choose a shaded area in your garden and dig a hole to create a new growing space.

2. Place your used mushroom block in the hole, ensuring that it is completely covered.

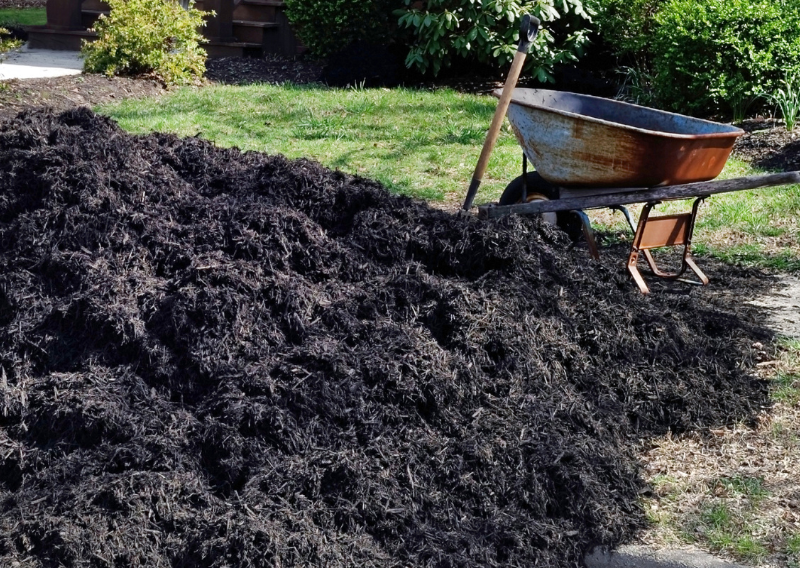
3. Put a layer of wood chips or straw on top of the block. 

And voila! All you have to do is sit back and relax, plant other plants perhaps, and just wait for a month or two, and you should be seeing a new flush of mushrooms. And if you’re lucky enough, you might even score an extra harvest from a partially used block.

    Challenges & Solutions

    Of course, just like any gardening adventure, there might be a few bumps along the way:

    • Contamination Concerns: Keep an eye on your recycled blocks for irregularities like odd odors, strange colors, or mold. It’s best to part ways with contaminated blocks and start afresh.
    • Slow Growth: If your mushrooms are too shy to sprout, check the environmental conditions – temperature, humidity, and light can all affect their growth. Tweak these to create the perfect mushroom haven.
    • Low Yield: If your harvest is disappointingly low, try adjusting the watering schedule, increasing ventilation, or introducing beneficial microorganisms to supercharge your mushroom growth.

    Remember, gardening is an art. Each mushroom block is a world in itself, and every issue can be an opportunity to learn and adapt. So why not give this recycling method a try? I promise you, it’s worth seeing the magic unfold!

    Here’s to abundant and sustainable mushroom cultivation. Happy growing!

    Journey to the Perfect Tomato Trellis: An Easy DIY Project

    Journey to the Perfect Tomato Trellis: An Easy DIY Project

    If you’re anything like me, you’ve probably experimented with different styles of trellises to support your tomato plants, only to find that most were good for just a single season and not always effective. But no worries. I’ve cracked the code to a sturdy, reliable trellis and I’m here to teach you how.

    First of all, are you familiar with a tomato trellis? A tomato trellis is a structure that supports the growth of tomato plants, helping them to grow vertically instead of sprawling outwards. It typically consists of stakes or poles, along with a framework of horizontal supports, to which the tomato plants can be tied or trained as they grow.

    (Below are the samples of trellises)

    Why is a Tomato Trellis Important?

    • Space Efficiency: By growing tomatoes vertically, a trellis maximizes the use of limited garden space. This is especially beneficial for urban gardeners or those with small plots.
    • Improved Air Circulation: A trellis allows for better air circulation around the plants, which can help reduce the risk of fungal diseases such as blight.
    • Easier Harvesting: When tomatoes are grown on a trellis, they are more accessible for harvesting. No more bending or reaching into tangled foliage to pick your ripe tomatoes!
    • Prevents Rot and Spoilage: Keeping the fruits off the ground reduces the risk of rot and spoilage, ensuring that you can enjoy your homegrown tomatoes at their best.
    • Enhanced Sunlight Exposure: Vertical growth on a trellis exposes more of the plant to sunlight, which is crucial for the development of flavorful tomatoes.

    The Birth of a DIY Idea

    Because I’ve tried many types or designs of trellises before, I already have a picture in mind of what will work for us. I discussed it with my fiance, and she played a significant role in the design. From that moment, we decided to give it a go, and all our efforts were worth it because it turned out to be the perfect trellis for our needs.

      Gathering Supplies and Building the Structure

      To kickstart this DIY project, I headed to a local store for some quality wood. I chose sections of 72 inches in height, as I planned to grow indeterminate varieties of tomatoes. Remember, you can adjust these measurements according to your needs and the variety of plants you’re growing.

      I started by constructing the sides of the trellis. This involved two 72 inches of wooden pieces with the top of the legs cut on a 13’’ angle (180 degrees) for aesthetic appeal.

      Next, I cut two braces, one measuring 9 1/2 inches placed 3 inches from the top and another one measuring 34 3/4 inches placed 59 inches from the top.

      Here’s a pro tip: when fixing the wooden braces, offset some of the screws to reduce the chances of the wood splitting. I used 2.3 inches screws and didn’t pre-drill the wood.

      Once I completed one side, I repeated the process to create a second identical frame.

      Assembling the A-Frame

      Time for the exciting part! With my fiance steadying the A-frames, I lined up an 80-inch wooden trellis bar along the top part of the trellis. I repeated the same process for the other side, and voila, I had the main structure of the A-shaped trellis.

      For added stability, I fixed a long wooden trellis bar between the two bottom braces. If you prefer, you could skip this step and use the base of the plant to secure the strings.

      Finishing Touches

      The final step in this DIY masterpiece? Running some hardy cotton twine or durable string from top to bottom – this will be the primary support for your plants.

      And there you have it! A sturdy, personalized trellis that not only supports my tomato plants but also adds an aesthetic appeal to my garden. Happy growing!

      Supercharge Your Garden: The Miracle of Seaweed Fertilizer

      Supercharge Your Garden: The Miracle of Seaweed Fertilizer

      Do you want to try a new and uncommon organic fertilizer at home?

      I’m super excited to share with you today about this fantastic and versatile organic fertilizer you can find right at the seaside – Seaweed!

      Now, I know what you’re thinking, isn’t seaweed just that slimy stuff that gets tangled around your toes at the beach? Well, yes, but also so much more!

      Did you know that around 70% of the world’s oxygen comes from seaweeds and algae? Not only that, but seaweed is also one of our planet’s biggest carbon sequesters. Isn’t that amazing?

      Benefits of Seaweed Organic Fertilizer

      1. Nutrient-Rich Elixir:
        Seaweed is packed with essential nutrients such as nitrogen, potassium, phosphate, and magnesium. These nutrients are vital for plant growth and health, promoting strong roots, vibrant foliage, and bountiful blooms.

        2. Natural Growth Stimulant:
        Seaweed contains natural plant hormones like cytokinins, auxins, and gibberellins. These hormones help regulate plant growth, stimulate cell division, and enhance nutrient uptake, resulting in healthier, more vigorous plants.

        3. Stress Buster:
        Plants face various stresses, from environmental factors to pests and diseases. Seaweed organic fertilizer helps plants cope with stress by strengthening their immune systems and increasing their resilience to adverse conditions.

        4. Soil Supercharger:
        Seaweed organic fertilizer improves soil structure, increases soil fertility, and enhances microbial activity. It helps retain moisture, suppress weeds, and reduce the need for synthetic fertilizers, making it an eco-friendly choice for sustainable gardening.

        5. Eco-Friendly and Sustainable:
        Seaweed is a renewable resource that grows abundantly in oceans worldwide. Harvesting seaweed for organic fertilizer does not deplete natural resources or harm the environment, making it a sustainable choice for environmentally conscious gardeners.

      But let’s dive into the gardening part. Seaweed is like a magic potion for your plants. It’s chock-full of beneficial hormones that help your plants grow strong and healthy, both above and below the soil.

      And that’s not all! Seaweed is also a fantastic mulch. It’s easy to work with, deters those pesky slugs, and enriches your soil with plenty of minerals and nutrients. Plus, it’s a fantastic soil conditioner too.

        How do you get your hands on this magical seaweed?

        Just head over to your nearest beach! Look for seaweed that’s been washed up and is in the process of decomposing. But remember, don’t pull it off the rocks, we don’t want to harm any marine life. Oh, and make sure to check your local regulations regarding how much seaweed you’re allowed to collect.

        Once you’ve got your seaweed, there’s no need to wash it. You can add it to your garden fresh or dry, or even chuck it into your compost to decompose and boost the nutrient and microorganism content.

        Here’s a little tip though: If you plan on planting something soon, give it a few weeks after adding the seaweed. This allows the rain to wash away any excess salt.

        Nature is really amazing. A little bit of creativity can go a long way. So next time you take a trip to the beach, don’t forget to bring back some of that magical seaweed for your garden. Trust me, your plants will thank you!

        Happy growing!

        How To Do Mulching: The Secret Weapon for a Lush and Healthy Garden

        How To Do Mulching: The Secret Weapon for a Lush and Healthy Garden

        Do you want to grow healthier plants in your garden? Mulching is the best solution! When I was starting my gardening journey, it was challenging to find the best technique that I could use to grow more healthy plants until I discovered mulching. It is one of the best game-changers in any garden.

        Mulching is simply applying a layer of a thick material like compost, woodchips, straw, leaf mold, or many other organic or inorganic materials to the surface of your soil. For the natural soil, you can buy it in the local store near you.

        Using a unique process called anaerobic digestion, harvested plant materials are broken down into a moist, crumbly solid. It’s full of essential nutrients for healthy plant growth, bursting with natural bacteria and fungi!

        Why Mulch?

        Mulching is like giving your garden a protective hug. It involves covering the soil around your plants with a layer of organic or inorganic material. This layer acts as a shield, offering these benefits:

        • Weed Suppression: Mulch forms a barrier that inhibits weed growth, reducing the need for time-consuming weeding sessions and allowing your plants to take center stage.
        • Moisture Retention: By reducing evaporation, mulch helps the soil retain moisture, ensuring your plants stay hydrated and reducing the frequency of watering.
        • Soil Health: As mulch breaks down, it adds organic matter to the soil, enriching it with nutrients and improving its structure, which in turn supports healthy plant growth.
        • Temperature Regulation: Mulch acts as a natural insulator, protecting plant roots from extreme temperatures, and keeping them cool in summer and warm in winter. 
        • Erosion Control: Mulch helps prevent soil erosion, especially on sloped areas, keeping your garden soil in place where it’s needed most.

          How to Mulch

          1. Choose Your Mulch: Select a mulching material that suits your garden’s needs. Organic mulches like compost, straw, or shredded leaves enrich the soil as they break down, while inorganic mulches like gravel or pebbles offer long-lasting weed control.

          2. Prepare the Area: Weed the area thoroughly and water the soil if it’s dry. Make sure the soil is moist but not waterlogged.

          3. Apply the Mulch: Spread a layer of mulch around your plants, leaving a small gap around the base of each plant to prevent moisture-related issues. Aim for a depth of 2-4 inches for organic mulches and 1-2 inches for inorganic mulches.

          4. Maintain the Mulch: Top up the mulch as needed to maintain the desired depth, especially as it breaks down over time. Keep an eye out for weeds attempting to poke through and remove them promptly.

          5. Consider Seasonal Mulching: In colder climates, mulch can be applied in the fall to protect plants over winter. In warmer climates, mulching in spring can help retain moisture as temperatures rise.

          By following these simple steps, you can reap the full benefits of mulching and watch your garden flourish like never before. Our garden in London is only 8×5 meters but it produces food that can suffice for the whole year. One of the secrets? None other than mulching.

          Happy growing!

          The Magic of Composting: Cheap DIY Compost Bin

          The Magic of Composting: Cheap DIY Compost Bin

          Making your own compost for the garden has multiple benefits: It enriches the soil, helps to retain moisture, suppresses plant disease and pests, and encourages the production of fungi and beneficial bacteria for your garden. Compost is decomposed organic material such as grass clippings, leaves, or kitchen waste. I top up all my raised beds twice a year with some good compost to improve the structure of my soil, in this way, I help the soil to retain the correct amount of moisture, nutrients, and enough air circulation for the roots. 

          Now, you might be thinking, “Sure, composting sounds fantastic, but what do I do if I don’t have a garden to leverage the compost?”  I’ll tell you, even without a garden, there’s plenty you can do. You can use your compost to nourish indoor plants or share the wealth with friends, family, or local community gardens. Imagine the joy and surprise on their faces when you show up with a gift of nutrient-rich compost.

          So if you’re ready to try this at home, here is what you need:

          • Compost bin or pile
          • Green materials (kitchen scraps, grass clippings)
          • Brown materials (dry leaves, straw, paper)
          • Water
          • Aeration tool (pitchfork or compost turner)

          Step-by-Step Guide to Composting

          1. Choose a Compost Bin: Select a bin that suits your space and needs. I prefer a simple DIY bin or an old water drum rather than a store-bought one.
          2. Collect Compostable Materials: Gather a mix of green (nitrogen-rich) and brown (carbon-rich) materials. Green includes kitchen scraps like fruit and vegetable peels, coffee grounds, and grass clippings. Browns include dry leaves, straw, and paper.
          3. Layer Materials: Start with a layer of browns, then add greens, and continue layering, making sure to mix them up for aeration.
          4. Keep Moist and Aerated: Compost needs to stay moist but not soggy. Turn the pile regularly to aerate it and speed up decomposition.
          5. Wait and Watch: Depending on the conditions, compost can be ready in a few months to a year. You’ll know it’s ready when it’s dark, crumbly, and earthy-smelling.
          6. Use Your Compost: Mix the compost into your garden soil or use it as a mulch to nourish your plants.

          ** Additional tip: I always place my compost bin on top of some rocks to raise it from the floor in order to have good drainage.

          Do you see how easy it is to do? Size or location doesn’t matter when it comes to composting! I’ve personally proven this by turning a very small space in my garden into a composting hub. As you can see, the process is pretty seamless and before I forget, the best part is it’s odor-free!

          Composting at home is an incredibly simple act, yet it yields significant benefits. It’s one of the easiest ways to reduce the amount of waste we generate daily. What’s more, every small composting effort adds up, helping to lessen our environmental impact. Make your homely corner a little greener, one compost pile at a time.

          Happy growing!

          0
            0
            Your Cart
            Your cart is emptyReturn to Shop