Master Your Garden: 4 Simple Steps to Success (Even for Newbies!)

Master Your Garden: 4 Simple Steps to Success (Even for Newbies!)

For those just starting or eager to deepen their gardening knowledge, I will share four essential tips to set you on the path to success. Understanding and mastering the basics can transform your gardening experience from good to great. These are also the first 4 gardening knowledge that I learned and it’s a game changer when you know these.

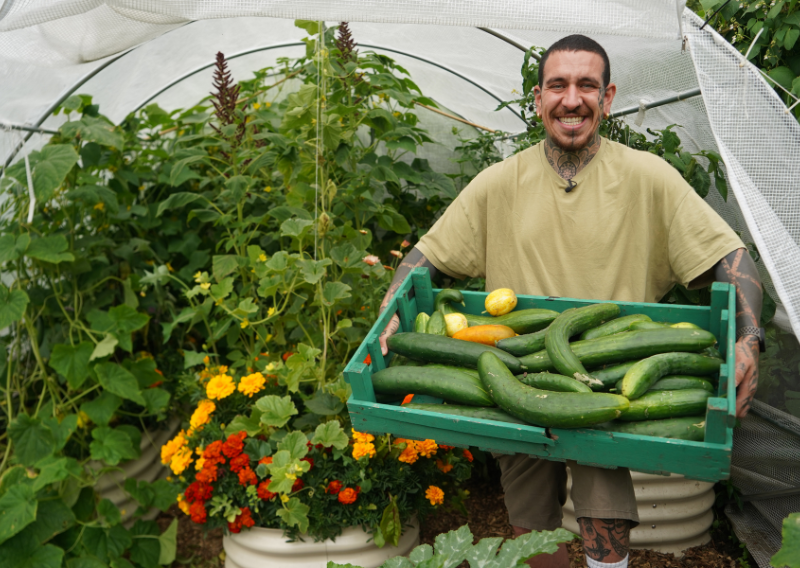
You can do all these in almost any growing space and your final harvest will benefit from the amount of time and effort invested in your garden.

I feel like time spent surrounded by nature is never wasted. And if you don’t have many woodlands around your area, bring nature to your house by creating your own garden!

Start A Herb Garden

Herbs are an excellent starting point for any gardener. I have a bunch of herbs at home and recently I wrote a blog about how you can clone them (read the blog here). They’re relatively easy to grow, need little area, and offer numerous benefits. Fresh herbs may improve your recipes, give natural treatments, and even discourage pests. Basil, mint, rosemary, and parsley are excellent options for beginners.

Why It is Important:

  • Accessibility: Herbs can be grown indoors or outdoors, making them suitable for any living situation.
  • Cost-effective: Growing your own herbs allows you to save money while also ensuring you always have fresh supplies.
  • Health Benefits: Fresh herbs provide more nutrients than dried herbs and can enhance flavor without adding calories.

Pruning Plants and Flowers

Pruning is an important gardening technique that encourages healthy growth and flowering. It involves cutting dead, broken, or overgrown branches to promote new development and keep the plant’s shape. Regular pruning ensures that your plants get enough sunshine and air circulation, which are essential for their health. (I have a  separate blog where I shared how to prune tomatoes!)

Why It is Important:

  • Promotes Growth: Pruning stimulates new growth and can enhance the plant’s overall health.
  • Disease Prevention: Removing dead or diseased branches helps to avoid the spread of illnesses.
  • Aesthetic Appeal: Well-pruned plants look nice and can substantially improve the appearance of your garden.

    Apply Worm Castings

    Worm castings sometimes referred to as vermicompost, are organic fertilizers created by earthworms. They are high in nutrients and helpful microorganisms, which improve soil health and encourage strong plant growth. Worm castings can help improve your garden soil’s structure, water retention, and fertility. It might sound intimidating at first, but it’s really a big help!

    Why It is Important:

    • Nutrient-dense: Worm castings include vital nutrients such as nitrogen, phosphorus, and potassium, which are required for plant growth.
    • Soil Health: They improve soil structure by increasing aeration and moisture retention.
    • Eco-Friendly: Worm castings are a sustainable approach to recycle organic waste and minimize the need for chemical fertilizers.

    Sow New Seeds

    Planting new seeds is an exciting and fulfilling part of gardening. Whether you’re planting veggies, flowers, or herbs, starting from seeds allows you to see the full growth process from germination to harvest. It’s also a cheap method to grow your garden.

    Why It is Important:

    • Variety: Sowing seeds offers a wide range of plant varieties that may not be available as seedlings.
    • Control: Starting with seeds provides you more control over the growing factors and health of your plants.
    • Satisfaction: Witnessing a plant grow from a tiny seed to a full plant is both enjoyable and inspiring.

    These methods not only boost your garden’s health and production, but they also increase your personal satisfaction and connection to nature. Remember that gardening is an ongoing learning process, and the more you participate in it, the more gratifying it becomes.

    Happy gardening!

    DIY Small Space Pond: Follow the Easy and Simple Steps!

    DIY Small Space Pond: Follow the Easy and Simple Steps!

    Since I started urban gardening in London, I had to move from one rented space to another with different challenges, but I am always excited to design and create a new growing space. Recently, we moved again to a different place, and I’m looking forward to designing our new space!

    Space is not a limitation but just an opportunity to inspire your creativity. You don’t need a lot of space to garden, but it’s all about making the best use of what you have! Adding a small pond to your garden is an excellent way to improve the ambiance. Even if you have a limited area, a pond may add a peaceful life to the area around you.

    How to Create Your DIY Small Space Pond

    You’ll need the following:

    • Pond solar fountain (optional)
    • Oak barrel
    • Water plants
    • Rocks

    Follow these simple steps:

    Step 1: Choose the Right Container

    You don’t need a large space to create a pond. A half-barrel, a large ceramic pot, or even a sturdy plastic tub can serve as the base for your pond. But I used an oak barrel for this, just make sure to clean the sides!

    Step 2: Location

    Place your pond in a spot that receives a mix of sunlight and shade. Too much sun can lead to excessive algae growth, while too much shade can hinder the growth of aquatic plants.

    Step 3: Add Substrate and Water

    Add small rocks or pebbles to the bottom of your container to provide a natural look and a base for plants. You can also add quartz if you have available at home. Fill the container with water, ideally rainwater or dechlorinated tap water, to avoid harming aquatic life.

    Step 4: Introduce Aquatic Plants

    Aquatic plants are crucial for maintaining the balance of your pond. Floating plants like water lettuce and water hyacinth provide shade and reduce algae growth. It’ll also look good if you add some snails and flowers!

    Step 5: Add Solar Powdered Fountain (optional)

    Solar Powered Fountain is a great addition to your DIY small pond. It’s aesthetically pleasing and will give more life!

    Step 6: Maintain Your Pond

    Regularly remove debris and dead plant material to keep the water clear. Check the water level occasionally, especially during hot weather, and top up as needed. Avoid using chemicals that can harm aquatic life.

      Support Local Wildlife

      A small pond attracts a wide variety of insects and wildlife. Frogs, dragonflies, birds, and beneficial insects will be looking for shelter and food in your small aquatic ecosystem. The boost in biodiversity promotes natural pest management while also benefiting the local ecosystem.

      Building a small space pond is a fun project that you can do with your family and friends. It also brings numerous benefits to your garden. For aspiring gardeners, it’s an excellent way to learn about water gardening and ecosystem management. So, roll up your sleeves with your loved ones and try building a DIY small pond.

      Happy gardening!

      Zero-Waste Sunflowers: How to Plant and Enjoy Every Part of This Beautiful Flower

      Zero-Waste Sunflowers: How to Plant and Enjoy Every Part of This Beautiful Flower

      Who else here loves sunflowers as much as I do? Sunflowers were my grandma’s favorite flower and you couldn’t go wrong when gifting her a bouquet of these beautiful flowers. My mom has one of her only tattoos of this beautiful flower which I obviously convinced her to do and she has many paintings of this vibrant flower hanging around her house. Sunflowers are basically happy flowers for our family.

      In this blog, I’ll show you how to maximize this amazing flower by teaching you 3 ways to use sunflowers.

      Why Sunflowers?

      Sunflowers are incredibly versatile. You might think each sunflower is just a single bloom, but each flowerhead is actually made up of up to two thousand florets. These tiny flowers are packed full of nectar, making them a great treat for pollinators, attracting bees and other beneficial insects to your garden as well. Almost every part of this flower is edible including young leaves which can be cooked like spinach and the whole head could be roasted when still fresh. Plus, they are relatively easy to grow, making them perfect for both newbie and experienced gardeners.

      3 Ways You Can Maximize Sunflowers

      1. Sunflower Woodchips

      • Using a sharp knife, cut the main stem of the giant sunflower
      • Remove leaves and head
      • Dry the stem (Direct sunlight will dry them faster)
      • Once dried, turn into woodchips
      • Use for pathways – It will provide a soft and comfortable surface to walk on compared to gravel or bare soil

      2. Sunflower Tea

        • Separate flowers from the head
        • Dehydrate them for 3-5 hours with a low temperature between 40-50 degrees Celsius (104-122 degrees Fahrenheit)
        • Once dehydrated, soak it in a cup of hot water and enjoy it as a tea


          3. Sunflower Butter

        • Dry the flower head under sunlight
        • Separate the seeds
        • Remove husk
        • In low to medium heat, toast the seeds until brown
        • Add any oil (olive oil will do)
        • Blend until you get a buttery consistency

        How To Plant Sunflowers

        Step 1: Choose a Location- Select a sunny spot in your garden that receives at least 6-8 hours of direct sunlight daily. Ensure the soil is well-drained and fertile

        Step 2: Prepare the Soil- Loosen the soil to a depth of about 2 feet and mix in compost or organic matter. This will provide nutrients and improve drainage.

        Step 3: Sow the Seeds- Plant sunflower seeds about 1 inch deep and 6 inches apart. Cover them with soil and gently pat down to secure them in place.

        Step 4: Water the Seeds- Water the planted area thoroughly after sowing. Keep the soil moist but not waterlogged until the seeds germinate.

        Step 5: Thin the Seedlings- Once the seedlings are about 6 inches tall, thin them to about 12-18 inches apart. This spacing allows room for growth and prevents overcrowding.

        Step 6: Support the Stems- As sunflowers grow tall, they may need support to prevent them from toppling over. Use stakes or garden twine to help stabilize the stems.

        Step 7: Water Regularly- Water your sunflowers regularly, especially during dry periods. Deep watering once a week is preferable to shallow, frequent watering.

        Step 8: Harvest the Seeds- Once the flower heads start to droop and the back turns brown, it’s time to harvest. Cut the heads off and hang them upside down in a dry, well-ventilated area to dry.

        Step 9: Enjoy Your Sunflowers- Enjoy the beauty of your sunflowers in the garden. Once the seeds are dried, you can use them for snacks, bird feed, or replanting next season.

        Growing sunflowers is a rewarding experience that contributes to a zero-waste lifestyle. By following these steps, you can enjoy the beauty and benefits of sunflowers while minimizing waste. It’s also incredible how a flower could not only be used in many ways but bring up lots of happy memories always facing the sun but going through a lot of dirt to go there.

        Happy growing!

        How To Preserve Mushrooms: 3 Easy Ways You Can Try At Home

        How To Preserve Mushrooms: 3 Easy Ways You Can Try At Home

        Over the past few days, I was always in my kitchen trying to find the best way to preserve and maintain the flavor of freshly picked mushrooms. After some fun experiments (and a few tasty tests!), I’ve come up with a handful of ideas that I’m really excited to share with you in this blog. Join me as we explore these tips and tricks, ensuring that every mushroom you harvest is as flavorful and fresh as the moment you pick it.

        3 Ways You Can Preserve Mushrooms

        Jerky Mushrooms

        Ingredients:

        • Salt
        • Olive Oil
        • Honey
        • Lemon juice

        Step-By-Step Procedure:

        1. Remove the base of the mushroom
        2. Wash and tap dry
        3. Cut the mushroom into thick slices
        4. Add a pinch of salt and 1 tbsp of olive oil
        5. Add ½ cup of honey
        6. Squeeze lemon juice
        7. Mix well, place in a zip bag, and remove the air
        8. Let it in the fridge overnight
        9. Dehydrate until crispy to the touch and you can enjoy it for up to 7 days

        Freezing Mushroom

        Ingredients:

        • 500ml water
        • 1 Tbsp lemon juice

        Step-By-Step Procedure:

        1. Dice the mushrooms
        2. In a large container, add 500 ml of water and 1 tbsp of lemon juice
        3. Soak for 10 minutes and drain
        4. Steam until soft and tender
        5. Place in a container and freeze it. You can keep it in the freezer for up to 1 year

        Canning Mushroom

        Ingredients:

        • 600 g mushrooms
        • 3 bay leaves
        • 6 garlic cloves
        • 1/2 cup rapeseed oil
        • 1/3 cup of vinegar
        • 3/4 cup of water
        • 1 Tsp of salt
        • Sterilized jars

        Step-By-Step Procedure:

        1. Dice garlic
        2. Chop the dry sage
        3. In a large pan with low to medium heat, add 1/2 cup of rapeseed oil
        4. Add the diced garlic and 600 g mushroom 
        5. Cook until soft then add the chopped dry sage
        6. Once soft, add 1/3 cup of vinegar and 3/4 cup of water
        7. Place them inside the sterilized jars
        8. Clean the rim of the jar with vinegar
        9. Place the jars in a boiling water for about 20 minutes

        *If you don’t do water or pressure canning, you can store it in the fridge for up to 3/4 weeks

          The Health Benefits of Mushrooms

          1. Rich in Nutrients: Mushrooms are low in calories but high in essential nutrients. They are an excellent source of B vitamins, such as riboflavin, niacin, and pantothenic acid, which are vital for energy production and brain health.
          2. Boosts Immunity: Certain types of mushrooms, such as shiitake and maitake, contain beta-glucans. These compounds have been shown to enhance the immune system, helping your body fend off illnesses more effectively.
          3. Supports Heart Health: Mushrooms contain compounds that can help reduce cholesterol levels. They are also rich in antioxidants, which protect the heart by preventing oxidative stress and inflammation.
          4. Aids in Weight Management: Thanks to their low-calorie content and high fiber levels, mushrooms can help you feel full and satisfied, making them a great addition to a weight management plan.
          5. Anti-Cancer Properties: Some mushrooms, like the reishi and turkey tail, have been studied for their potential anti-cancer properties. They contain compounds that may inhibit the growth of cancer cells and boost the body’s natural defense mechanisms.

          Preserving mushrooms not only extends their shelf life but also allows you to enjoy the nutritional benefits all year. Whether you can, freeze, or make them jerky mushrooms, each method assures that you can continue to enjoy these lovely mushrooms long after the harvest season is over. So, try these preserving methods and continue to appreciate the health advantages of mushrooms while discovering new flavors in your kitchen.

          Happy growing, and happy preserving!

          Spice Up Your Life: 3 Easy Chilli Recipes at Home

          Spice Up Your Life: 3 Easy Chilli Recipes at Home

          I have to confess something: chillies are one of my absolute favorite things to grow. In fact, they’re one of the main reasons I started this gardening journey in the first place! My love for these fiery little wonders has deep roots, and I owe it all to my grandpa, a true “chilli head.”

          Grandpa was more than just a fan of chillies; he was a fanatic! He had a knack for discovering new varieties and even created his own hybrids, importing seeds from all corners of the globe. His passion for chillies was contagious, and it’s a thrill that has been passed down to me.

          Delicious Recipes to Spice Up Your Kitchen

          If you’re as passionate about chillies as I am, you’re going to love these recipes. They’re simple, flavorful, and the perfect way to elevate your meals.

          Chilli Salt

          A versatile seasoning that adds a fiery kick to any dish!

          Ingredients:

          • Any chilli variety
          • Coarse salt
          • Dehydrator or oven

          Instructions:

          1. Use a dehydrator or an oven to dry out your chillies and salt.
          2. Grind them once they’re completely dry.
          3. Store in an airtight container and sprinkle over salads, veggies, or any meal for an extra zing! It could last from 6 months up to 1 year.

          Chilli Chutney

          A sweet and spicy condiment that pairs beautifully with cheeses, meats, or even as a spread on sandwiches.

          Ingredients:

          • 1 kg apple (peeled, cored, and chopped)
          • 2 cloves garlic
          • 1 onion
          • 2 red chillies
          • 60 g fresh ginger
          • 180 g brown sugar
          • 2 tsp salt
          • 2 cups cider vinegar

          Instructions:

          1. Chop and combine all ingredients in a large pot.
          2. Bring to a boil, then reduce heat and simmer for about an hour, until thickened.
          3. Pour into sterilized jars and seal. Enjoy this chutney with your favorite dishes! You can store it inside a refrigerator and consume it within 1-2 months.

          Stir-Fried Chilli Leaves

          My favorite! You can imagine my excitement when I stumbled upon the concept of chilli leaves stir fry. The moment I tasted it, I was blown away by the incredible flavors. Who knew these often-overlooked leaves could taste this good?

          Ingredients:

          • 400 g chilli leaves (without stems)
          • 2 tbsp olive oil
          • 3 garlic cloves
          • Fresh chillies
          • 1 tsp sugar
          • Ground peanuts

          Instructions:

          1. Heat olive oil in a pan and add chopped garlic cloves.
          2. Once the garlic is golden brown, toss in the chilli leaves and fresh chillies.
          3. Sprinkle in the sugar and stir-fry for a few minutes until the leaves are tender.
          4. Top with ground peanuts for an added crunch. Serve hot and enjoy!

          There’s something incredibly rewarding about growing your own food, especially when it comes to chillies. Whether you’re a seasoned gardener or just starting out, I encourage you to give it a try. Not only will you add some heat to your dishes, but you’ll also experience the joy and satisfaction that comes with nurturing these delicious plants.

          Try the 3 recipes and let’s keep the chilli passion alive together!

          Happy gardening!

          0
            0
            Your Cart
            Your cart is emptyReturn to Shop