Give It New Life: DIY Recycled Paper From Junk Mail & Cardboard (Easy & Fun!)

Give It New Life: DIY Recycled Paper From Junk Mail & Cardboard (Easy & Fun!)

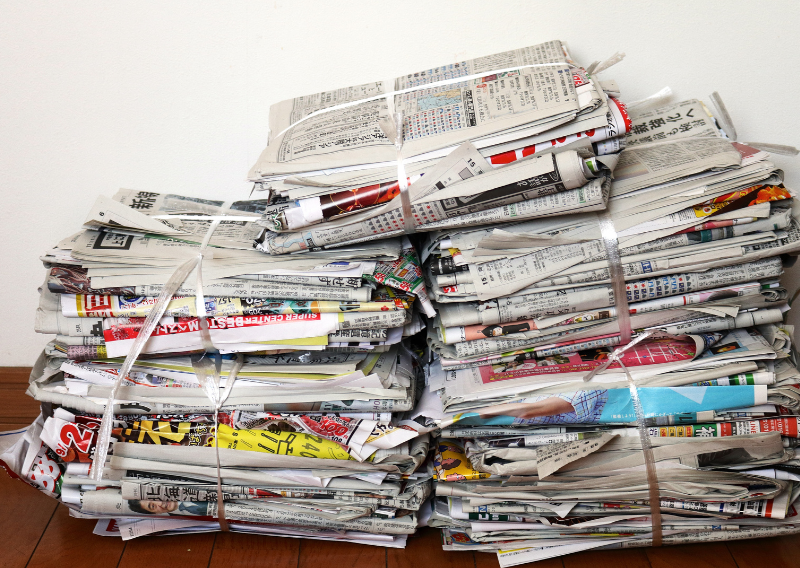
Do you have so much junk mail and cardboard boxes at home and you’re wondering what to do with it? I have an idea. It’s a fun and environmentally responsible alternative for you. Let us transform that “trash” into treasure by creating lovely DIY recycled paper items such as lampshades, bowls, and vases.

Not only will you save trash, but you will also produce something genuinely one-of-a-kind for your house. My fiance, Iasmina (@lajatattoo), and I tried this at home and the results are lovely. Let’s get started on this easy and enjoyable DIY project!

DIY Recycle Paper Project

What You’ll Need:

  • 2 cups of paper pulp
  • 1 cup of plain flour
  • 1 cup of rice glutinous flour
  • 1 teaspoon of salt
  • Acrylic glue (depending on the size of your objects)

Step-by-Step Procedure:

  1. Tear up paper or cardboard and add it to a bowl: Start by tearing your paper or cardboard into small pieces and placing them in a bowl. This will make the blending process easier.

  2. Cover with water and let it sit overnight: Soak the torn pieces in water overnight. This helps to soften the paper, making it easier to blend into a pulp.

  3. Blend until you achieve a paste: Blend the soaked paper until it turns into a smooth paste. This step is crucial for creating a uniform texture.

  4. Strain the paste with a cheesecloth: Use a cheesecloth to strain the paste, removing excess water. This step ensures that your pulp isn’t too wet, which can affect the final product.

  5. Add 1 cup of plain flour, 1 cup of glutinous rice flour, 1 teaspoon of salt, and 2 cups of paper pulp: Mix these ingredients together in a bowl. The combination of flours and salt will help bind the pulp together, creating a clay-like consistency.

  6. Mix and add a bit of water until you reach a clay-like consistency: Gradually add water to the mixture until it feels like clay. You want it to be pliable but not too sticky.

  7. Use a beeswax wrap as a sheet to shape the item you’ve decided to create: Lay out a beeswax wrap and use it as a base to mold your item. Whether you’re making a lampshade, bowl, or vase, the beeswax wrap helps hold the shape.

  8. Measure and carve the middle hole to fit a light bulb (for lampshades): If you’re making a lampshade, measure and carve out a hole in the center to fit a light bulb. Ensure the hole is appropriately sized for your light fixture.

  9. Leave it to dry overnight: Allow your creation to dry completely overnight. This ensures it hardens properly and maintains its shape.

  10. Once completely dry, you can paint it with a natural color and coat it with acrylic glue: After your item has dried, paint it with natural colors. Once the paint is dry, coat it with acrylic glue to seal and protect it.

  11. It’s important to let it dry completely before coloring and sealing it with glue to prevent mold and rot: Ensure everything is thoroughly dry before applying any paint or glue. This step is crucial to avoid mold or rot.

Note: You don’t need to worry that the lampshades will be a fire hazard! It’s not because it’s been processed with water, flour, and salt. But of course, please always use it with care. Remember that safety first is important!

Tips for Success

Experiment with Shapes: Don’t limit yourself to just lampshades, bowls, and vases. Try making plant pots, decorative plates, or even wall art. Your imagination is the limit!

Use Natural Dyes: For an extra eco-friendly touch, use natural dyes made from fruits and vegetables to color your creations. It’s both cost-effective and a very good way to practice zero waste.

Gift Your Creations: Handmade items make great gifts. Consider making a few extra pieces to give to friends and family, they will surely appreciate the art and the effort.

We enjoyed the process so much and I hope you’ll enjoy it, too. By transforming junk mail and cardboard into beautiful, usable things, you are not only decreasing trash but also promoting a sustainable lifestyle. So, the next time you have a bunch of papers and boxes, don’t throw them out. Instead, see their potential and create something amazing.

Happy crafting!

The Secret Weapon of Successful Gardeners: Top 5 Hacks Revealed

The Secret Weapon of Successful Gardeners: Top 5 Hacks Revealed

I’m very excited to share my Top 5 gardening hacks that I wish I had known before to grow food in my previous urban garden in London. Though it is not limited to urban gardens, you can also apply these tips to any growing space and they will help you to get ready for the next season!

My main goal is to help people create as many green spaces as possible because soil can absorb carbon from the air, reducing carbon emissions and you’ll also reduce the amount of single-use packaging from the store.

Tip #1: Leave the Roots in the Ground

When your plant’s season ends, whether it’s a chili plant in a pot or a tomato in the ground, resist the urge to pull it out by the roots. Instead, cut it off at the base, leaving the roots in the soil.

This may sound strange, but those roots will break down and provide excellent fertilizer for your garden. The macro and microorganisms in the soil will convert those old roots into nutrient-dense nourishment for the next batch of plants. It’s like a natural recycling process taking place right beneath your feet!

Tip #2: Collect Dry Leaves for Leaf Mold

Next time you’re walking through a local park, grab a bag and collect some of those dry, fallen leaves. Store them in bags and let nature take its course.

Over time, these leaves will decompose into nutrient-rich leaf mold, which is an excellent addition to your plant soil. Leaf mold increases soil structure and water retention while also providing a slow-release source of nutrients. It’s like a magical potion for your plants and it is entirely free!

Tip #3: Prune Your Mint for a Stronger Return

If you happen to have mints growing in your garden, such as chocolate mint or peppermint, give it a good prune at the end of the season.

Cut it back totally and let it dormant for the winter. Spring will bring your mint back to life, stronger and more vibrant than before. It’s a simple trick that will keep your mint patch healthy and productive for years.

    Tip #4: Manage Strawberry Runners

    Strawberries are delicious, but they have a sneaky habit of attempting to take over your garden via runners. These are the long stalks they use to propagate themselves.

    While it may appear that having too many runners is beneficial, it may reduce the energy of the parent plant, resulting in smaller and less delicious berries. Snip those runners to transfer the plant’s energy back into the root system, resulting in larger, sweeter strawberries.

    Tip #5: Chop and Compost Your Plant Waste

    When you clean up your garden at the end of the season, don’t just throw away the plant cuttings. Chop them into little pieces and place them in your compost container. To balance out the green debris, add some dry leaves or shredded cardboard, and then begin the composting process.

    By the next season, you’ll have a rich, dark compost to feed your garden. It’s a great way to recycle plant waste while saving money on store-bought compost.

    These top 5 hacks may sound simple, but I’m telling you that it’s a game-changer. I really wish I had known these things when I started my gardening journey! I know that gardening can be a little intimidating and challenging at first, but it’s really worth it!

    Give these hacks a try and I’m confident that you’ll soon reap the rewards of your hard work.

    Happy growing!

    Creating Your Own 100% Plant-Based Bird Food: A Simple Guide

    Creating Your Own 100% Plant-Based Bird Food: A Simple Guide

    Wild birds are awesome! They play an important role in our environment, especially in our gardens. They serve as natural pest management, eating various types of insects that would otherwise harm our plants. By inviting birds to your garden, you are effectively asking little assistants to keep your plants healthy and growing.

    There is one problem though, these birds often struggle to find enough food, especially during certain times of the year. Natural food sources can be limited, therefore offering a mix high in fat and protein can make a significant difference for them. So I decided to make some nutritious plant-based bird food to help them out.

    Ingredients You’ll Need

    Here’s what you’ll need to make your own batch of bird food:

    1 cup of coconut oil

    1 cup of vegetable suet

    2 tablespoons of crunchy peanut butter

    ½ cup of desiccated coconut

    ½ cup of linseed

    1 cup of mixed seeds (I used sunflower, pumpkin, and sesame seeds, slightly crushed)

    ½ cup of chopped raisins

    Let’s Make Some Bird Food!

    1. Prep Your Ingredients: Roughly chop the raisins, and slightly crush the mixed seeds using a mortar and pestle.
    2. Melt the Coconut Oil: In a pan over low heat, melt the coconut oil until it’s completely liquid.
    3. Combine the Ingredients: Add the vegetable suet to the melted coconut oil and stir until it’s fully combined. Stir in the crunchy peanut butter until it melts into the mix, then add the desiccated coconut and mix well.
    4. Add the Seeds and Raisins: Pour in the slightly crushed mixed seeds and chopped raisins. Mix everything together thoroughly.
    5. Transfer to a Mold: Pour the mixture into a silicone mold. You can use any shape you like. Once the mixture is in the mold, gently press it down to make sure there are no air pockets.
    6. Let It Set: Allow the mixture to set for at least 24 hours. Once it’s solidified, pop it out of the mold.

      Serving Your Bird Food

      Once your bird food is ready, simply pop it out of the mold and place it in a feeder or a suitable spot in your garden. You’ll soon notice the birds flocking to it, enjoying the delicious and nutritious treat you’ve made for them.

      Making your own bird food is an easy yet effective method to help wild birds and improve the natural beauty of your garden. It’s a wonderful project you can do with your family, and the birds will appreciate your efforts.

      Here’s to happy birds and thriving gardens! If you try this recipe, please let me know how it turns out and share your bird-feeding experiences. Together, we can keep our feathered friends healthy and happy!

      Happy bird-feeding!

      Kombucha at Home: Easy DIY Recipe for This Tasty Probiotic Tea

      Kombucha at Home: Easy DIY Recipe for This Tasty Probiotic Tea

      Have you ever tried kombucha? Kombucha is a fermented tea and one of our favorite drinks. It’s not only tasty and refreshing but also packed with health benefits. We’ve been brewing our own Kombucha for a long time, and it has become a delightful staple in our kitchen. It’s always a nice feeling whenever we start the day by drinking our kombucha tea.

      In this blog, we will talk about this wonderful drink and how you can make it at home.

      What Exactly Is Kombucha?

      Kombucha is a living beverage, which means it contains helpful probiotics that can improve your gut health. These probiotics assist to balance bacteria in your intestines, strengthen your immune system, and even enhance digestion.

      A little organism known as a SCOBY is responsible for the magic of Kombucha. The acronym SCOBY stands for Symbiotic Culture of Bacteria and Yeast. It resembles a jellyfish or a thick pancake and is essential for tea fermentation. Every time you brew a batch of Kombucha, a new SCOBY grows on top, creating your own tiny Kombucha family!

      How To Make Kombucha?

      Ingredients:

      2 SCOBYs

      2 liters of filtered water

      16 grams of black tea (though you can experiment with other types of tea)

      8% of the tea’s weight in sugar (brown or white works great)

      Juice of your choice to fill 1/3 or 1/2 of your bottles during the second fermentation phase

      Instructions:

      1. Brew the Tea: Begin by heating two liters of filtered water. Once it’s boiling, add your tea and steep for around 10 minutes. After that, remove the tea leaves or bags and stir in the sugar until thoroughly dissolved. Now, let the tea cool to room temperature. This step is critical since putting a SCOBY in hot tea can kill it.

      2. Fermentation Phase One: Transfer the cooled tea to a big glass container. Gently add your SCOBY to the jar, along with a cup of previously prepared Kombucha. Cover the jar with a clean cloth and fasten with a rubber band. This allows the tea to breathe while excluding any undesirable particles.

      3. Fermentation Phase Two: After the first fermentation, your Kombucha is ready for the next phase. Pour the brewed Kombucha (minus the SCOBY) into bottles, leaving some space at the top. This is where you add your juice. Fill each bottle 1/3 to 1/2 full with the juice of your choice. This will add flavor and help with carbonation. Seal the bottles tightly and let them sit at room temperature for another 5-7 days.

      4. Burping the Bottles: During this second fermentation, your Kombucha will produce a lot of gas. To prevent the bottles from exploding, you need to “burp” them daily. Just open the cap to release some of the gas and then close it back up. Be careful, as it can sometimes be quite fizzy!

        Tips and Tricks:

        • SCOBY Hotel: I like to keep an extra jar where I store all my extra SCOBYs. This is known as a SCOBY hotel. Each time you brew a batch, save one cup of the brewed Kombucha and add it to this jar. This way, you’ll always have a backup SCOBY if anything goes wrong.
        • Cold Tea: Always let your tea cool completely before adding your SCOBY. Adding it to hot tea will kill life cultures, which we surely don’t want!
        • Experiment: Do not be scared to try different teas and juices. Each variation creates a distinct flavor profile, so have fun with it!

        Brewing Kombucha on your own is not only affordable, but it also lets you the flavors to your preferences. Plus, it’s a fun little scientific project that you can do every day with your family and friends, even your children. It’s really worth it.

        Cheers to your health and happy brewing!

        Free Medicine in Your Backyard: 3 Wild, Edible Weeds with Healing Power

        Free Medicine in Your Backyard: 3 Wild, Edible Weeds with Healing Power

        There are loads of medicinal weeds that you can forage in your garden but I have my top 3 favorites. Nature gives us everything we need to cure our bodies and minds, often in the most unexpected places. Today, I’m happy to share with you the incredible benefits of three common medicinal weeds that are easily foraged: cleavers, dandelion, and stinging nettle.

        Cleavers: Nature’s Cleansing Tonic

        The first weed is cleavers, which are often neglected yet provide a significant detoxifying power. Cleavers, often known as “sticky weed” or “goosegrass,” are one of the most powerful cleansing plants you may discover in your garden.

        How to get the most out of cleavers? Dry the plant and infuse it with oil.

        • This infusion can be used to drain toxins from your kidneys, resulting in improved overall health. Plus, cleavers can help with skin issues like eczema.
        • The infused oil can be used topically to relieve and treat inflamed skin. It’s incredible how a little plant can have such a significant impact on our health!

        Dandelion: The Elixir of Life

        These bright yellow flowers are more than just a cheerful addition to your garden. Dandelions are incredibly versatile and can be used in a variety of ways to boost your health.

        What can you do about the dandelion?

        • Dandelion honey is one of my personal favorite dandelion recipes. You can infuse the blossoms to make a lovely, golden honey that is both pleasant and nutritious. Dandelion honey is known for its ability to reduce inflammation and provide a natural source of antioxidants.
        • If you enjoy coffee and want a healthier alternative, dandelion root coffee is a game-changer. The roots can be roasted and brewed into a coffee replacement high in antioxidants and anti-inflammatory compounds. Also, it is caffeine-free, allowing you to have it at any time of day without feeling jittery.

        Note: I wrote a separate and more in-depth blog about dandelion, you can read it here.

        Stinging Nettle: A Therapeutic Powerhouse

        Don’t let the name scare you off—this plant is a medicinal powerhouse with multiple health advantages. Stinging nettle is widely known for its antibacterial and analgesic characteristics, making it an excellent addition to your natural medicine collection.

        How to enjoy stinging nettle?

        • Making a rich, green pesto from stinging nettle leaves is a fantastic way to enjoy it. This nettle pesto is full of flavor and an excellent way to get the plant’s medicinal benefits into your diet.
        • Stinging nettle is also known to stimulate hair growth. You can produce a tincture from the leaves and roots to use as a natural hair strengthener and nourish.


          Note: I wrote a separate blog about stinging nettle cake, you can read it here.

        I hope this blog has inspired you to look more closely at the plants in your garden. These medicinal weeds are not only easy to forage, but they also provide numerous health benefits that can be effortlessly incorporated into your everyday routine.

        Remember that the information stated here is only for educational purposes and is not a substitute for professional medical advice. Always contact a doctor before using new treatments, especially if you have any underlying health issues.

        Happy growing and foraging!

        0
          0
          Your Cart
          Your cart is emptyReturn to Shop