 COLOR2")
Do you want to start gardening, but you’re a bit lost and don’t know what or where to start? The Kratky Method is the perfect one for you. The simplicity, low cost, and minimal maintenance requirements of the Kratky method make it an excellent choice for beginners looking to start with hydroponic gardening. Personally, I have a few friends who started here and are now hooked on gardening.

Why should you try the Kratky Method?
There are dozens of reasons, but I’ll tell you the top three, so you can’t say no to this method.
1. The Beauty of Simplicity.
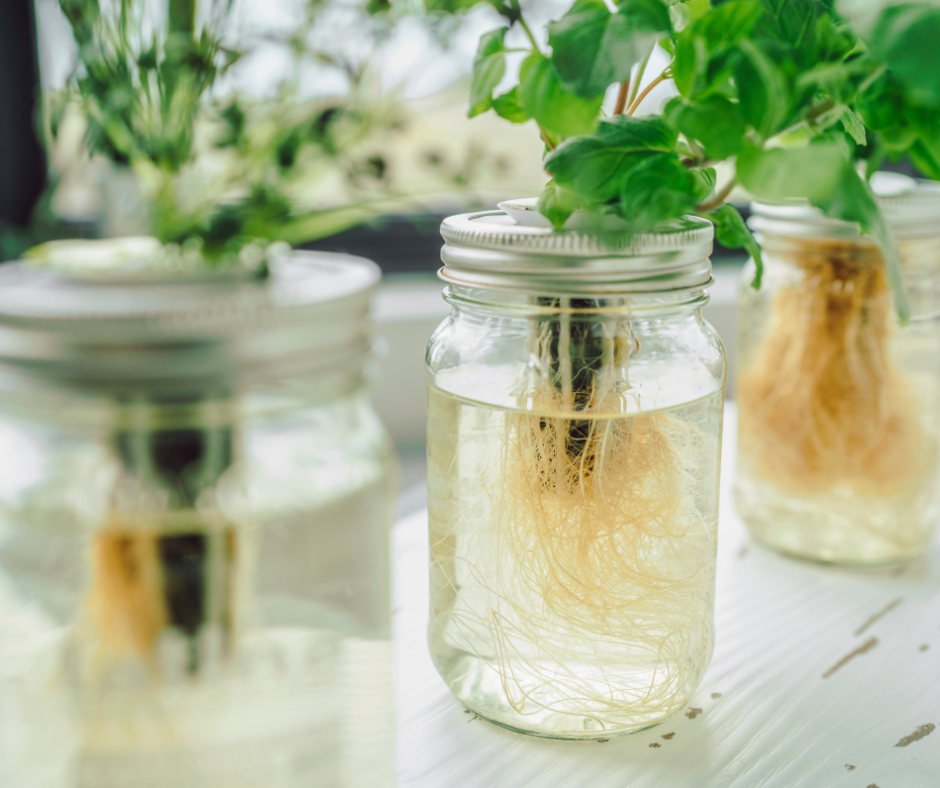
The Kratky method is a hydroponic approach that does not require pumps, aerators, or complex fertilizer solutions. You only need a pot, recycled bottled water, and a fertilizer solution. That is it. Easy peasy. Take it from me: I grow chilies in my kitchen without the need for soil or frequent watering. The Kratky method makes it possible for us to experience fresh, homegrown chiles with minimal effort.
2. Perfect for small spaces.
One of the most important advantages of the Kratky method is its adaptability to small environments. Whether you live in an apartment or have limited outside space, you can easily create a Kratky garden in your window or balcony. This makes it ideal for people living in urban areas (like me!) who want to experience the joys of gardening without a backyard. For instance, you can grow herbs like basil, mint, and cilantro in small containers, providing you with a constant supply of fresh herbs for cooking.
3. Sustainable and Cost-Effective
In addition to being simple and space-efficient, the Kratky method is also environmentally friendly and cost-effective. You reduce the risk of soil-borne diseases and pests by eliminating the need for soil. Because the nutrient solution is contained and reused, there is minimal waste compared to traditional gardening methods. For example, imagine growing lettuce in a Kratky system. Not only does it use less water than traditional gardening, but it also saves money because you do not need to buy soil or fertilizer. Plus, you can eat fresh, organic greens right at home.
Let’s go to the exciting part– The step-by-step method:
Step 1: Gather Your Materials
Before you start, make sure you have all the necessary materials:
- A container for your plants (e.g., a bucket, pot)
- Recycled bottled water
- Growing medium (e.g., perlite or clay pellets)
- Nutrient solution
- pH test kit
- Seeds or seedlings of your choice
Step 2: Prepare Your Container
Cut the bottled water in half, then place your pot. Fill the container with water, leaving about an inch of space below the lid.
Step 3: Add Nutrient Solution
Add the recommended amount of nutrient solution to the water in your container. Follow the instructions on the package carefully, as overfeeding can harm your plants. Use a pH test kit to ensure the pH level of the solution is between 5.5 and 6.5, as this is optimal for plant growth.
Step 4: Plant Your Seeds or Seedlings Place your seeds or seedlings into the net pots and set them in the holes in the lid of your container. Make sure the roots are submerged in the nutrient solution.
Step 5: Monitor and Maintain Check the water level in your container regularly and top up as needed. Monitor the pH level and adjust it if necessary. Keep an eye out for any signs of nutrient deficiencies or pests
Step 6: Harvest Your Plants
Depending on the type of plants you’re growing, you should be able to harvest them in a few weeks to a few months. Enjoy your fresh, homegrown produce!
Do you see how convenient it is to do this? It’s really easy and low-maintenance once it’s set up. You could grow any sort of plant with this method, and you don’t need any air stone. It’s a great way to extend the life span of plants like basil, parsley, or sage that you commonly buy from the supermarket. I made even a few plants of chilies with this method and got the fruit with no issue! Give it a try, and let me know what plants you have planted.
Happy growing.
