 COLOR2")
Do you want to reduce waste at home and upcycle any kind of container, like milk cartons? I have an ideal DIY Microgreens project for you. (Special thanks to my dearest friend, Jacks Patch, @jacks_patch for the brilliant idea!)
DIY Microgreens are young vegetable greens that are approximately 1–3 inches (2.5–7.5 cm) tall. They are packed with nutrients, and they come in many different varieties. It’s nature’s way of showing us that good things really do come in small sizes. These tiny greens might be small in stature, but they are bursting with flavor, nutrition, and endless possibilities. If you’ve been looking for a new gardening adventure or a way to elevate your culinary creations, microgreens are here to take your gardening game to new heights.
Also, once you harvest them, you can compost the substrate, as it contains nutrients and roots!
If you’re still not convinced, here are more reasons why you need microgreens at home:
- Quick growth and big rewards: Most varieties are ready to harvest in just 1-3 weeks, depending on the type of seed you choose. Imagine the satisfaction of harvesting your first batch of fresh, homegrown greens in less than a month! This is also the reason why microgreens are known as the “The Flash” of the plant world.
- Very Nutritious: Don’t let their small size fool you. Studies have shown that these tiny greens can contain up to 40 times more nutrients than their mature counterparts. For example, red cabbage microgreens are packed with vitamins C, and K, and antioxidants, while broccoli microgreens are loaded with sulforaphane, a compound known for its anti-cancer properties.
- Year-Round Gardening: With microgreens, you can harvest the fruit of your labor all year round. No matter the weather outside, you can grow fresh greens indoors! A sunny windowsill or a simple grow light is all you need to keep your microgreens happy and thriving. This means you can enjoy a continuous harvest of fresh, homegrown goodness, even in the winter season.
Things That You Need to Start Growing Your Microgreens:
- Bulk seeds (organic seeds)
- Upcycled containers, like milk cartons
- Light soil
- 1 cup of water
- Grow lights (or sunlight)


How to Grow Microgreens:
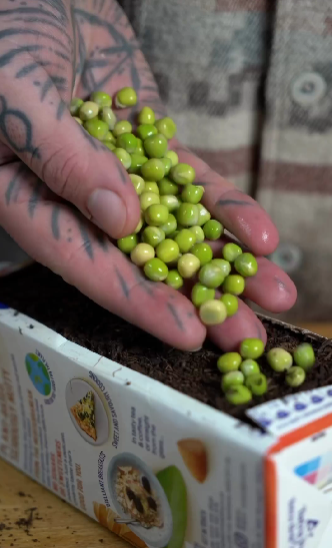
- Prepare organic seeds and any light soil
- Get your recycled milk carton and put 1 cup of water
- Top up with soil and gently level it flat
- Sprinkle high-density of seeds (don’t get too crazy!)
- Mist water and cover with an empty tray
- Lights on when they pop roots (you can also use sunlight)
- Watch them grow
- Cut and enjoy
Do you see how easy it is to grow them? It doesn’t matter where you live. Microgreens are incredibly easy and fast to grow, making them ideal for beginners or anyone looking for a quick gardening win (even if you only have a small space or even without a garden). It is also a cool way to introduce gardening to your siblings or children. I’m sure that they will enjoy the process.
Experiment with different varieties (like cress, cilantro, kale, parsley, and many more), mix and match flavors, and let your culinary creativity run wild. Sprinkle microgreens atop salads, sandwiches, soups, and basically any food that you like. Not only will it make your dishes more delicious, but you’ll also reap the nutritional rewards of incorporating these microgreens into your diet while helping Mother Earth by using your upcycled containers!
Happy growing!
